Among Us is the game between Hidden impostors between crewmates which is very popular these days.
Skeld was the very first map added in the game and presently it is the third biggest map of Among Us and it is still a favourite map of most game lovers for sure.
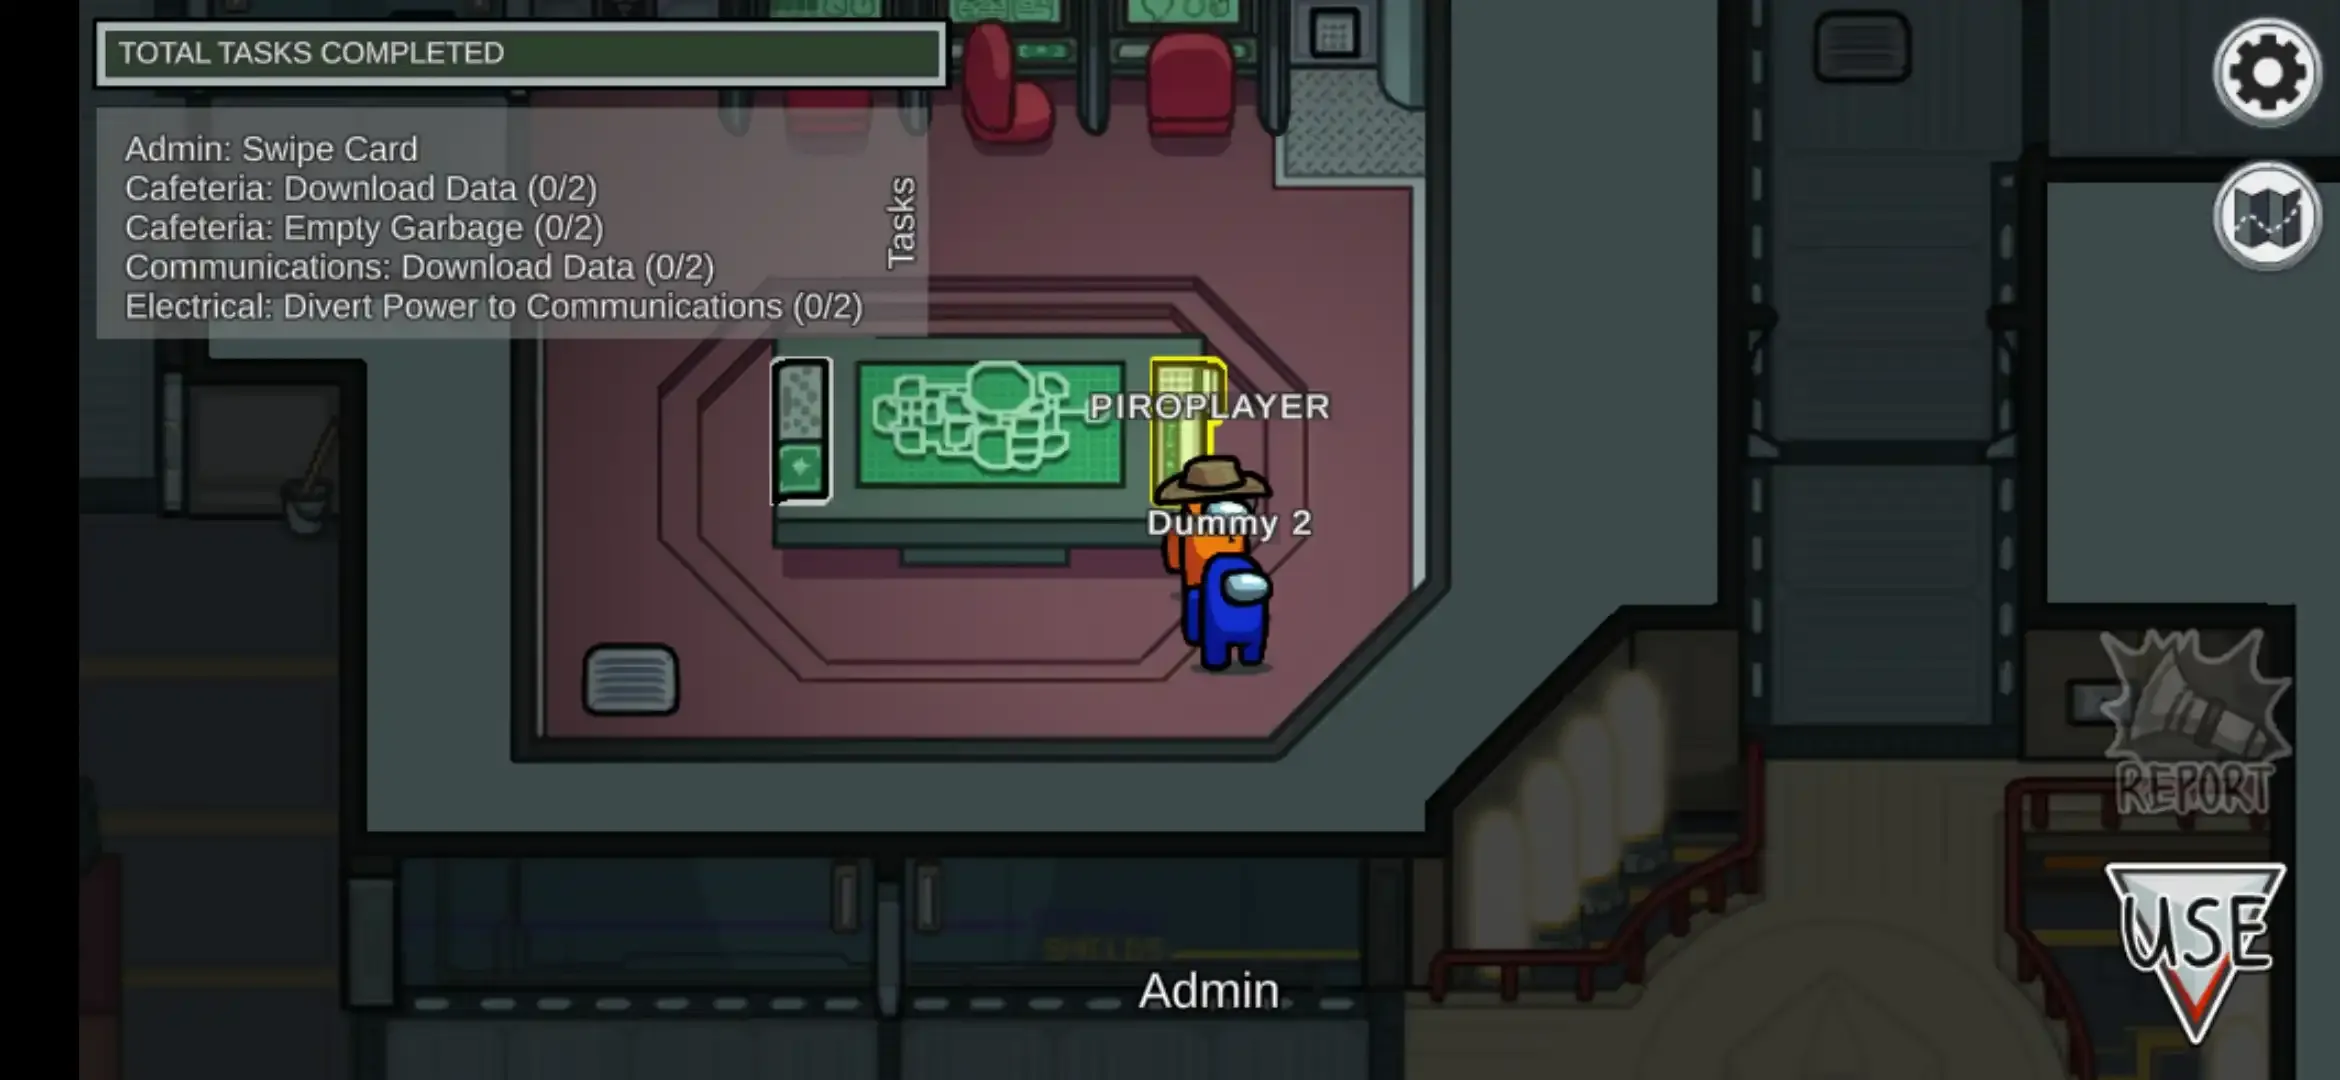
To complete this task go to the Admin location. Go to the right side of the admin table which is located in the center of that room.
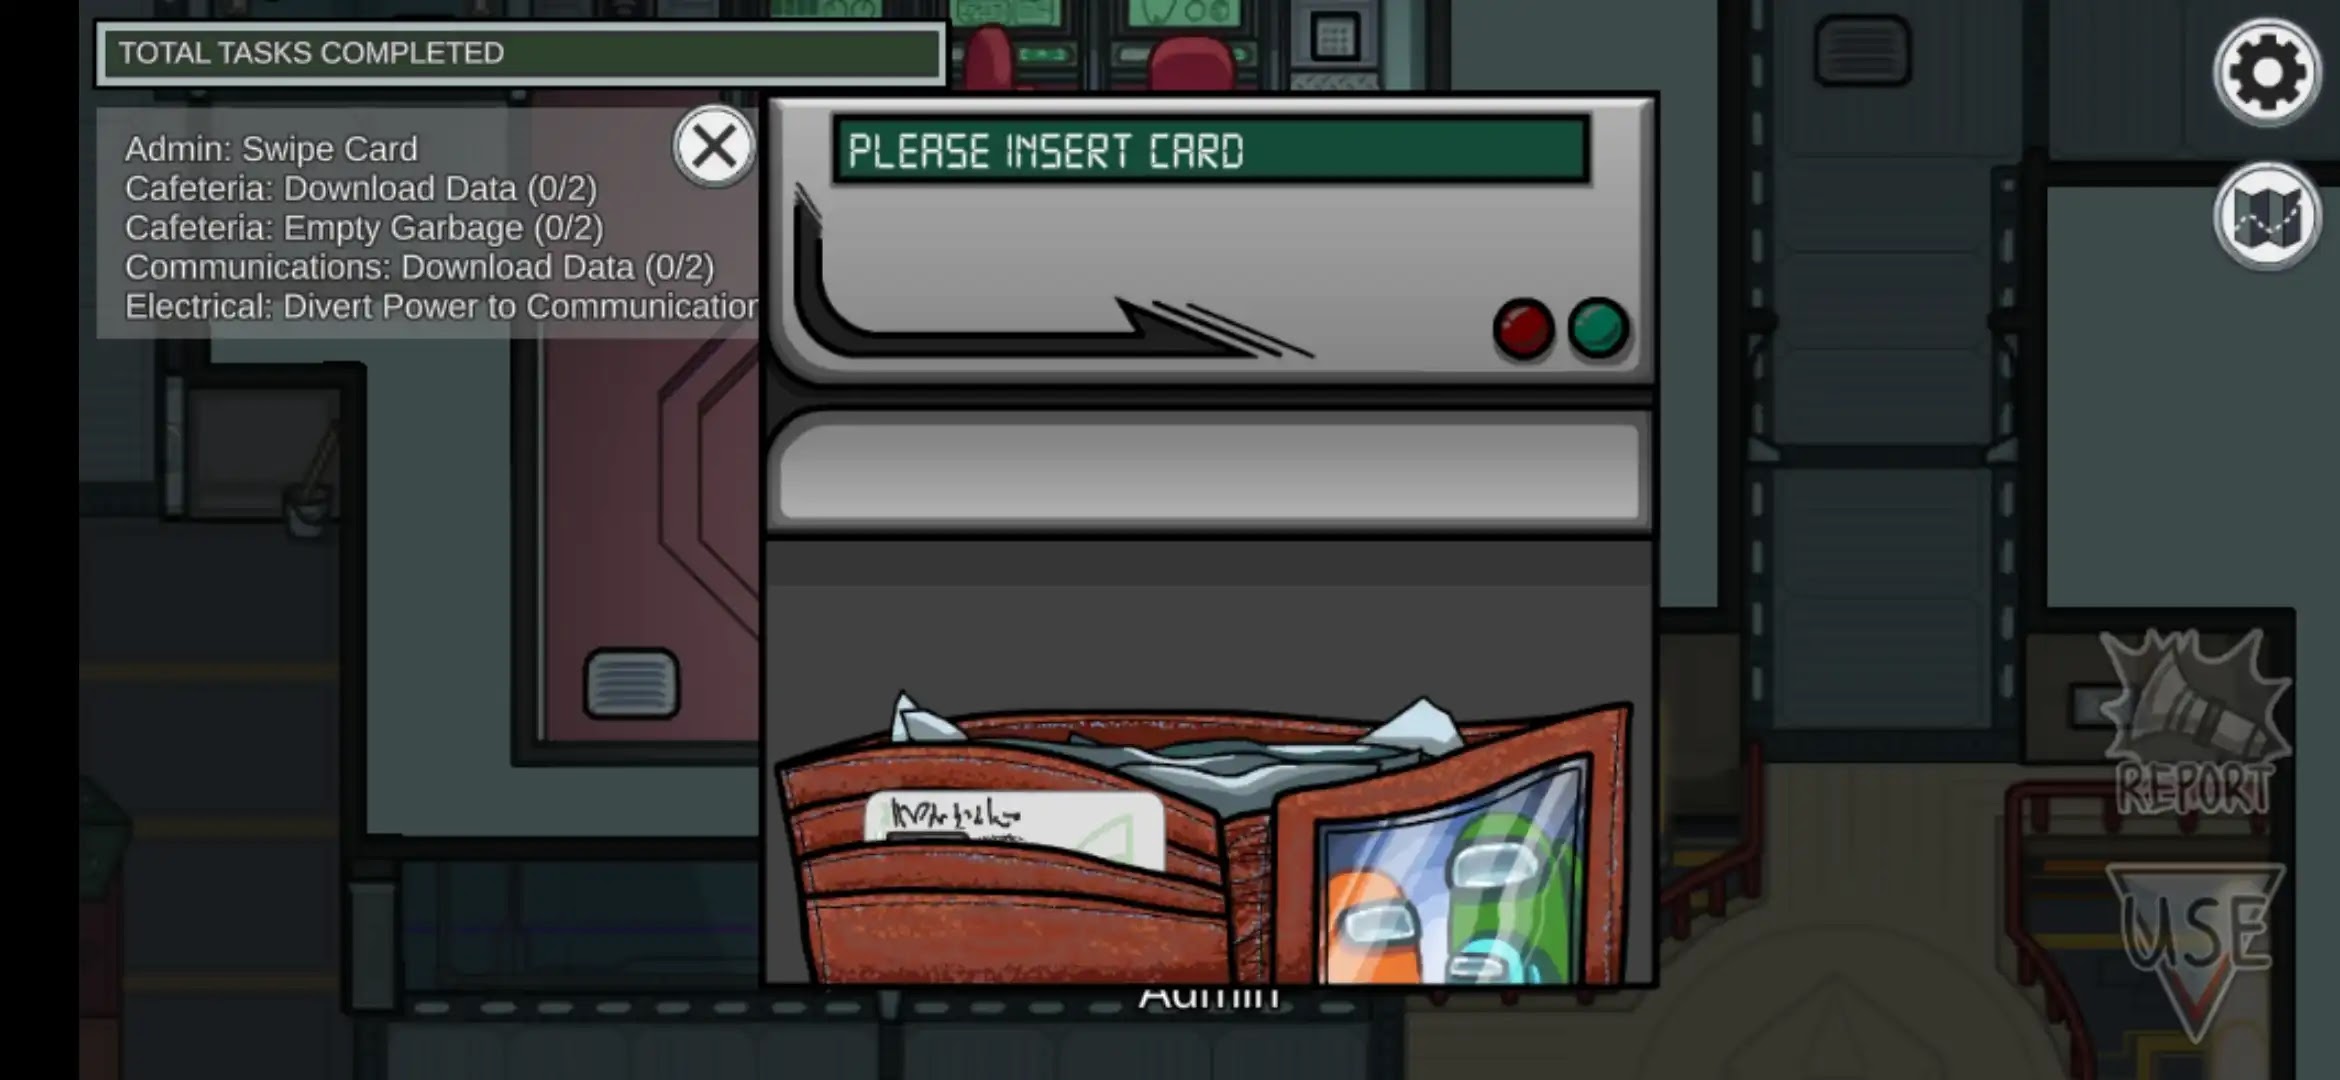
When you tap ‘use’ one popup will be visible, in that tap left side of wallet which will bring the card to the slider.
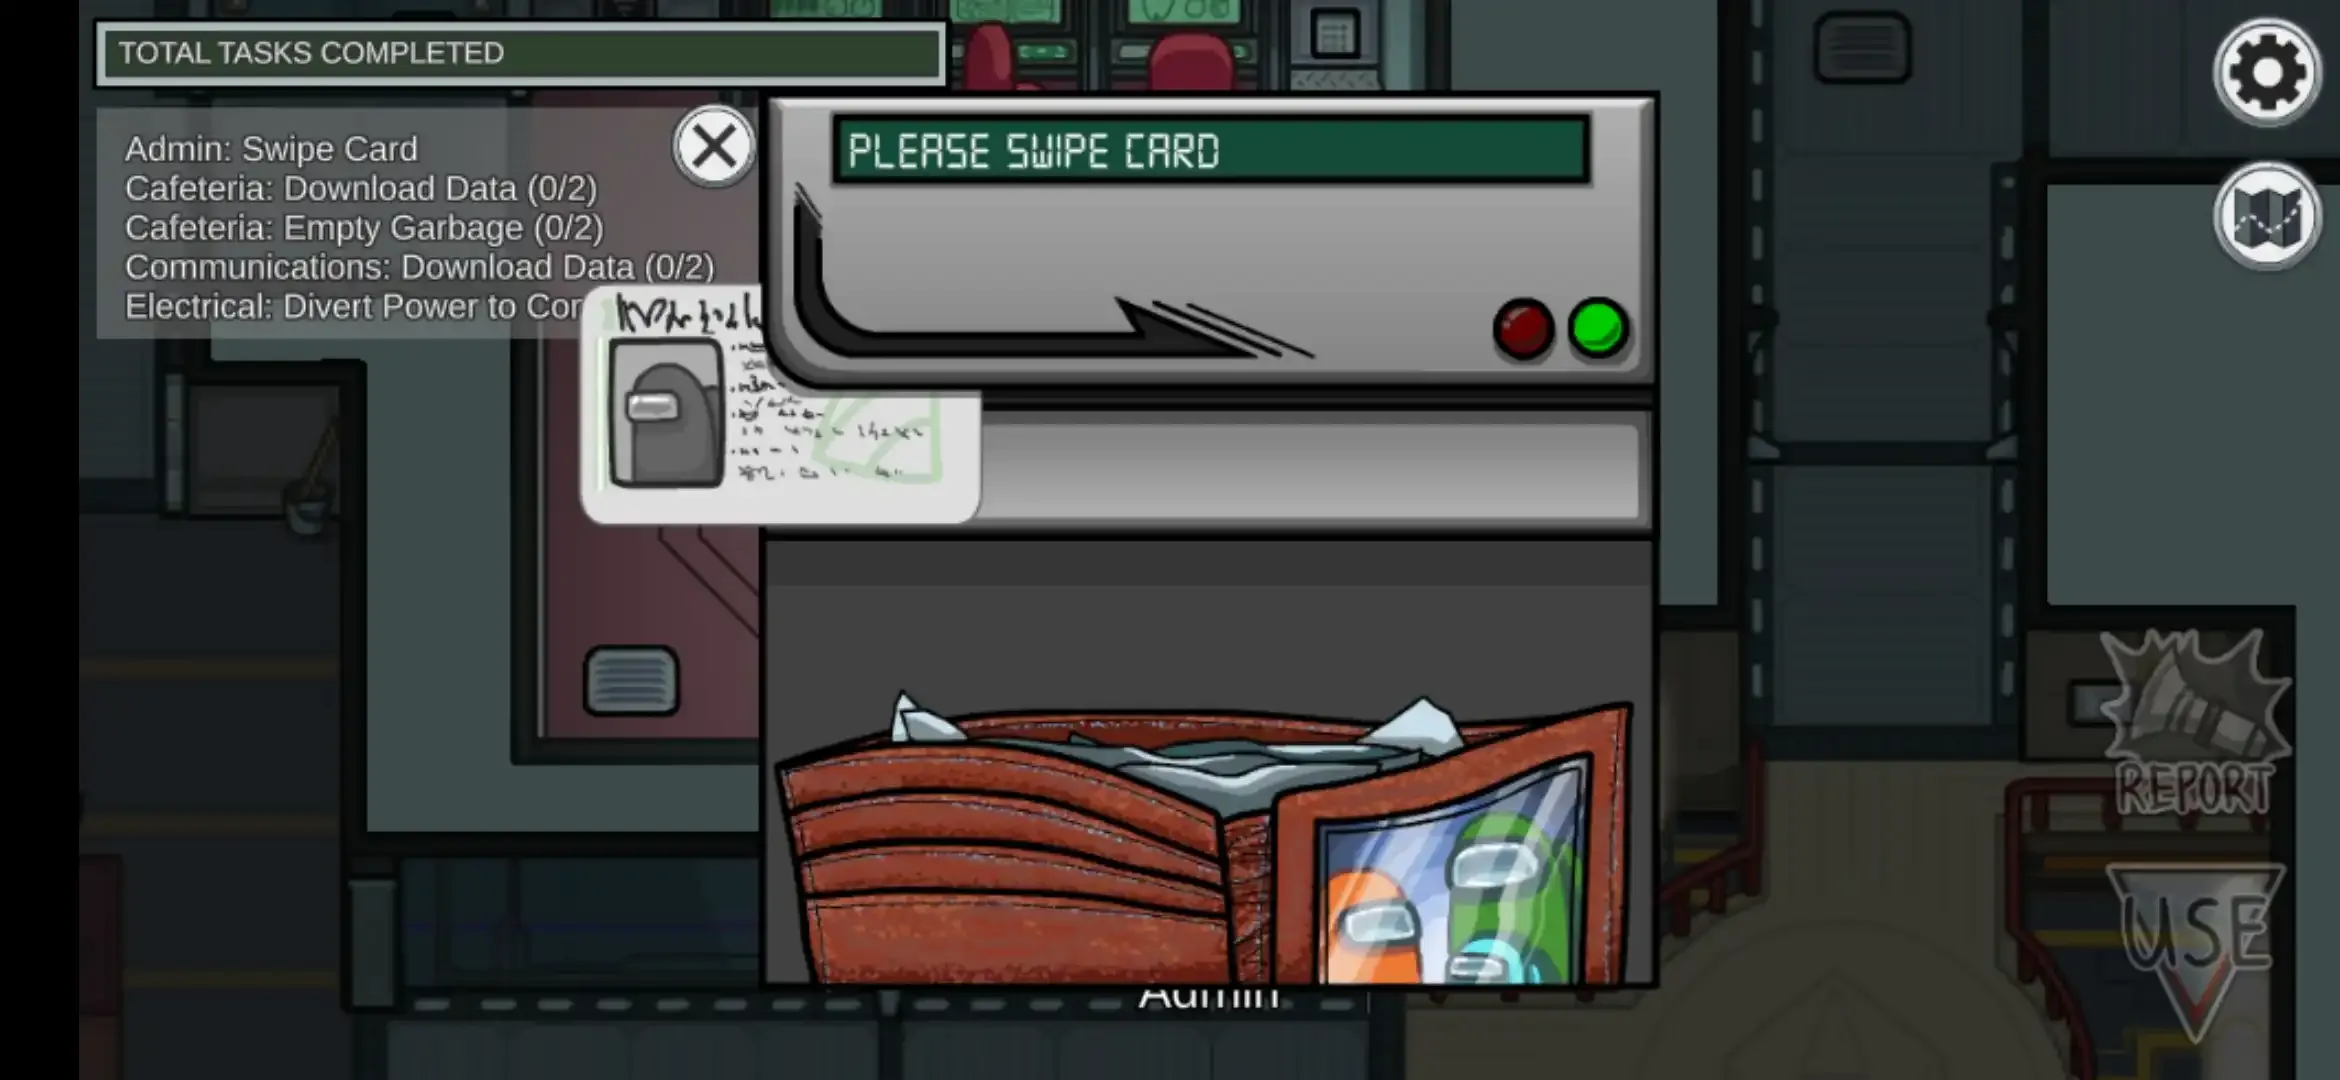
To complete this task just slide the card to the right side, but don’t slide the card too slow or too fast, sliding to halfway is also not accepted.
[Ⅱ] Cafeteria:
① Upload Data –
➤ Upload data is a short task. It is divided into two parts.
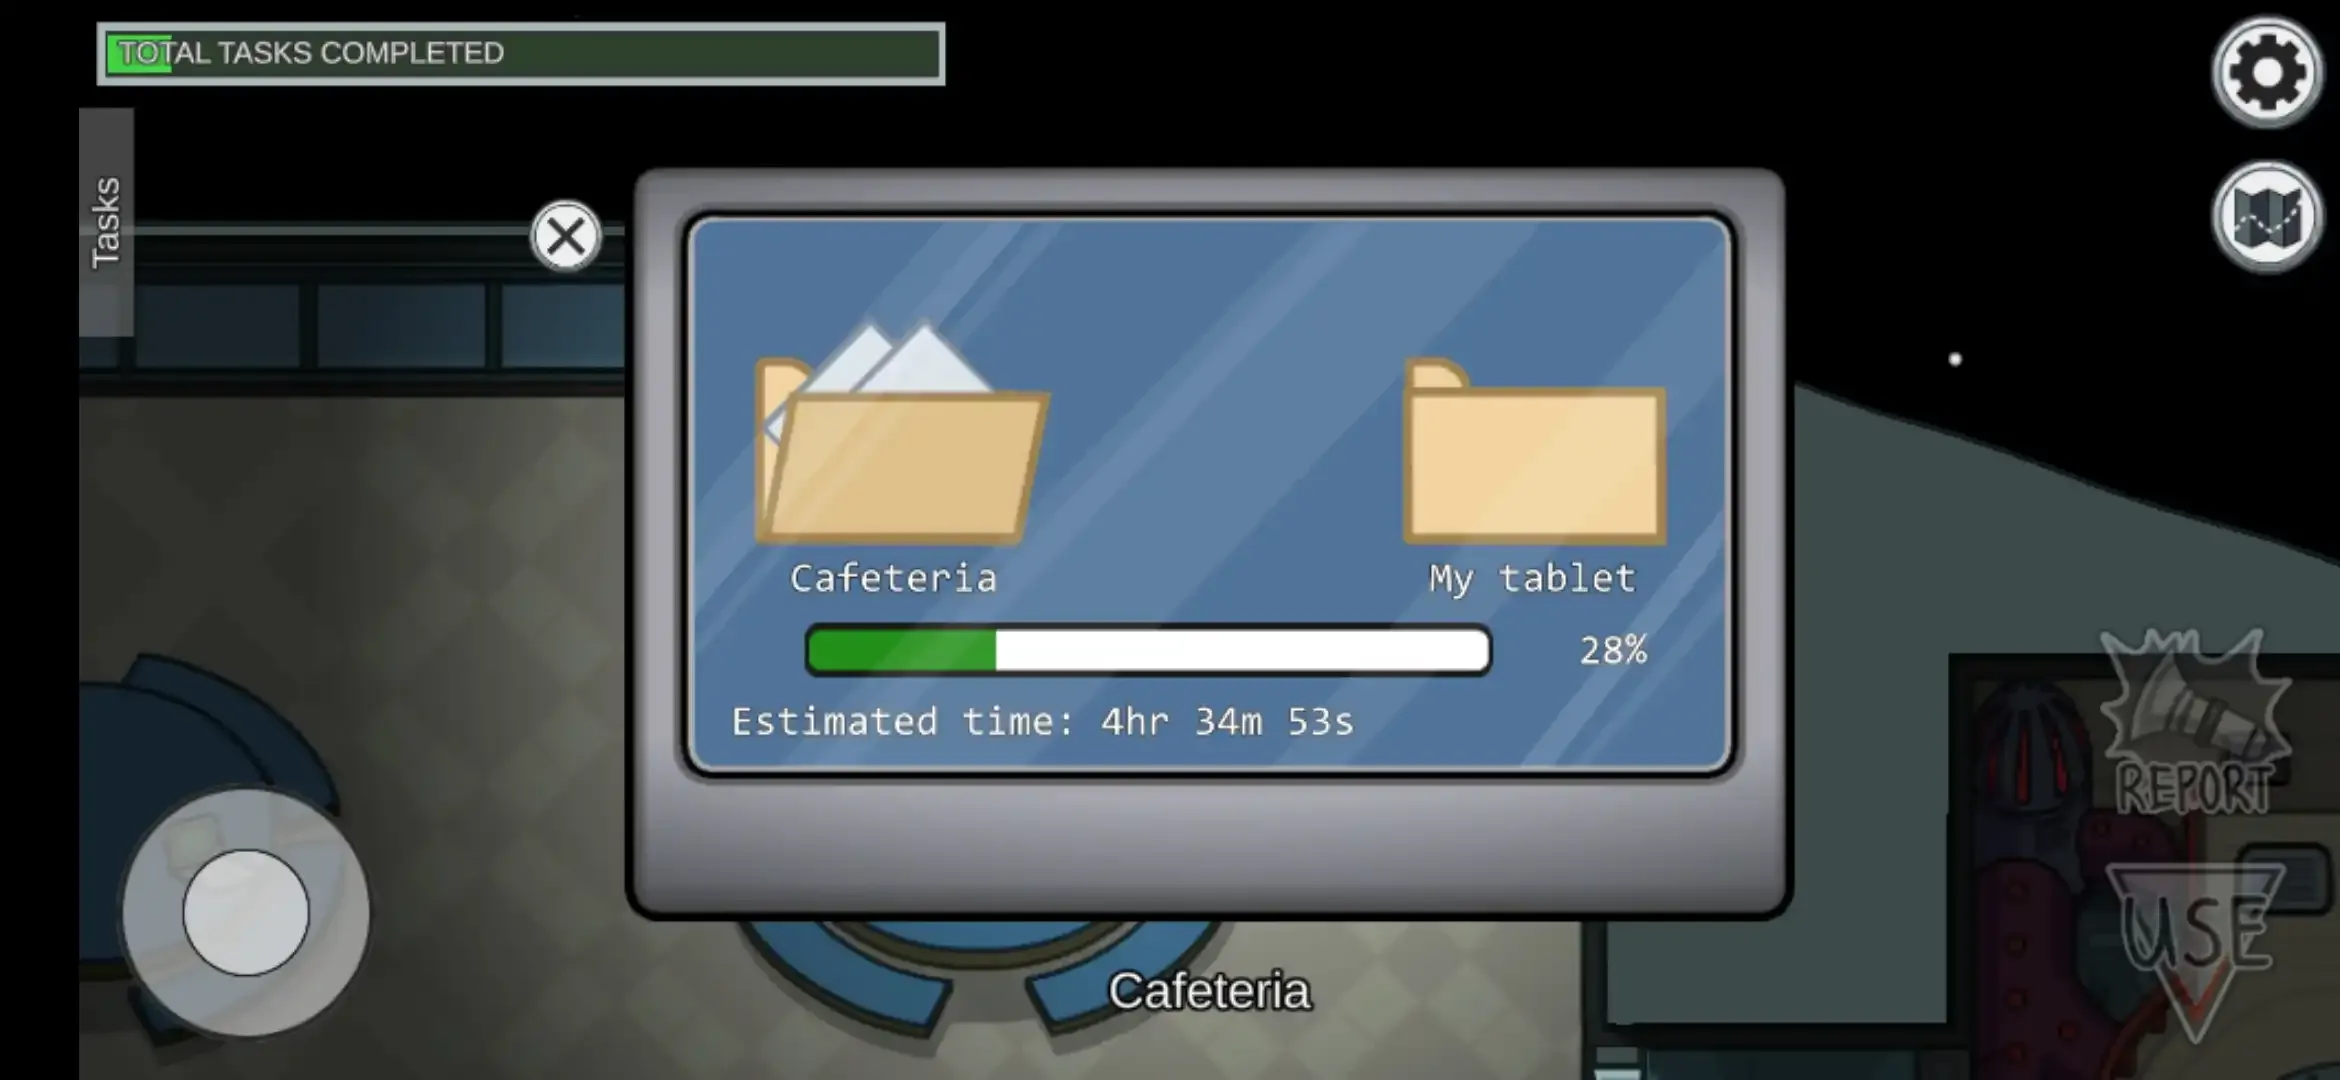
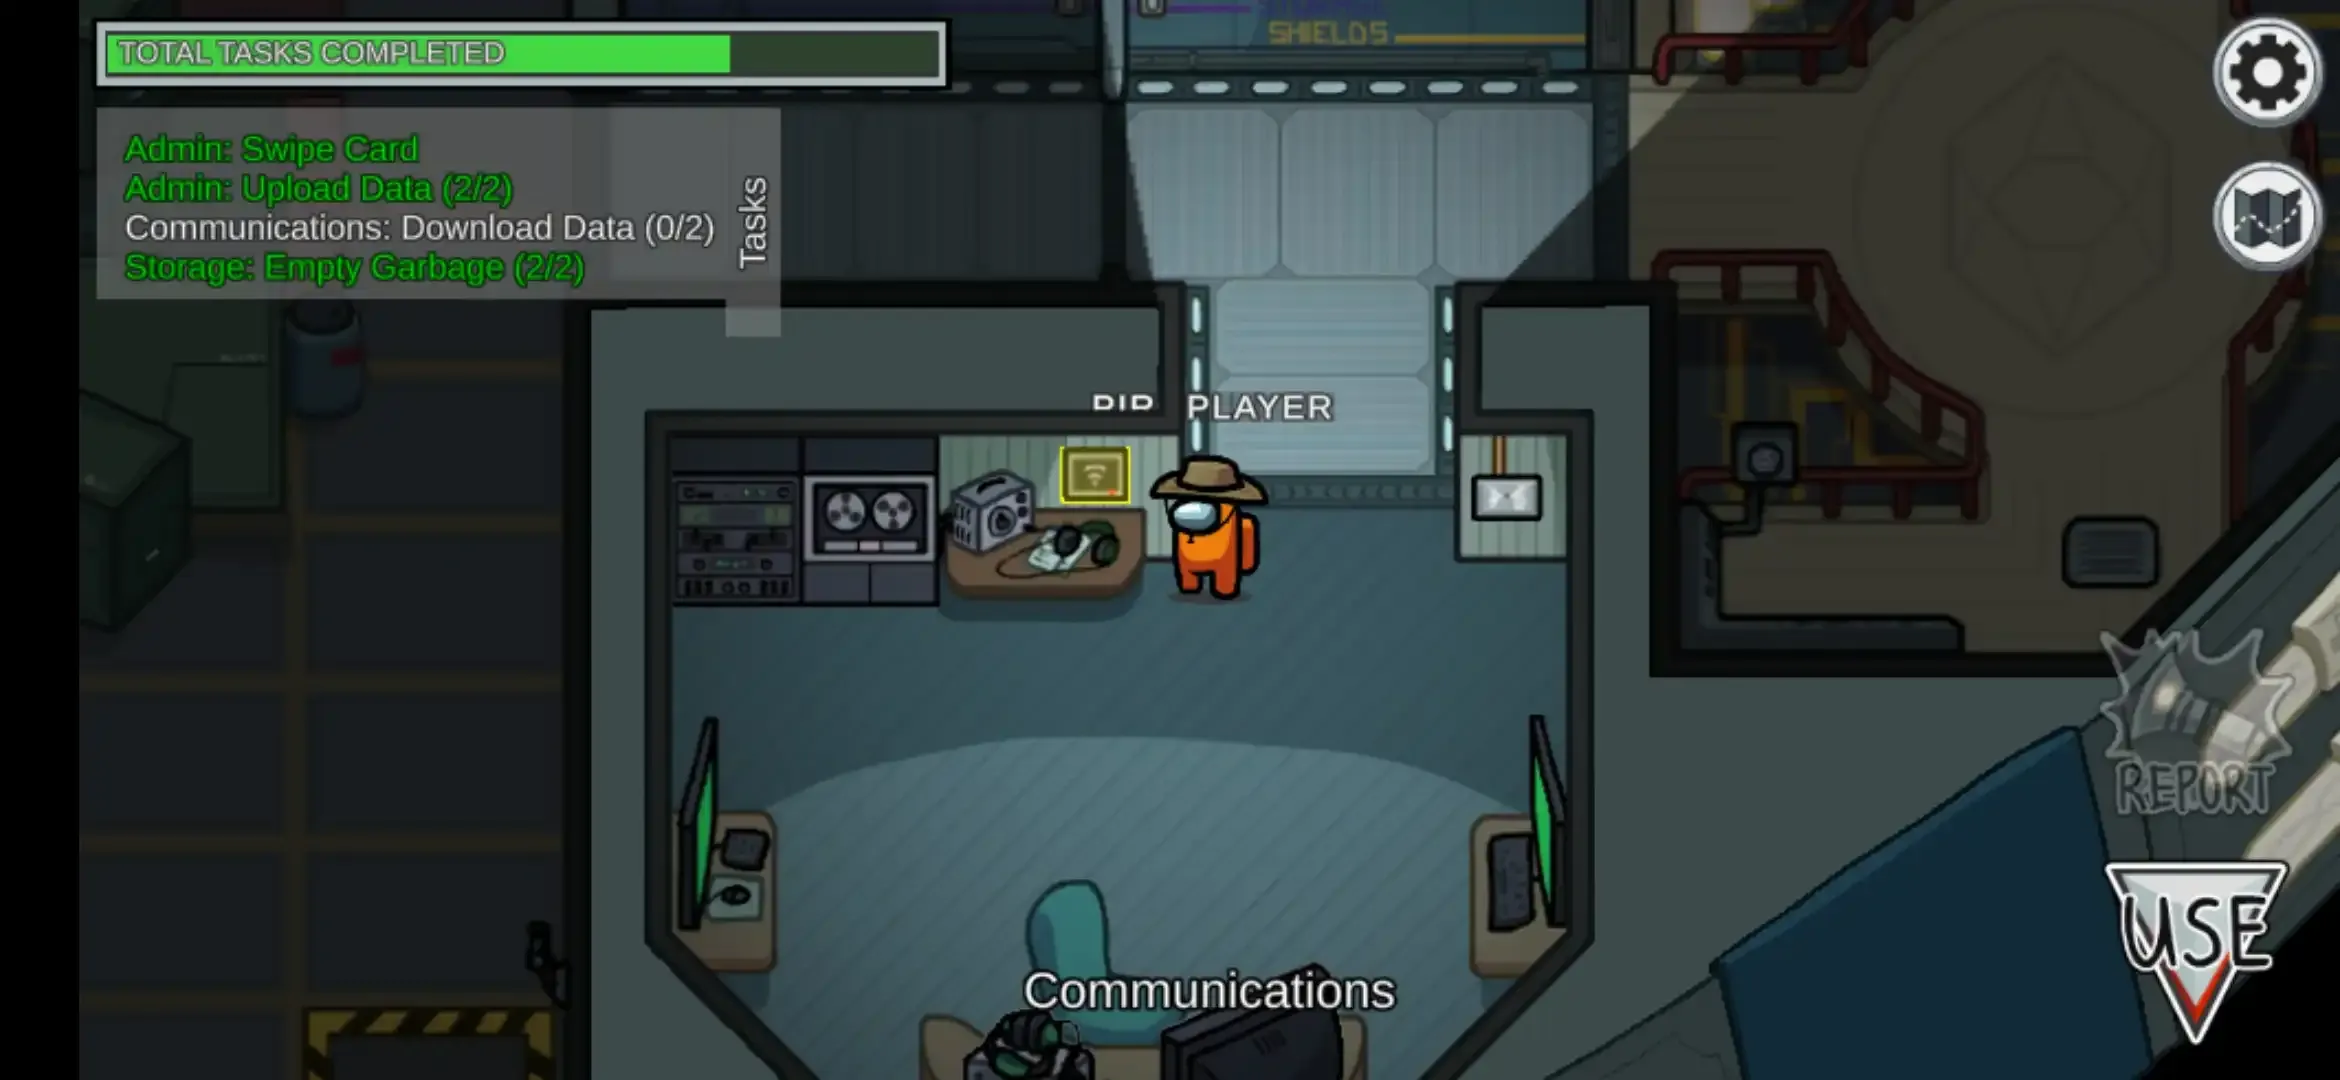
Step 1. To complete this task go to an upper-right corner in Cafeteria then go near to the WI-FI panel and tap the ‘use’ option.
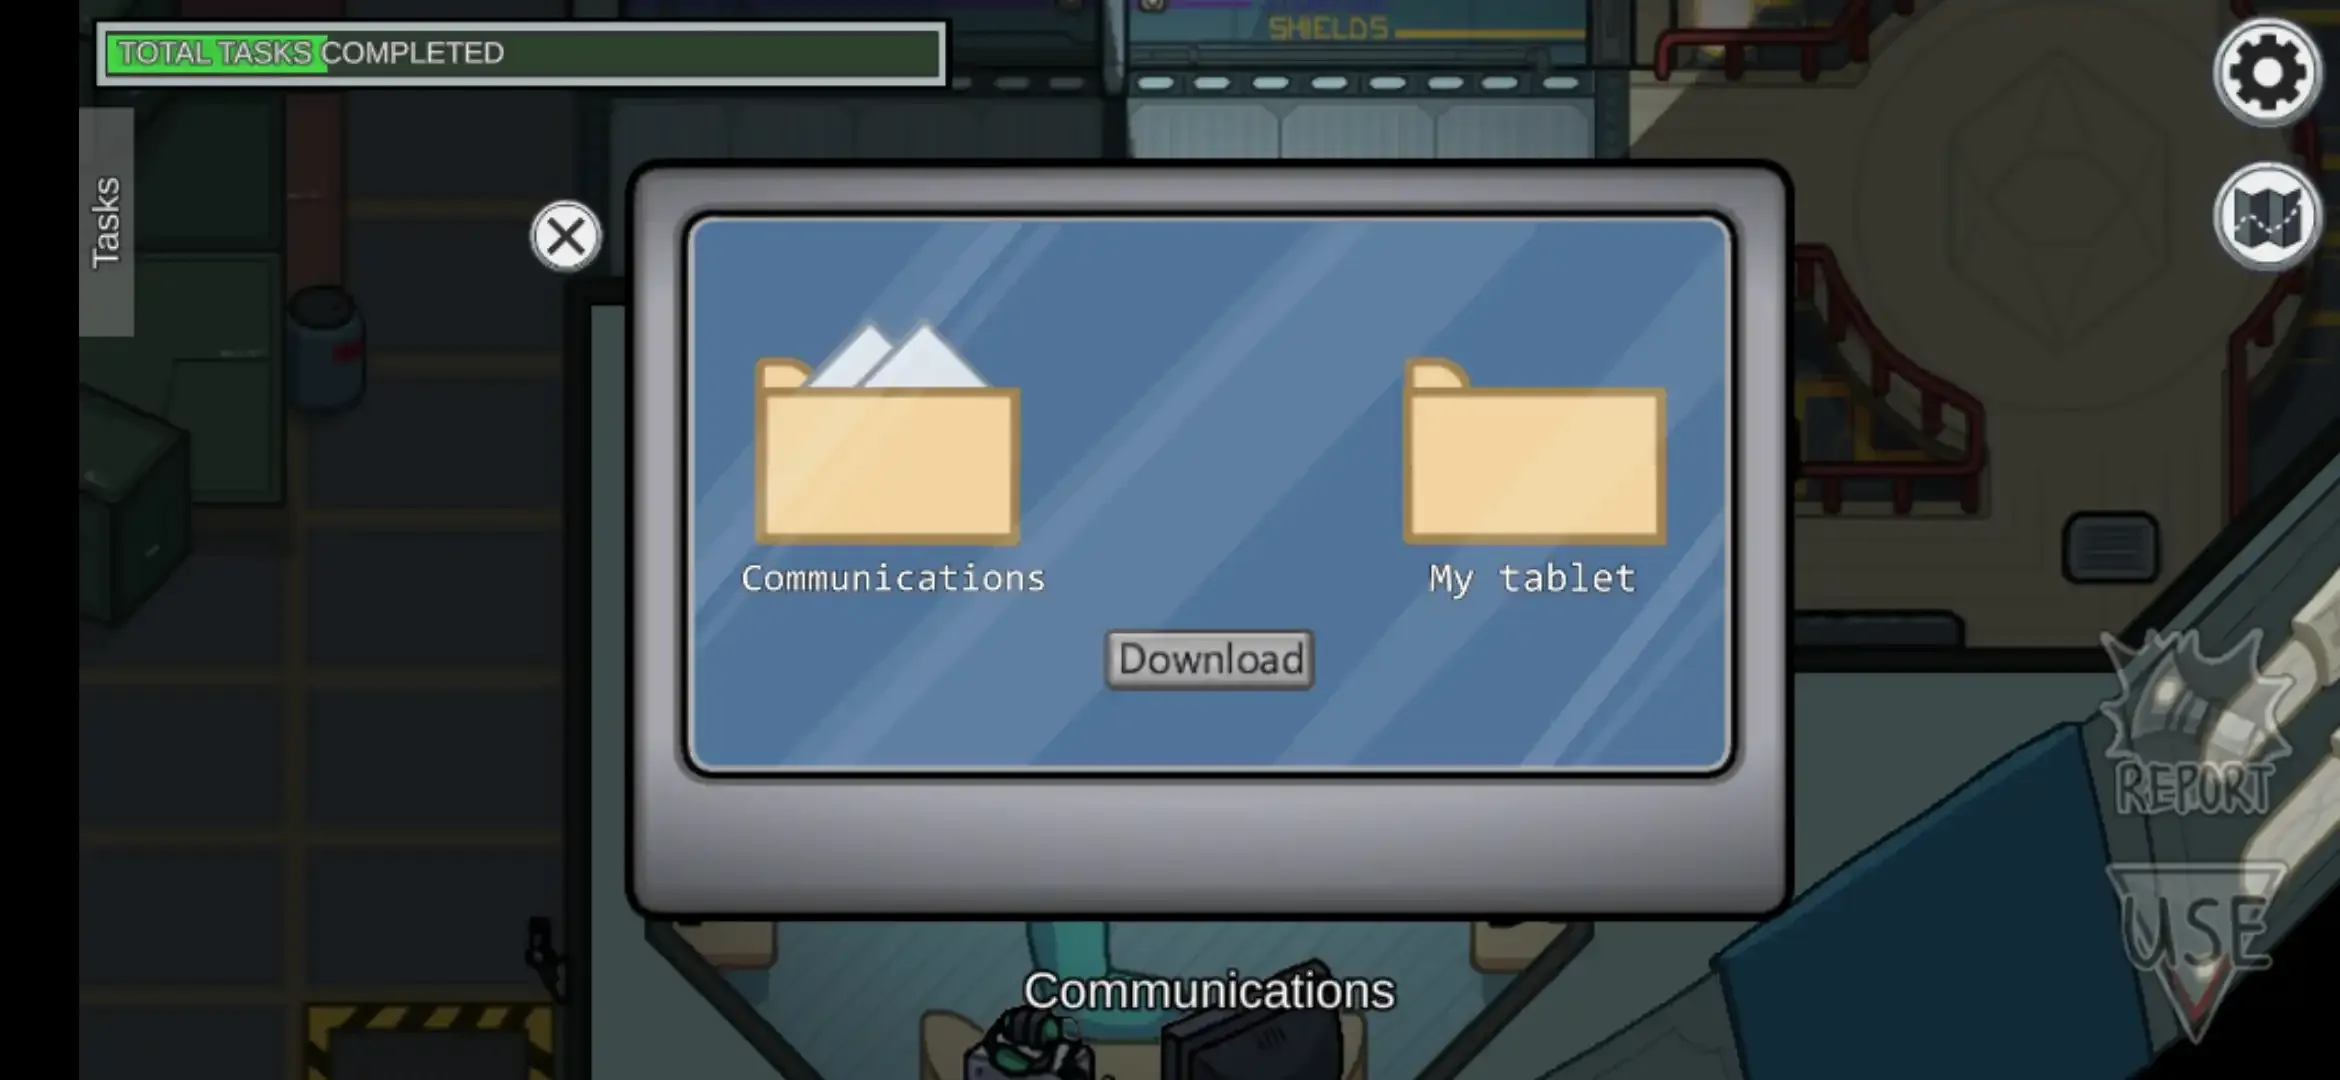
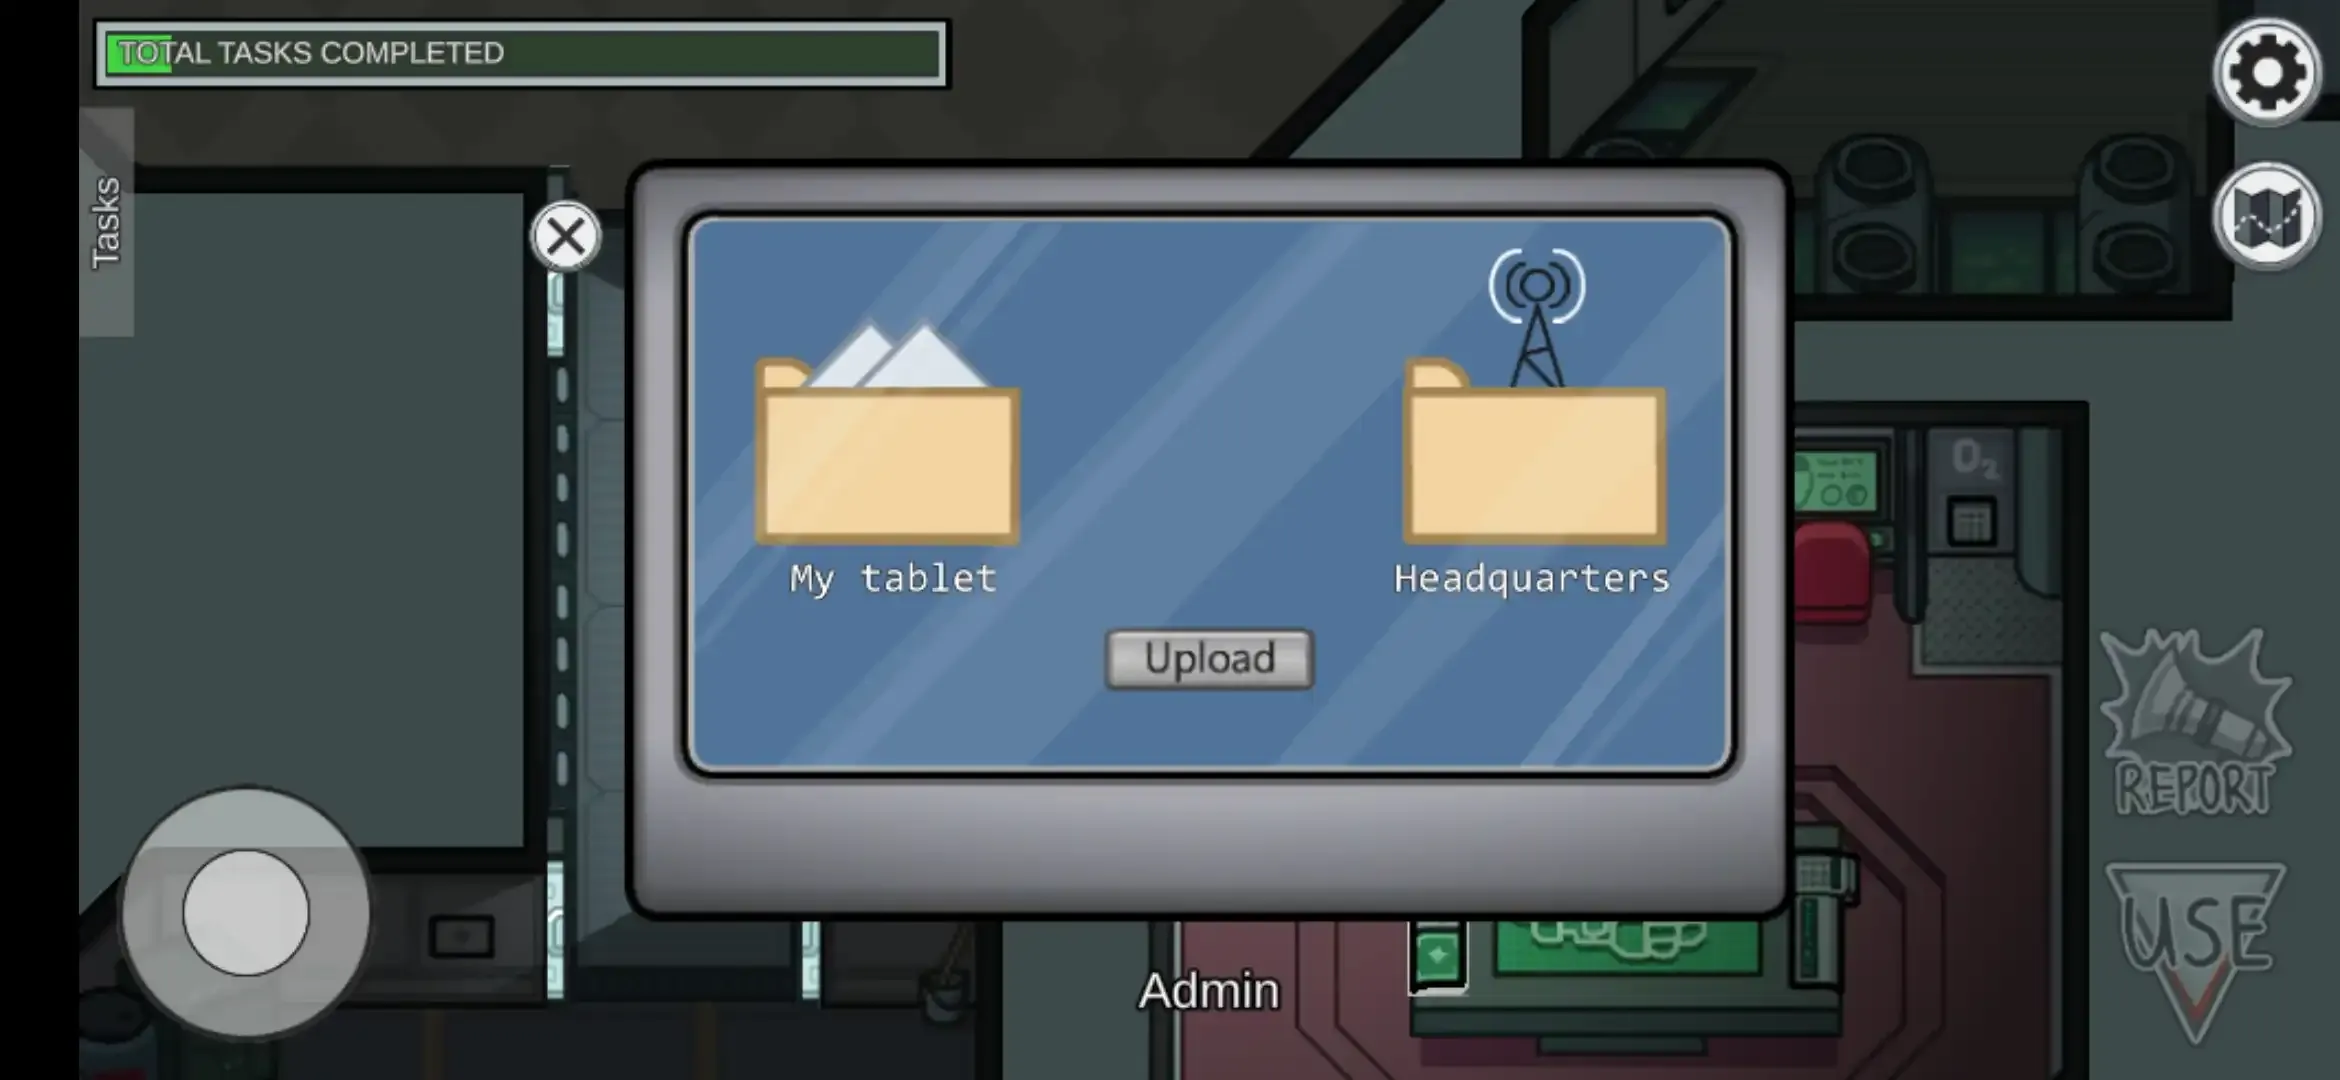
Now this one popup will be visible to you.
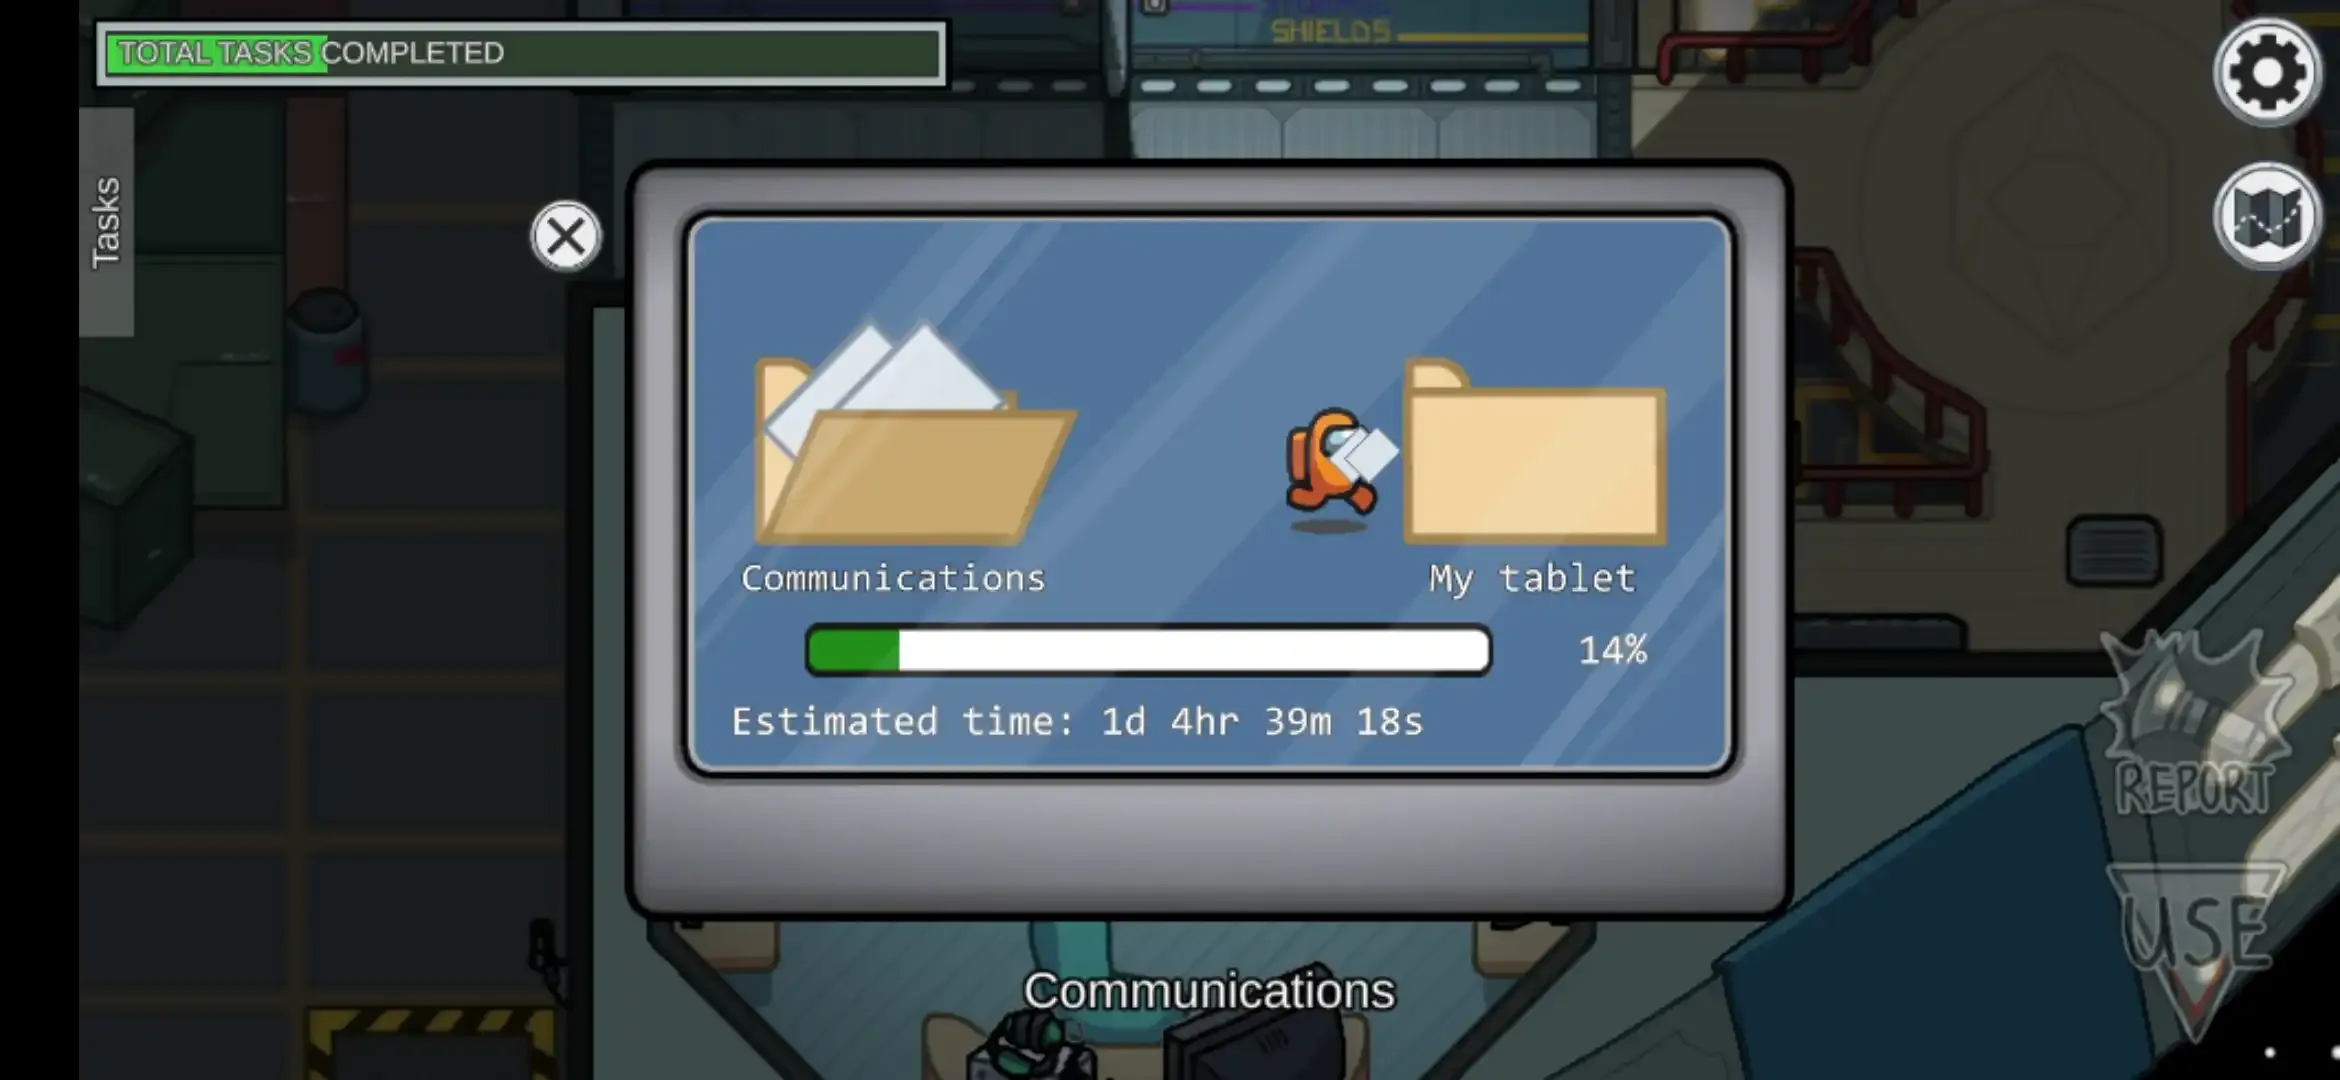
Tap the download button in that popup which will download the files from the Cafeteria folder to the My Tablet.
Generally, it takes 8.7 seconds. While downloading a file if it closes by mistake then one has to download it again from the beginning.
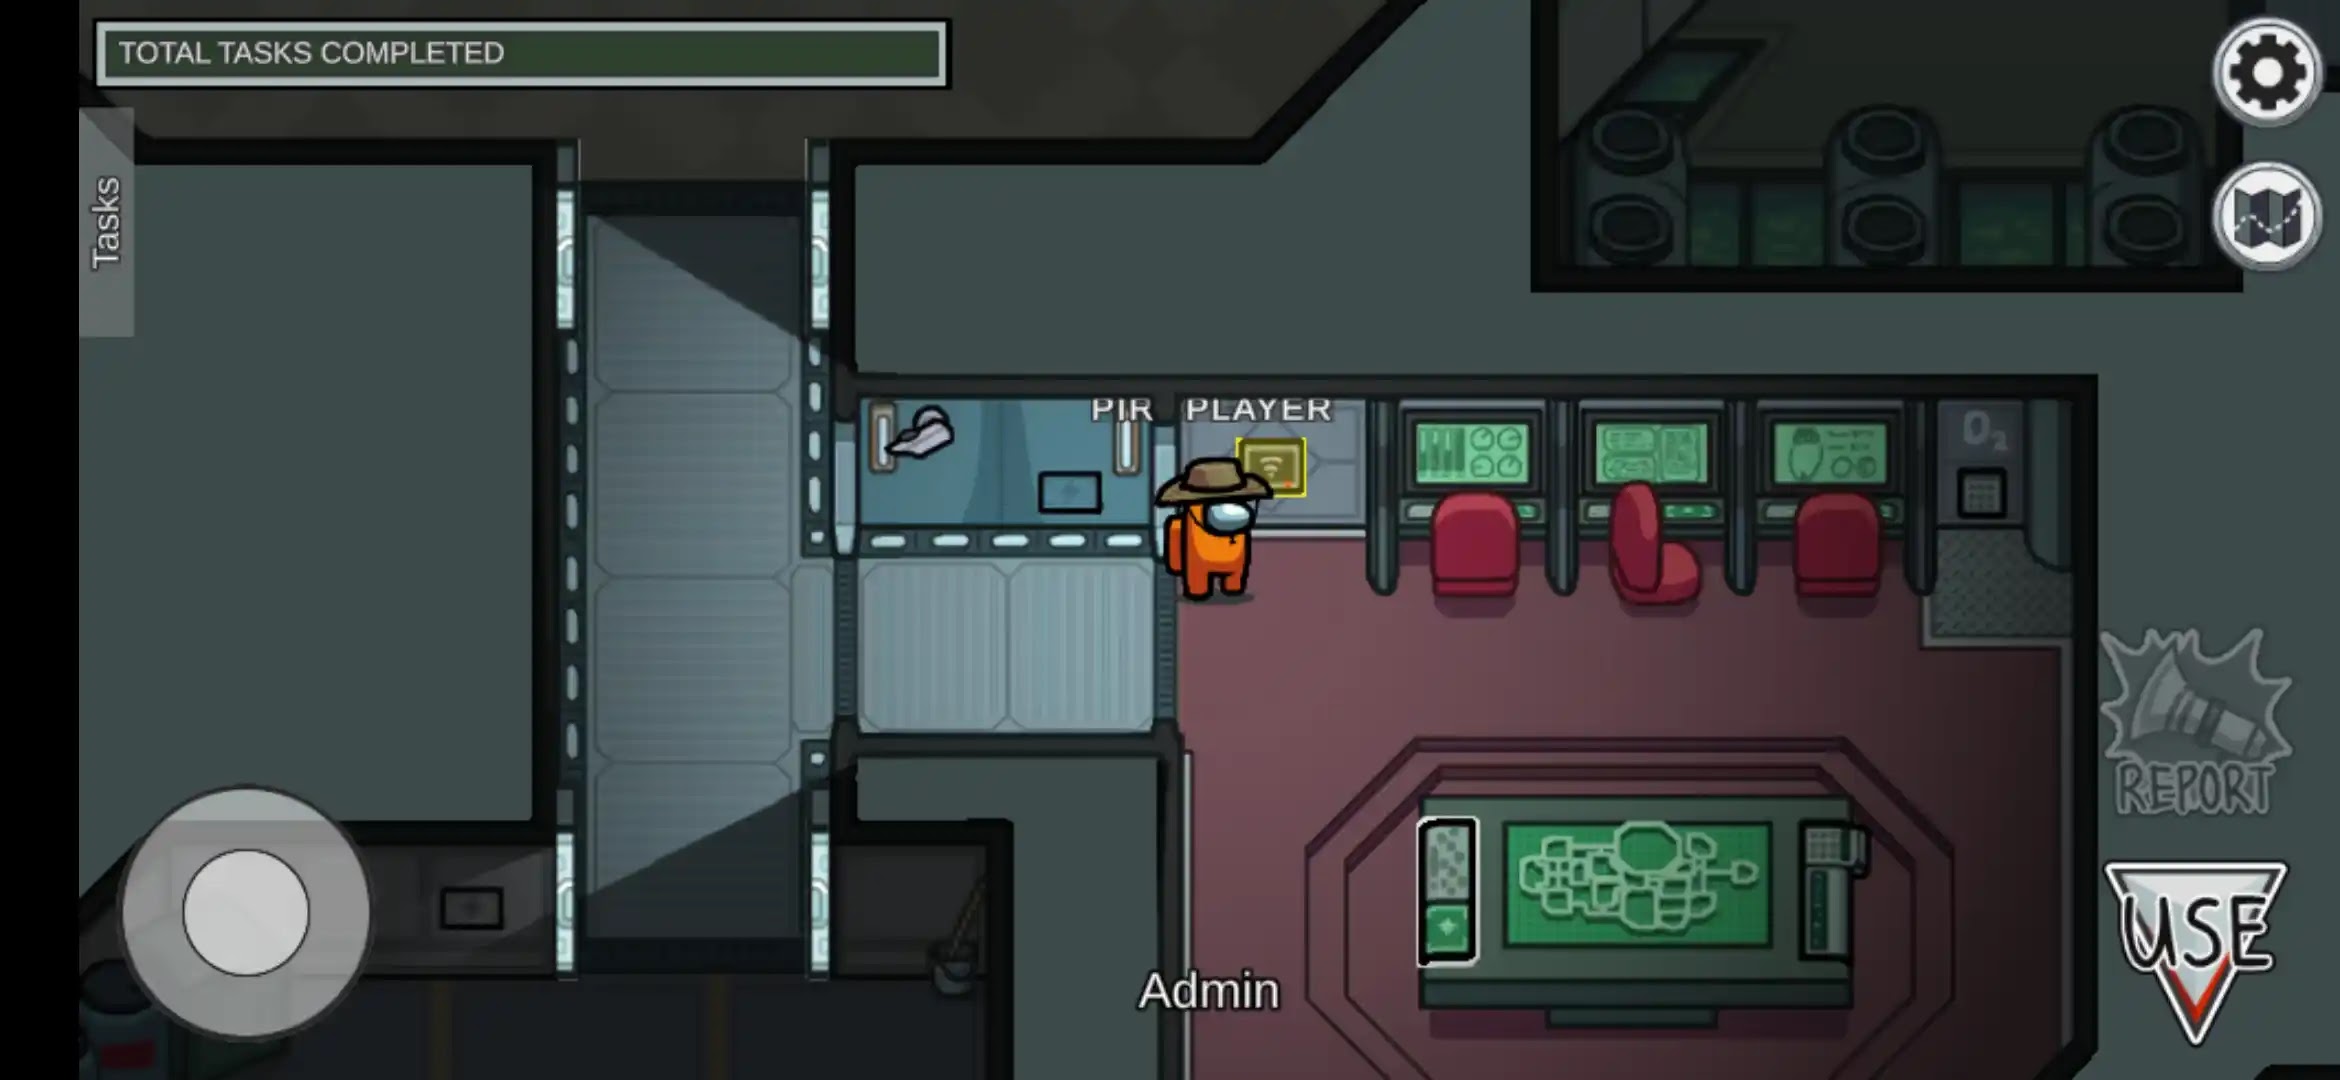
Step 2. After downloading data one direction will be visible to you with a➤ symbol, follow that direction which will carry you to the upper wall of the Admin location near the WI-FI panel, and tap the ‘use’ option.
Now one popup will be shown.
In that popup tap upload which will start uploading the file from the My Tablet folder to Headquarters which you were downloaded in step 1st.
While uploading a file if it closes by mistake then one has to upload it again from the beginning.
②Empty garbage –
➤ Empty garbage is a Long and Visual type of task. It is divided into two stages.
Step 1.To complete step 1 you must go to an upper-right corner in Cafeteria go near the lever and tap ‘use’ option.
Then one window will be shown like this.
In that window, pull down the lever and hold it for about 3-4 seconds, to empty the garbage.
Step 2. After completing the 1st step follow the ➤ symbol which will let you to a storage area in the bottom area and tap the ‘use’ option.
This window will open.
and similarly to the 1st step pull the lever down and hold for about 3-4 seconds, it will throw all garbage outside from the skeld spaceship.
Garbage is visible while it is thrown outside the spaceship. That is only possible if the task performed by Crewmate not Impostor, thus he can give proof of his innocence.
[Ⅲ] Communications:
① Upload data –
➤ Upload data is a short task. It is divided into two parts.
Step 1. Go to the Communications location, and go near the upper wall side go near the WI-FI panel, and tap use.
After that one popup will come having a download button, tap or click the download button.
It will start downloading files from the ‘communications’ folder to ‘My Tablet’.
Generally, it takes 8.7 seconds. While downloading a file if it closes by mistake then one has to download it again from the beginning.
Step 2. After downloading the files to My Tablet follow the➤ symbol which will carry you to the admin room’s WI-FI panel, then tap use.
A file window will open now tap or click the Upload button.
Now it will upload the files from My Tablet to Headquarters.
I
t also takes 8.7 seconds. While uploading a file if it closes by mistake then one has to upload it again from the beginning.
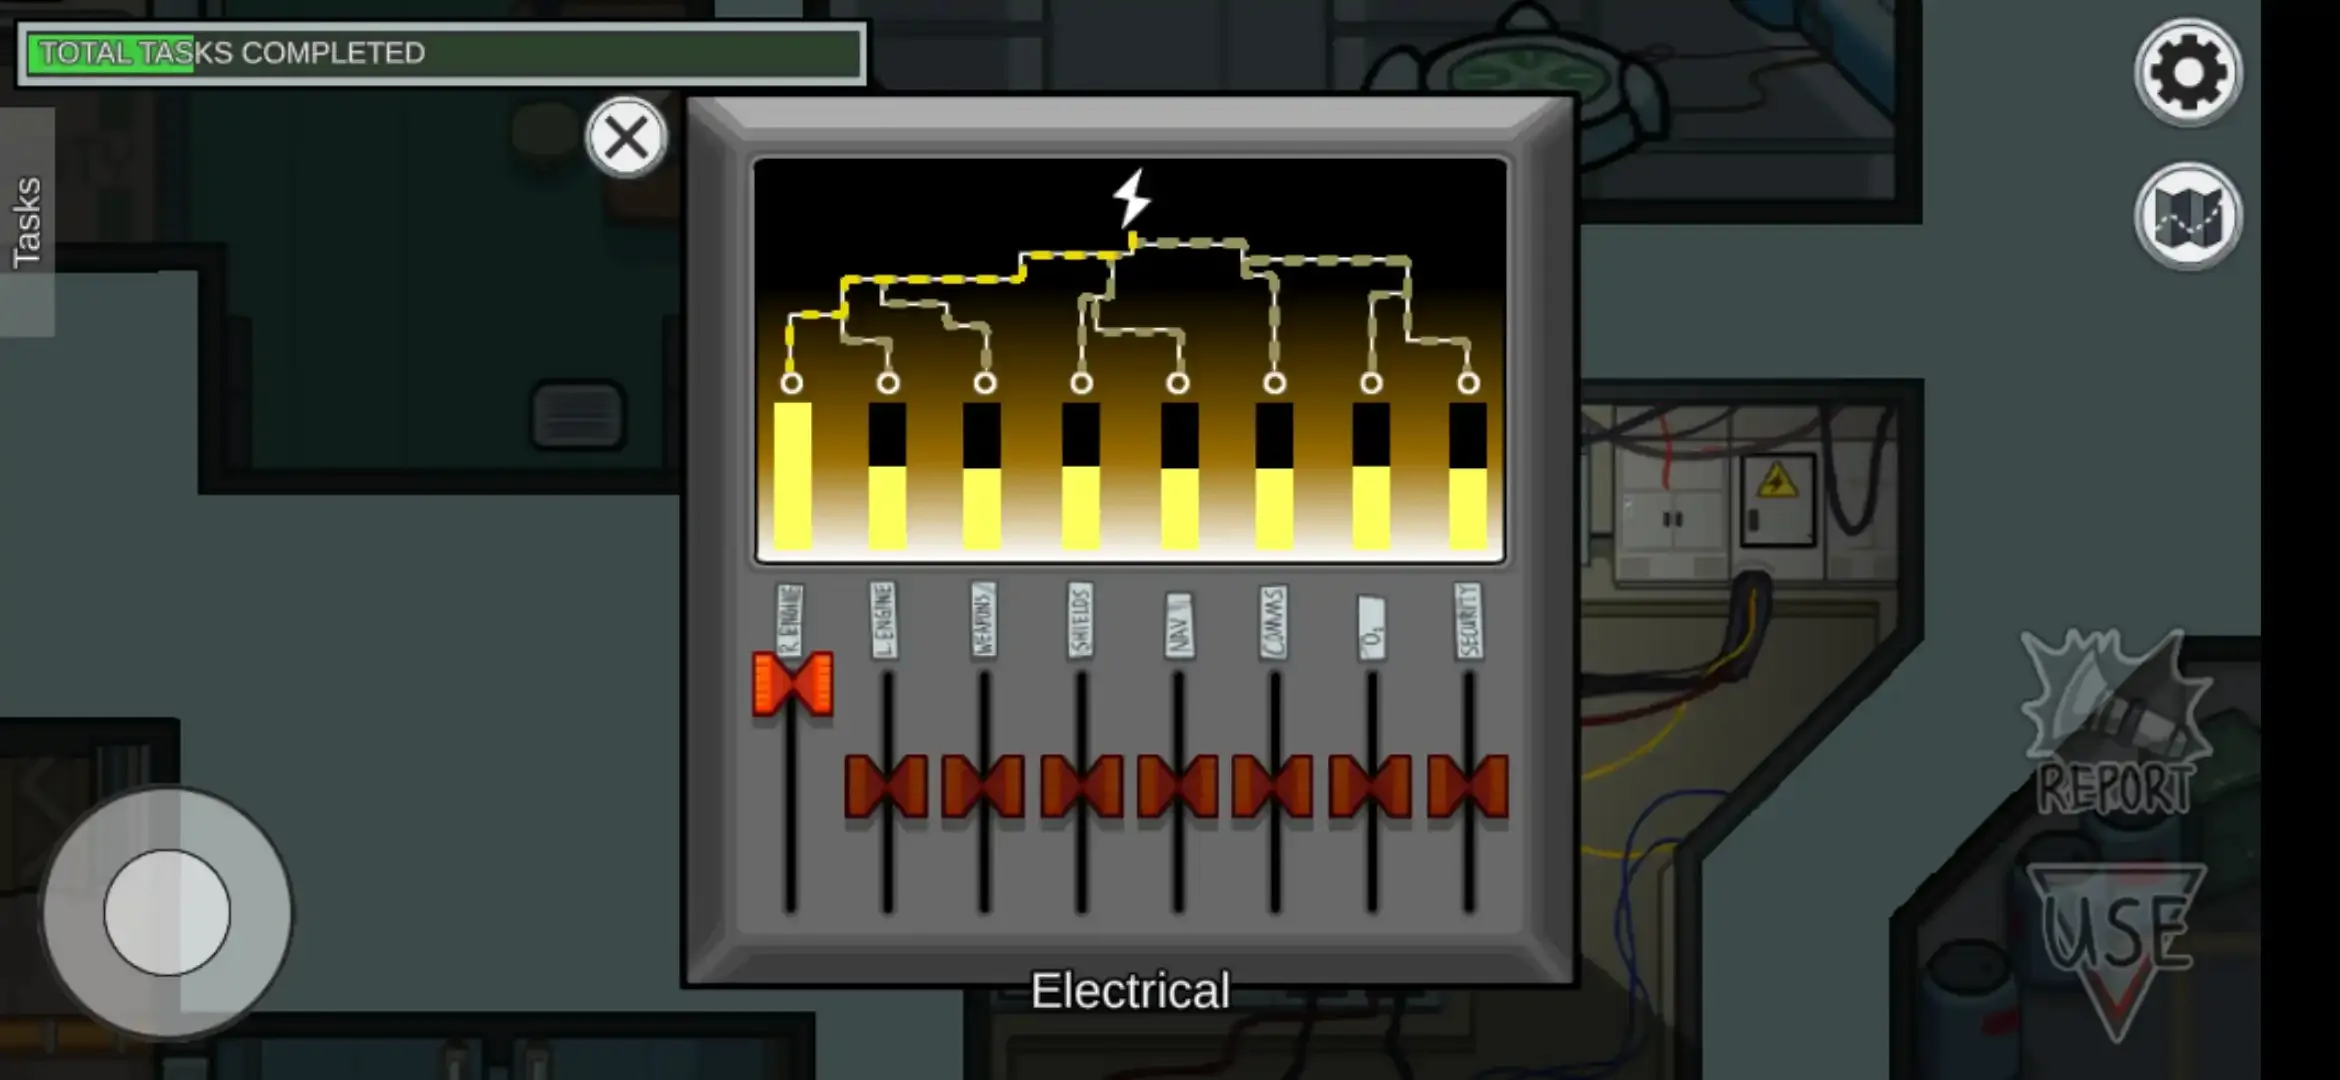
② Divert power to communications-
➤ It is a long task. It is divided into two stages.
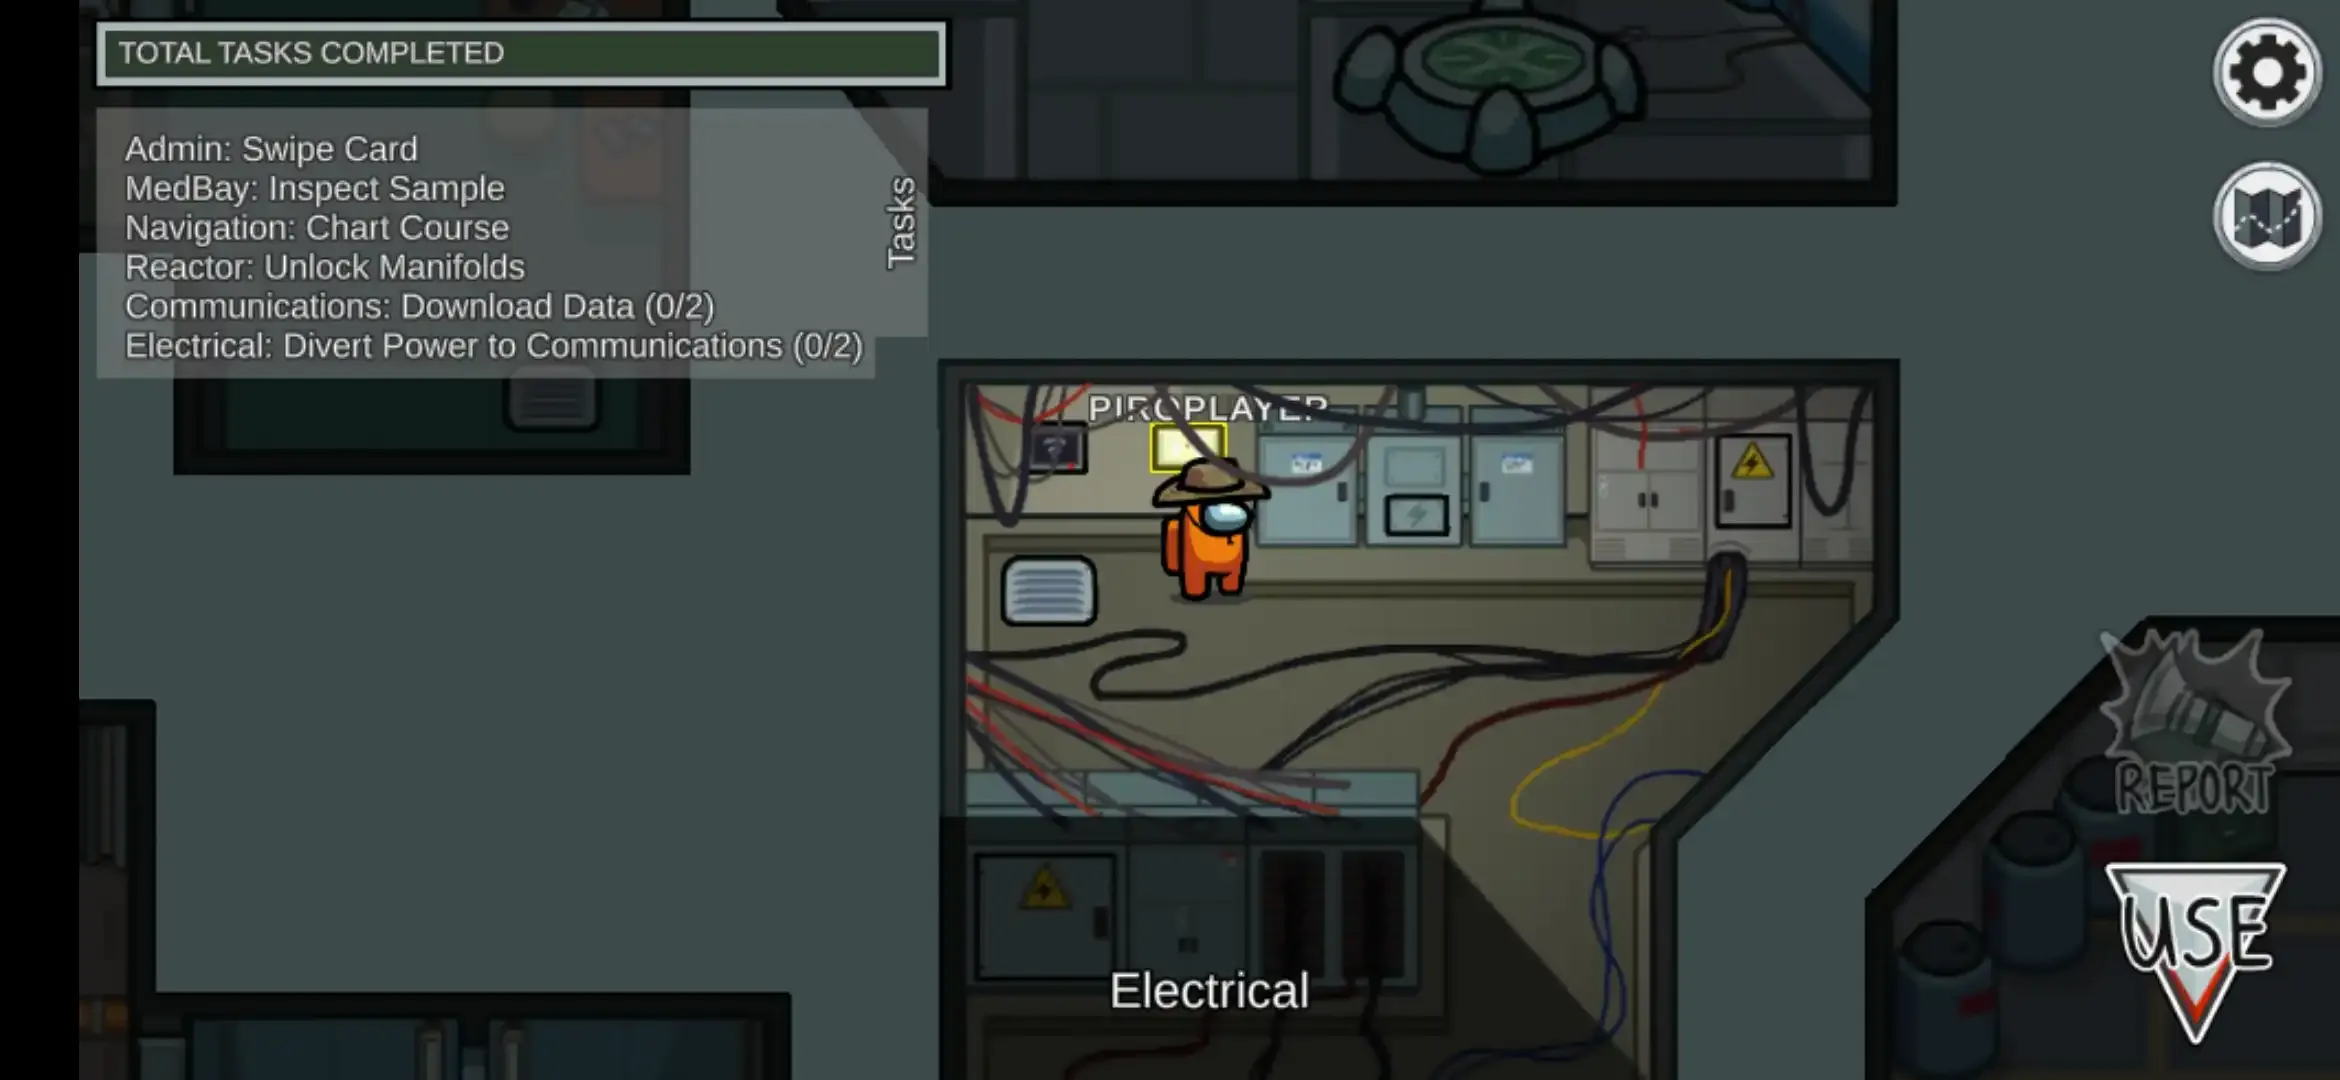
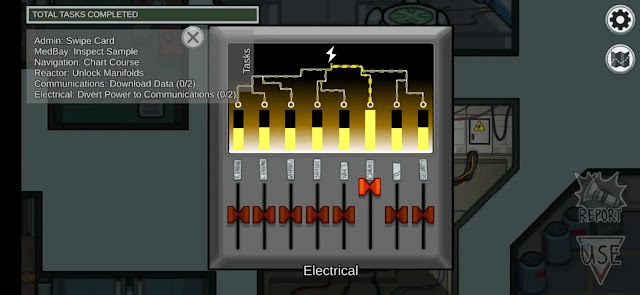
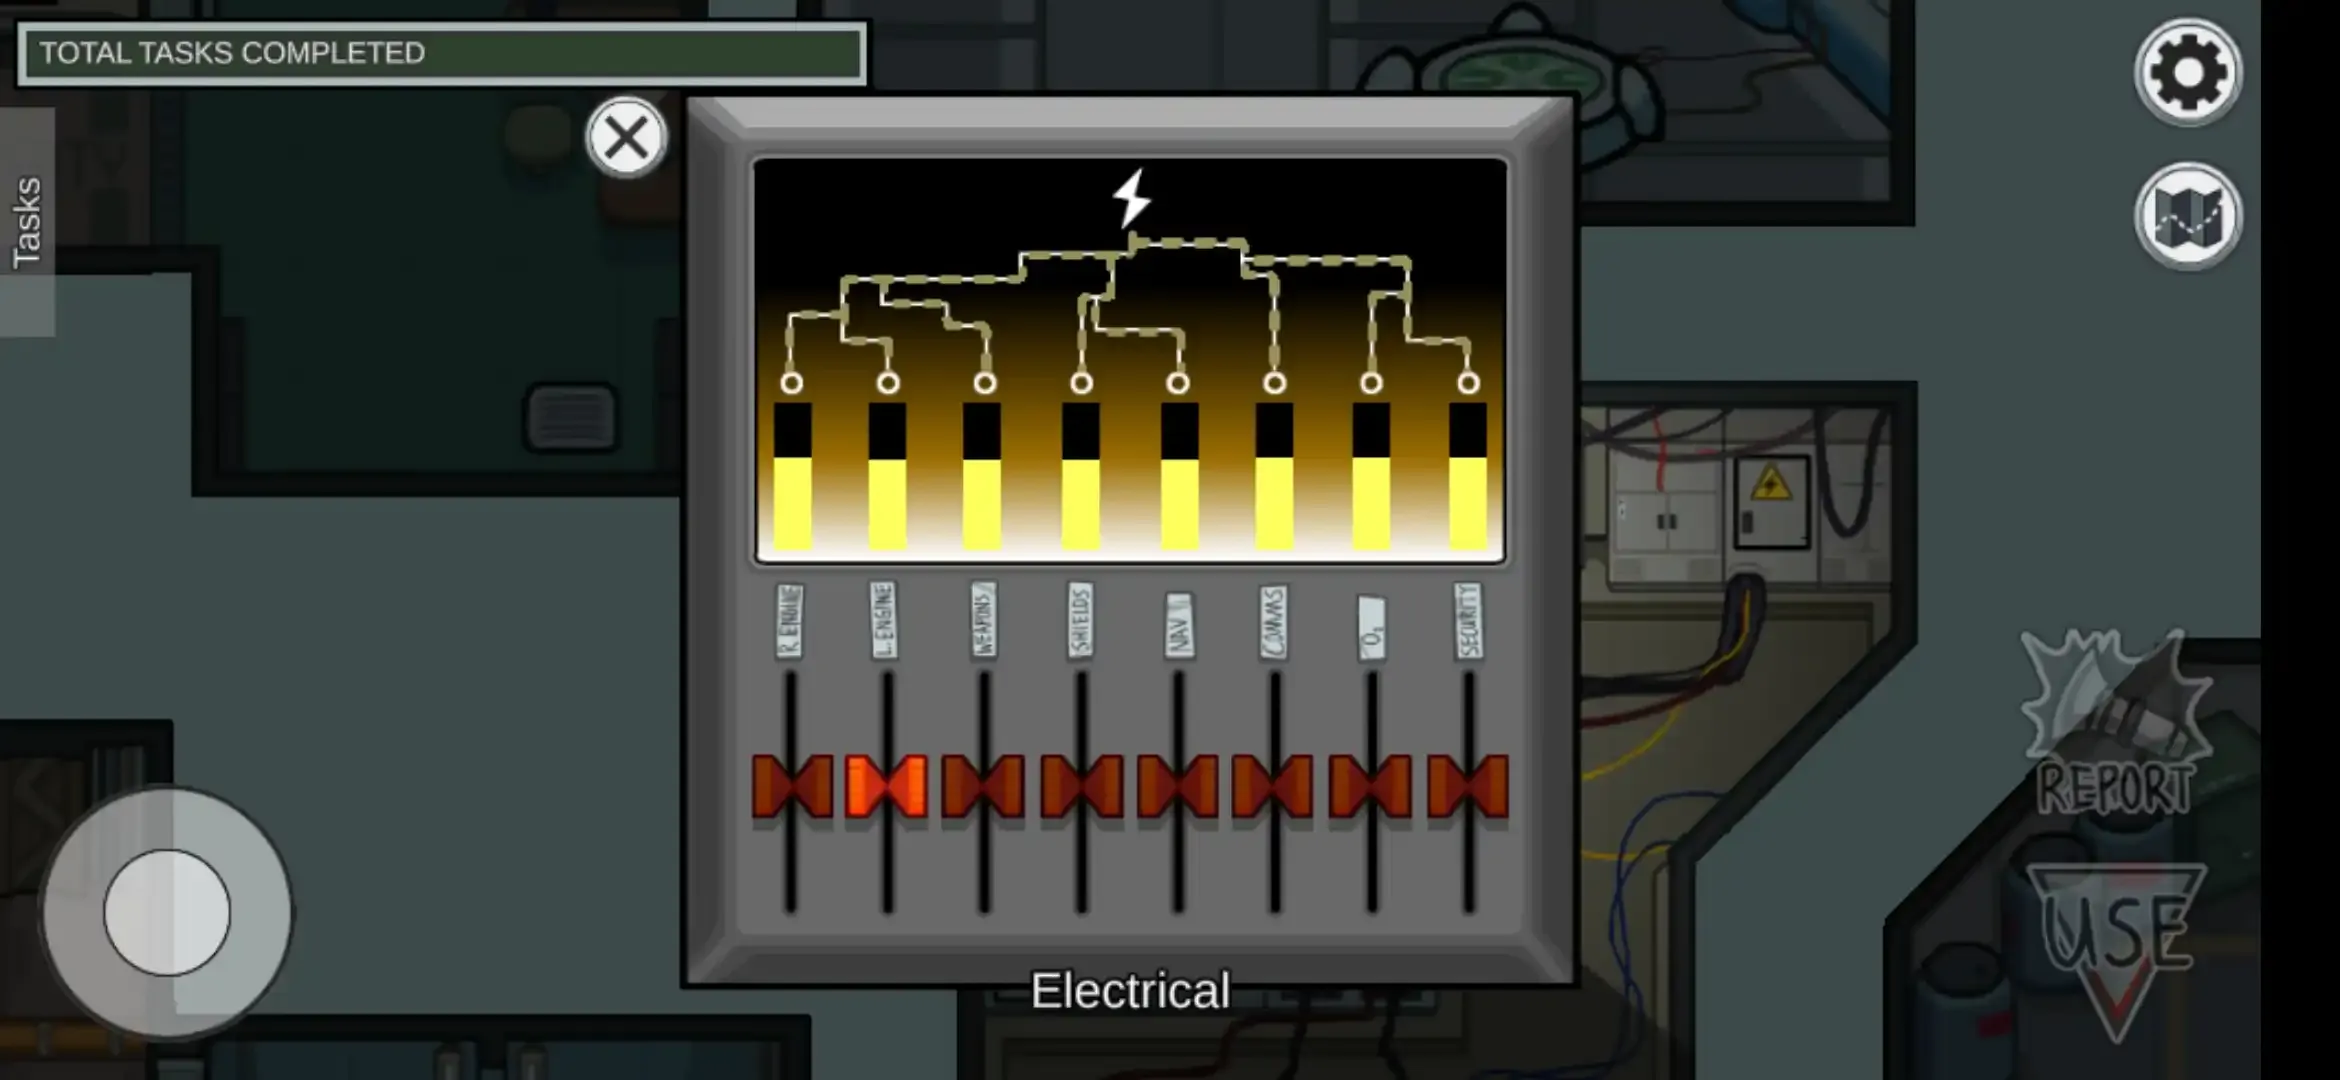
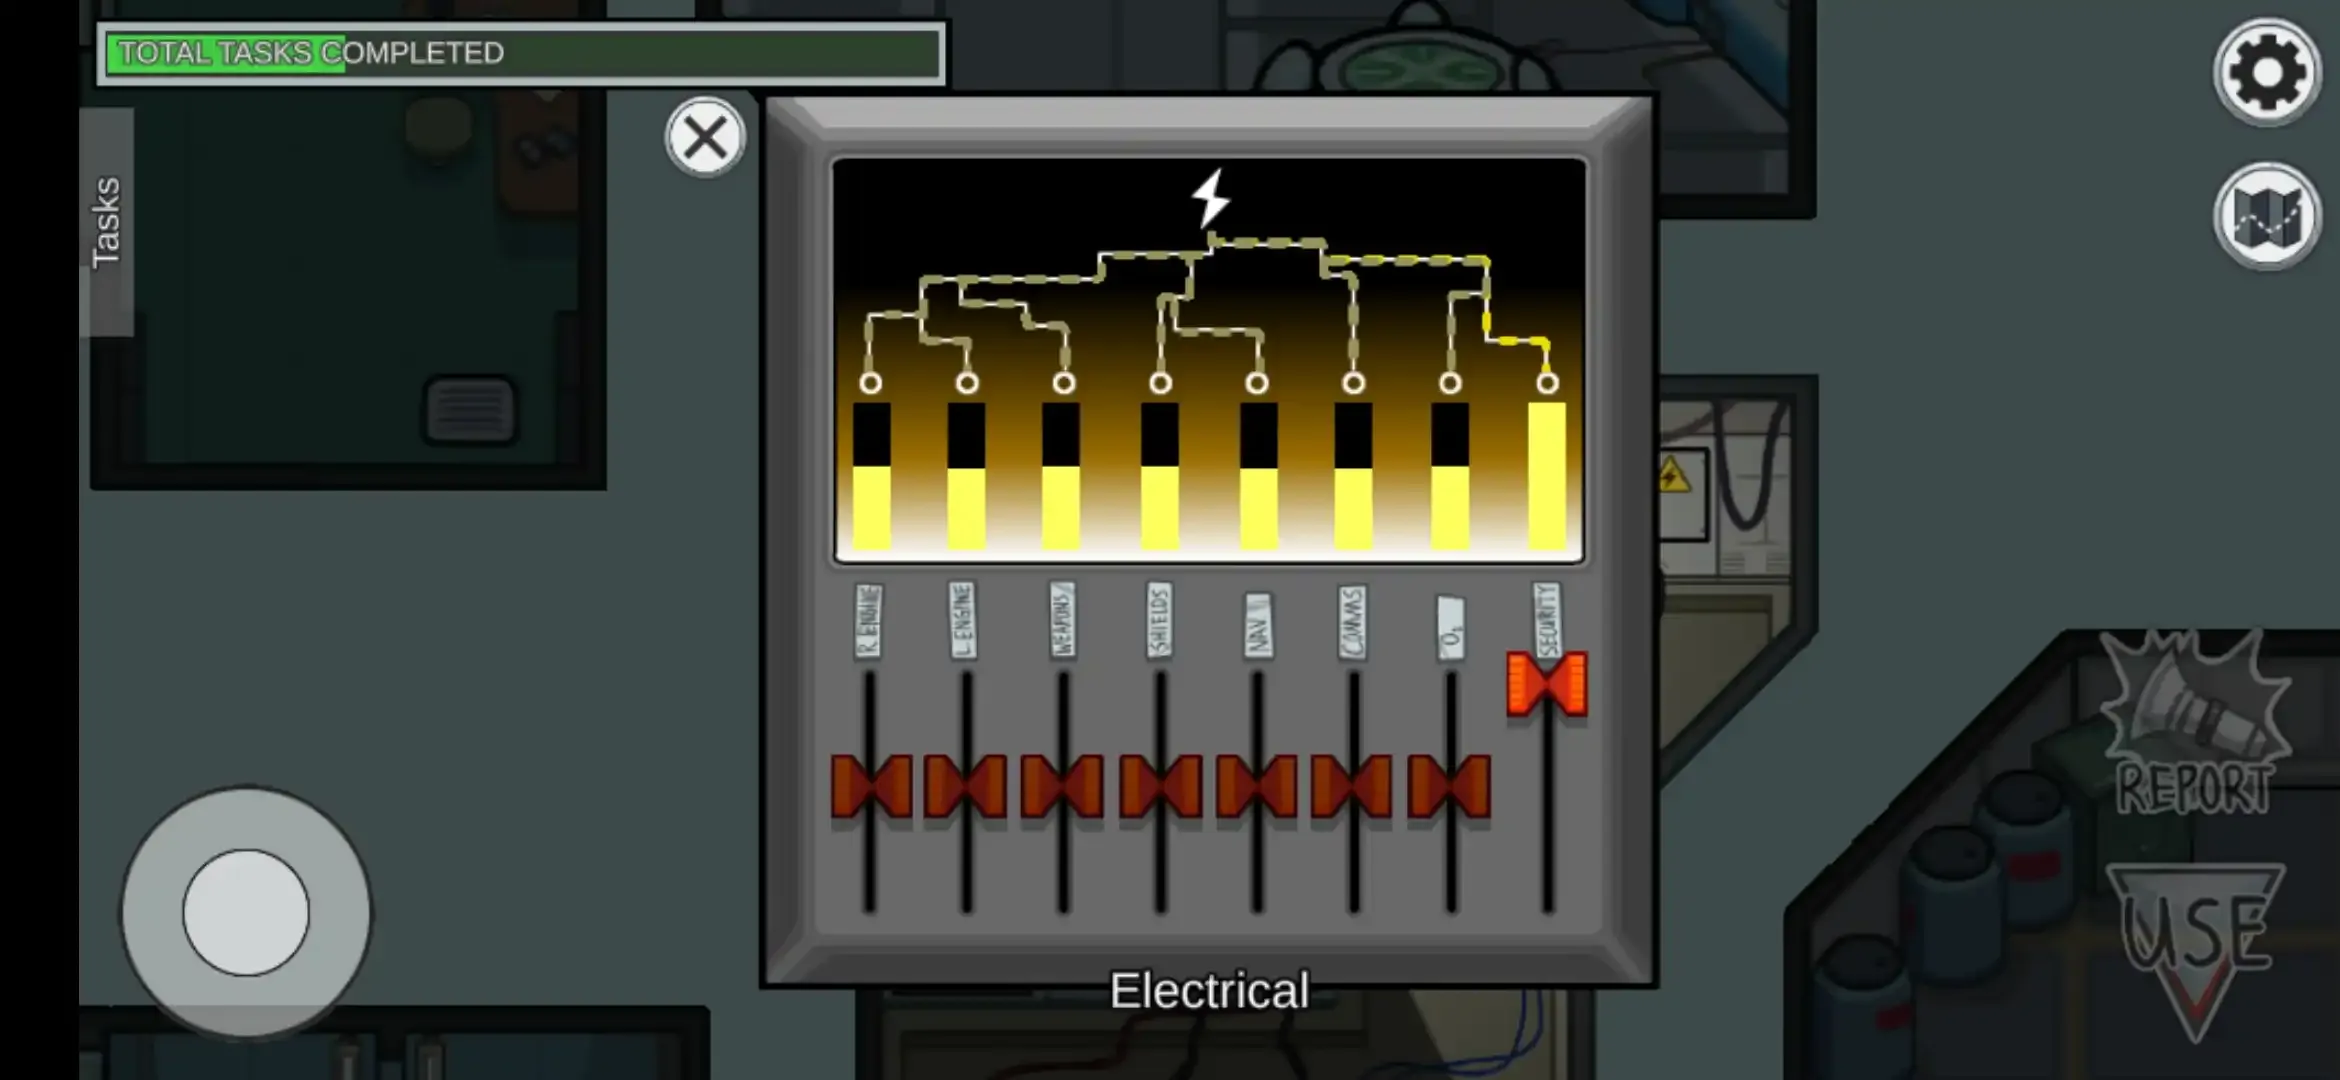
Step 1. Go to the electrical location and go near the right side of the WI-FI panel and tap use.
which will open an electric supply board. Now find the highlighted red switch with the ‘comms’ tag and as the task is about to divert power to the Communications room slide and hold the switch to the upper side.
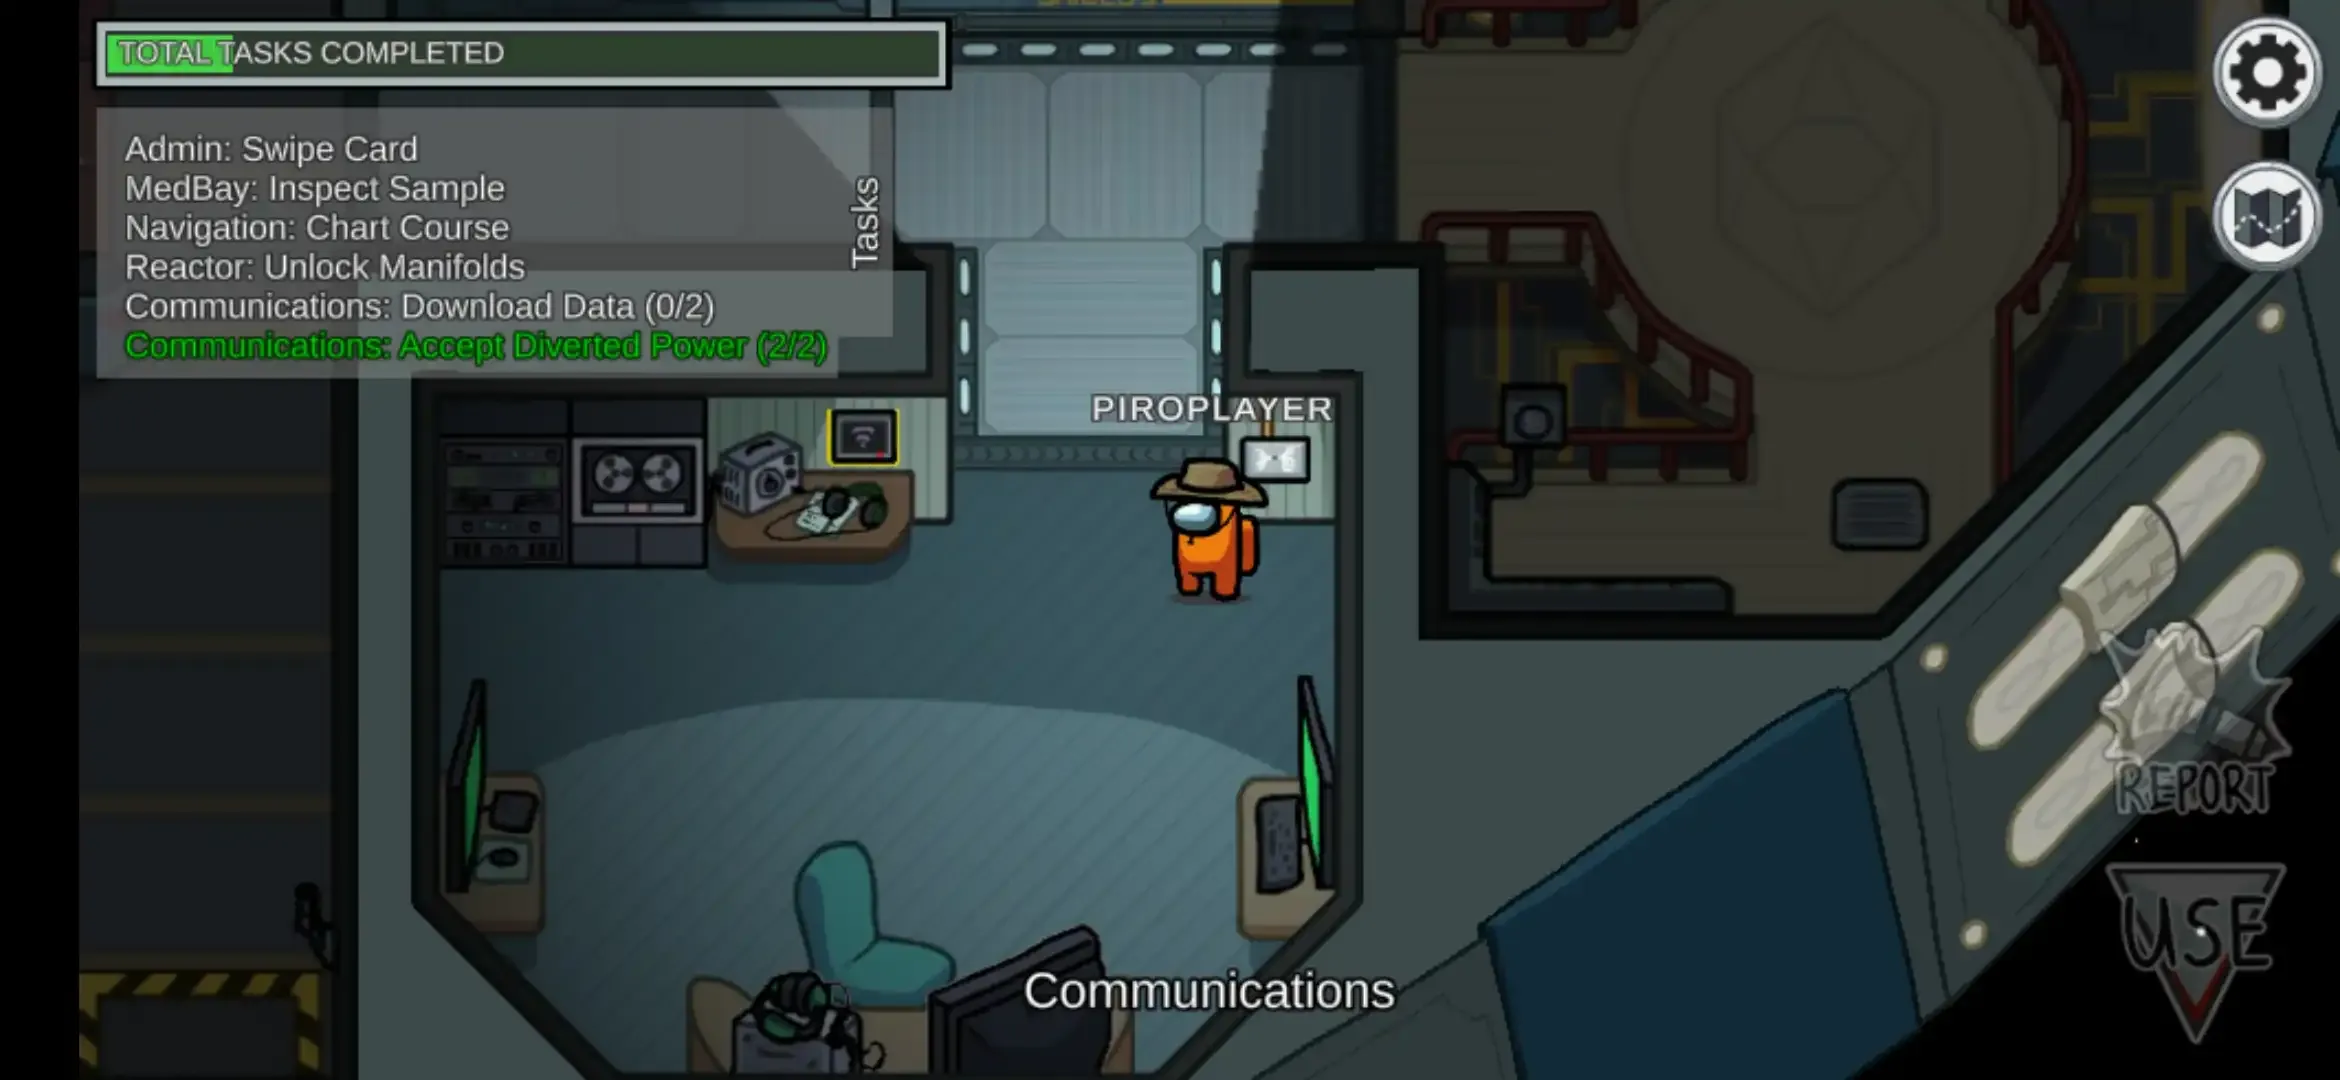
Step 2. Follow the➤ symbol which will carry you to the panel located on the upper-right sidewall of the Communications location and tap use.
Now it will open the power supply control box. Now tap the switch located in the center which will turn on the electric supply to the Communications room and the task will be completed.
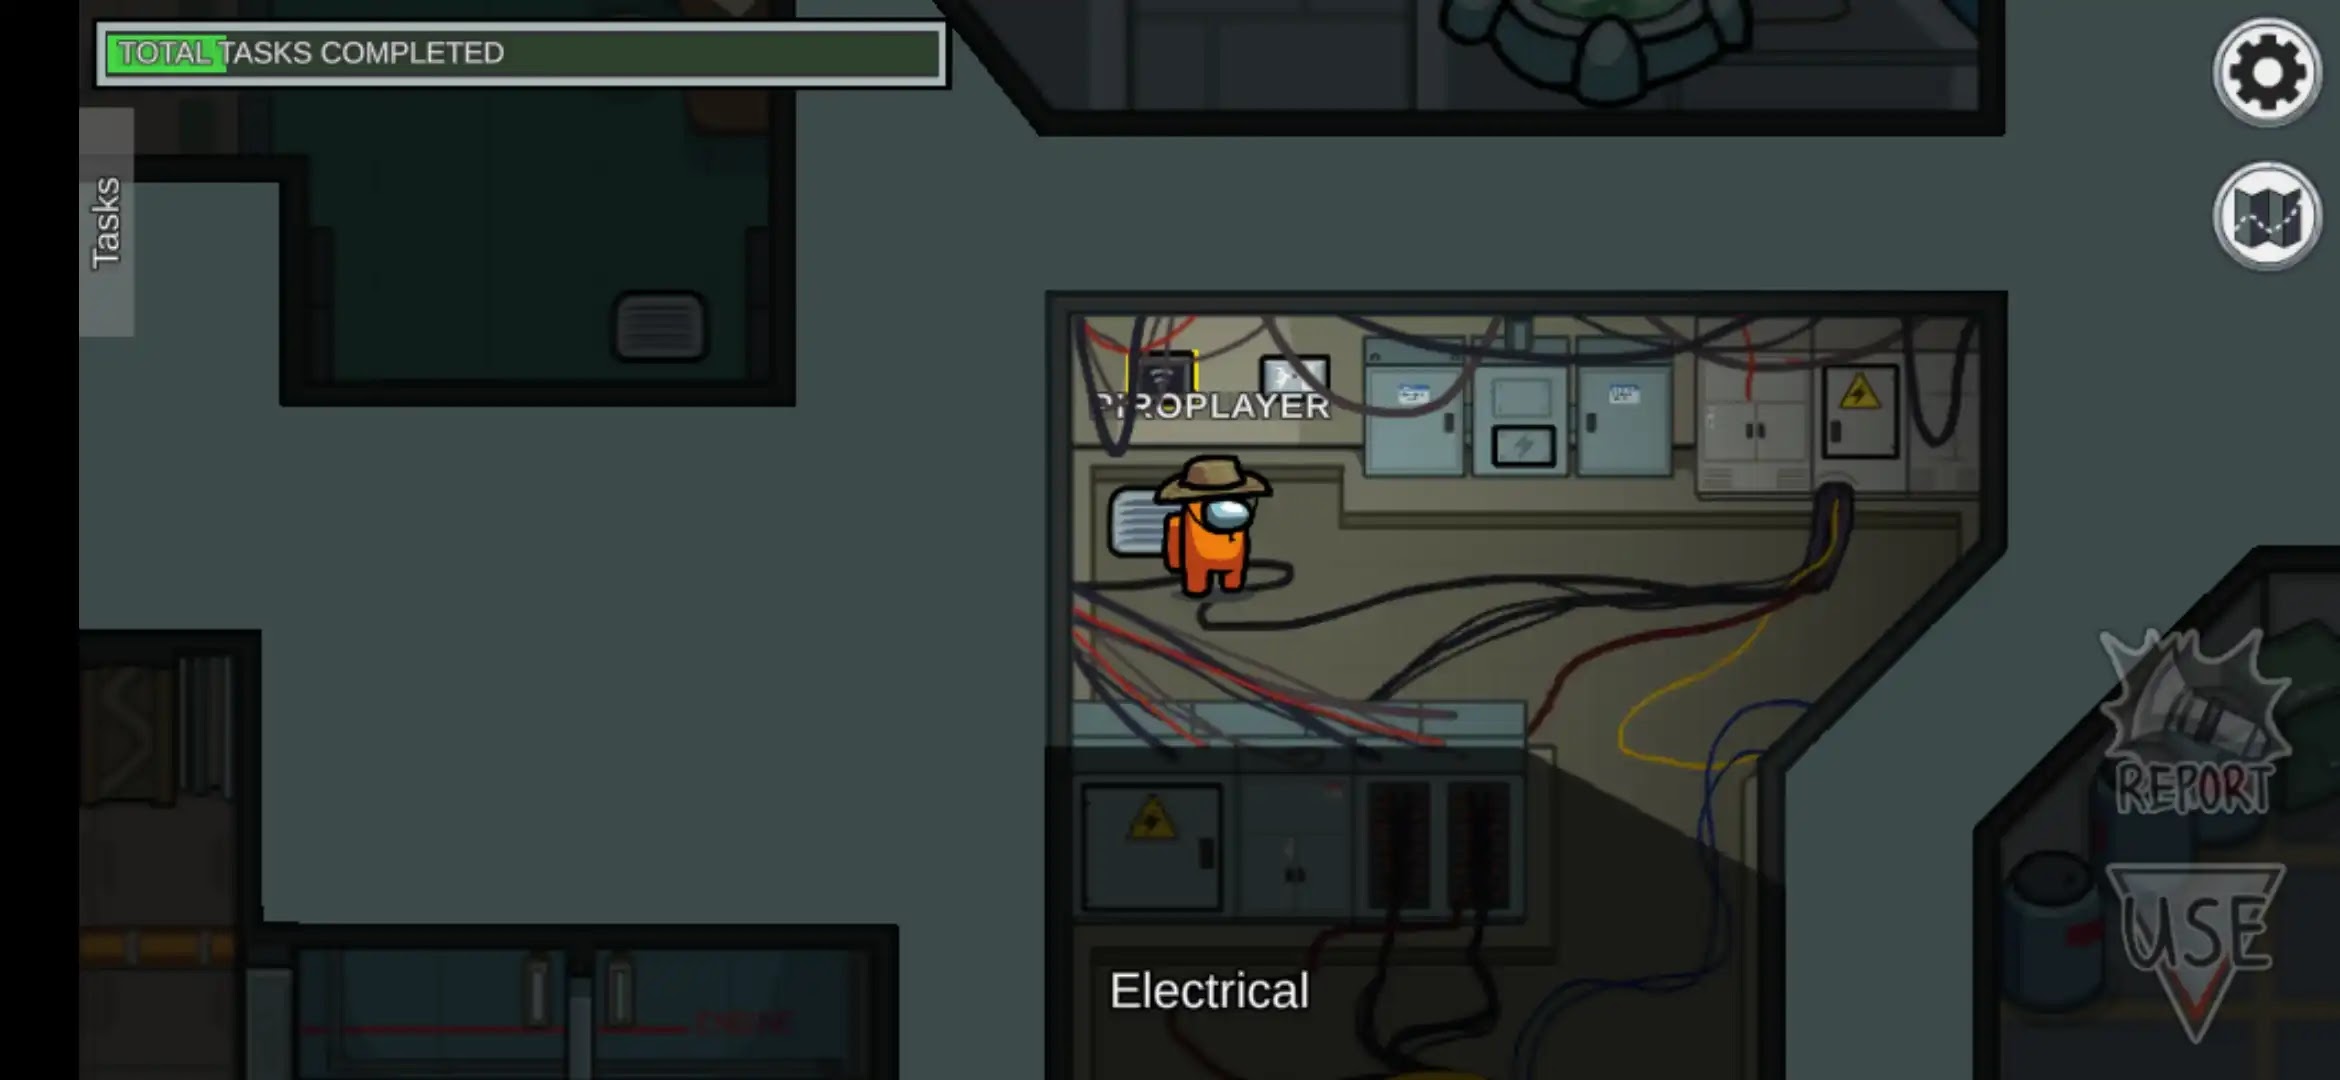
[Ⅳ] Electrical:
① Upload data –
➤ Upload data is a short task. It is divided into two parts.
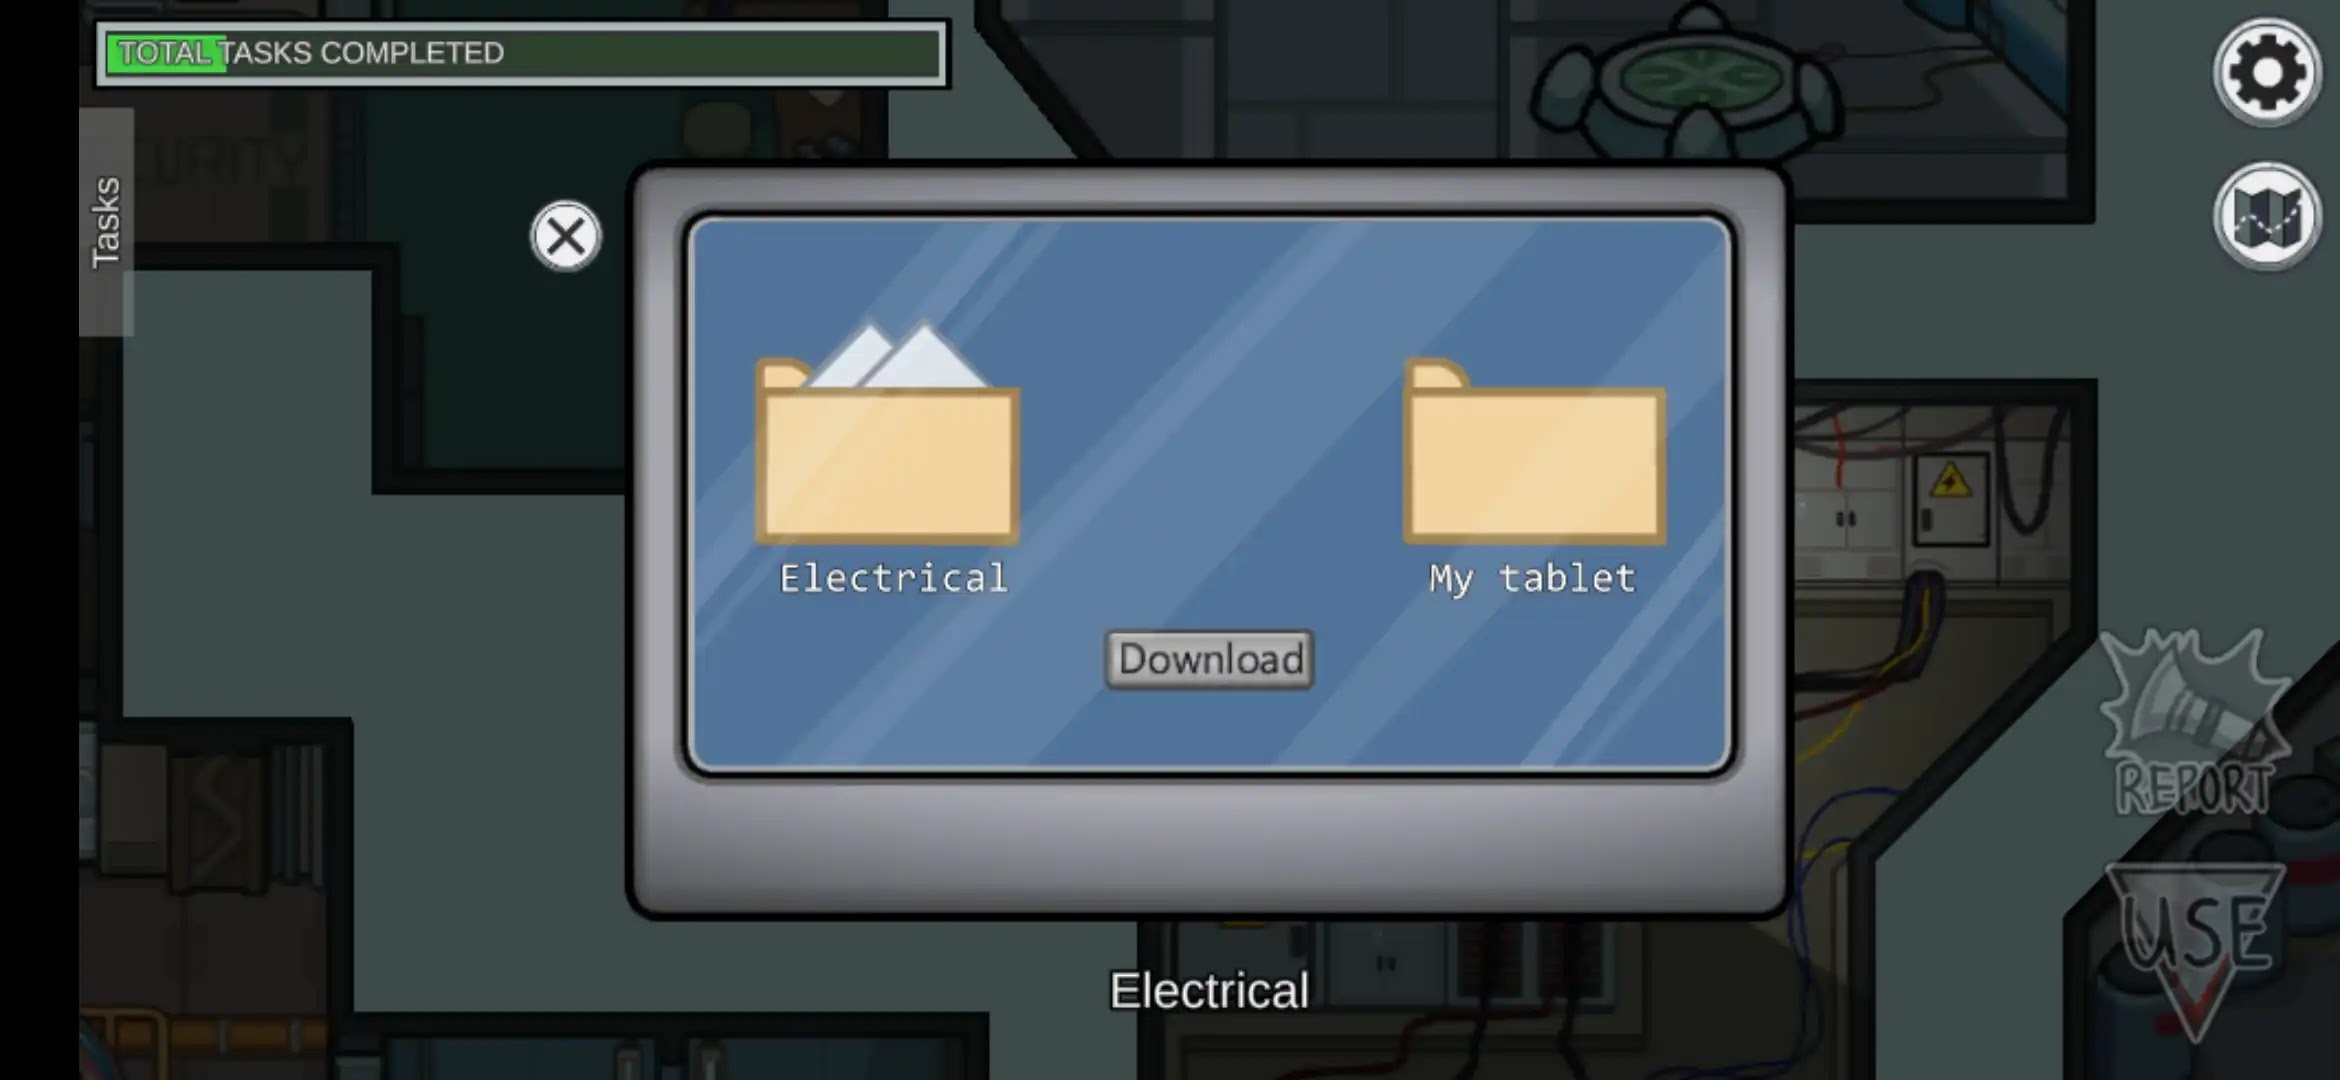
Step 1. Go to the Electrical location and on the upper wall side go near the WI-FI panel and tap use.
Now one window will be visible to you in that tap or click the download button
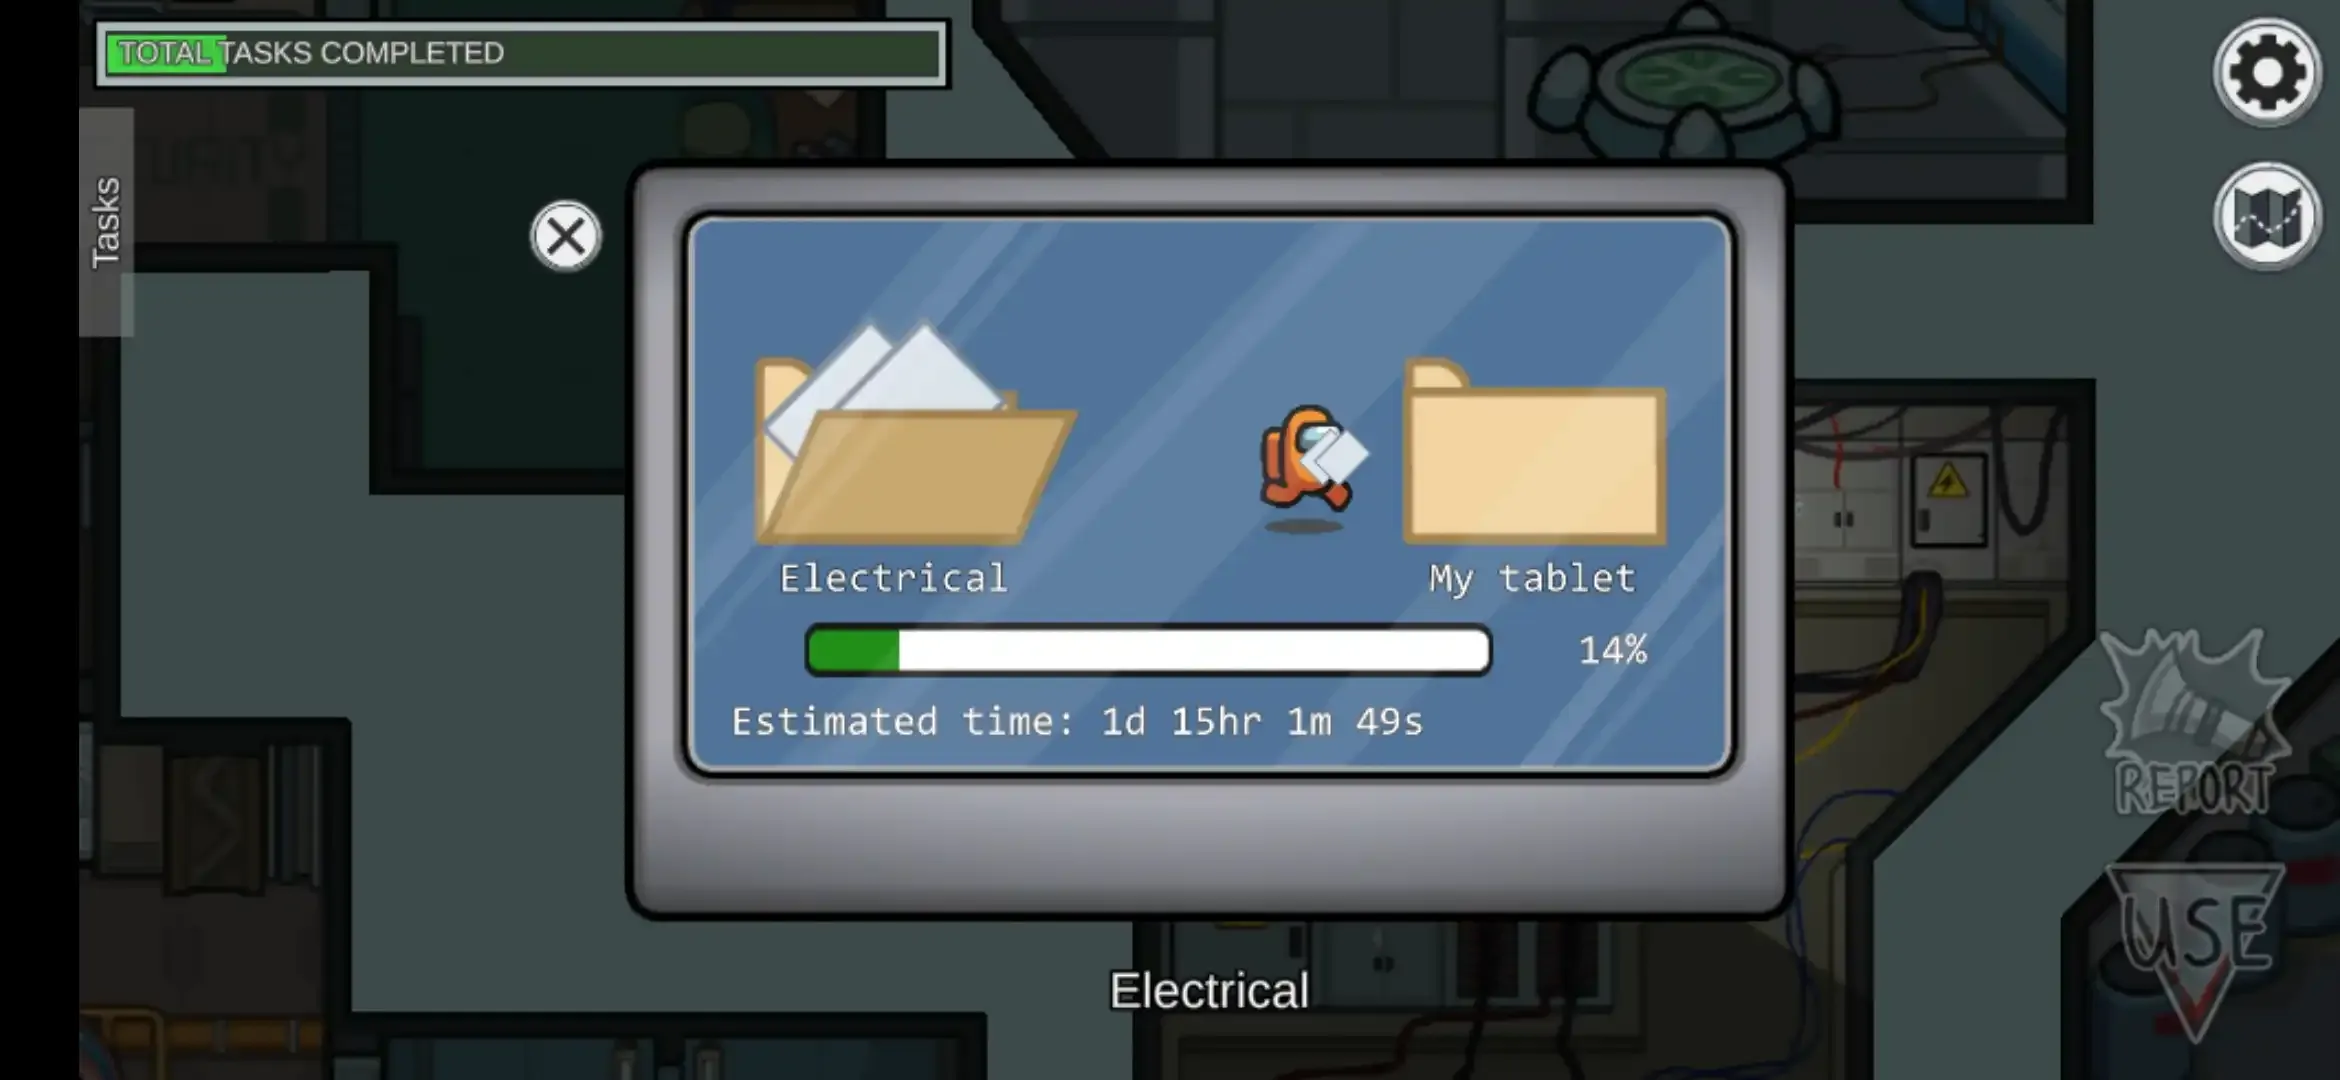
Now it will start downloading files from the ‘Electrical’ folder to My Tablet.
Generally, it takes 8.7 seconds.
While uploading a file if it closes by mistake then one has to upload it again from the beginning. While downloading a file if it closes by mistake then one has to download it again from the beginning.
Step 2. After downloading the files to My Tablet follow the➤ symbol which will carry you to the admin room’s WI-FI panel now tap use.
In window tap upload button.
Now it will upload the files from My Tablet to Headquarters and you will complete this task.
It also takes 8.7 seconds. While uploading a file if it closes by mistake then one has to upload it again from the beginning.
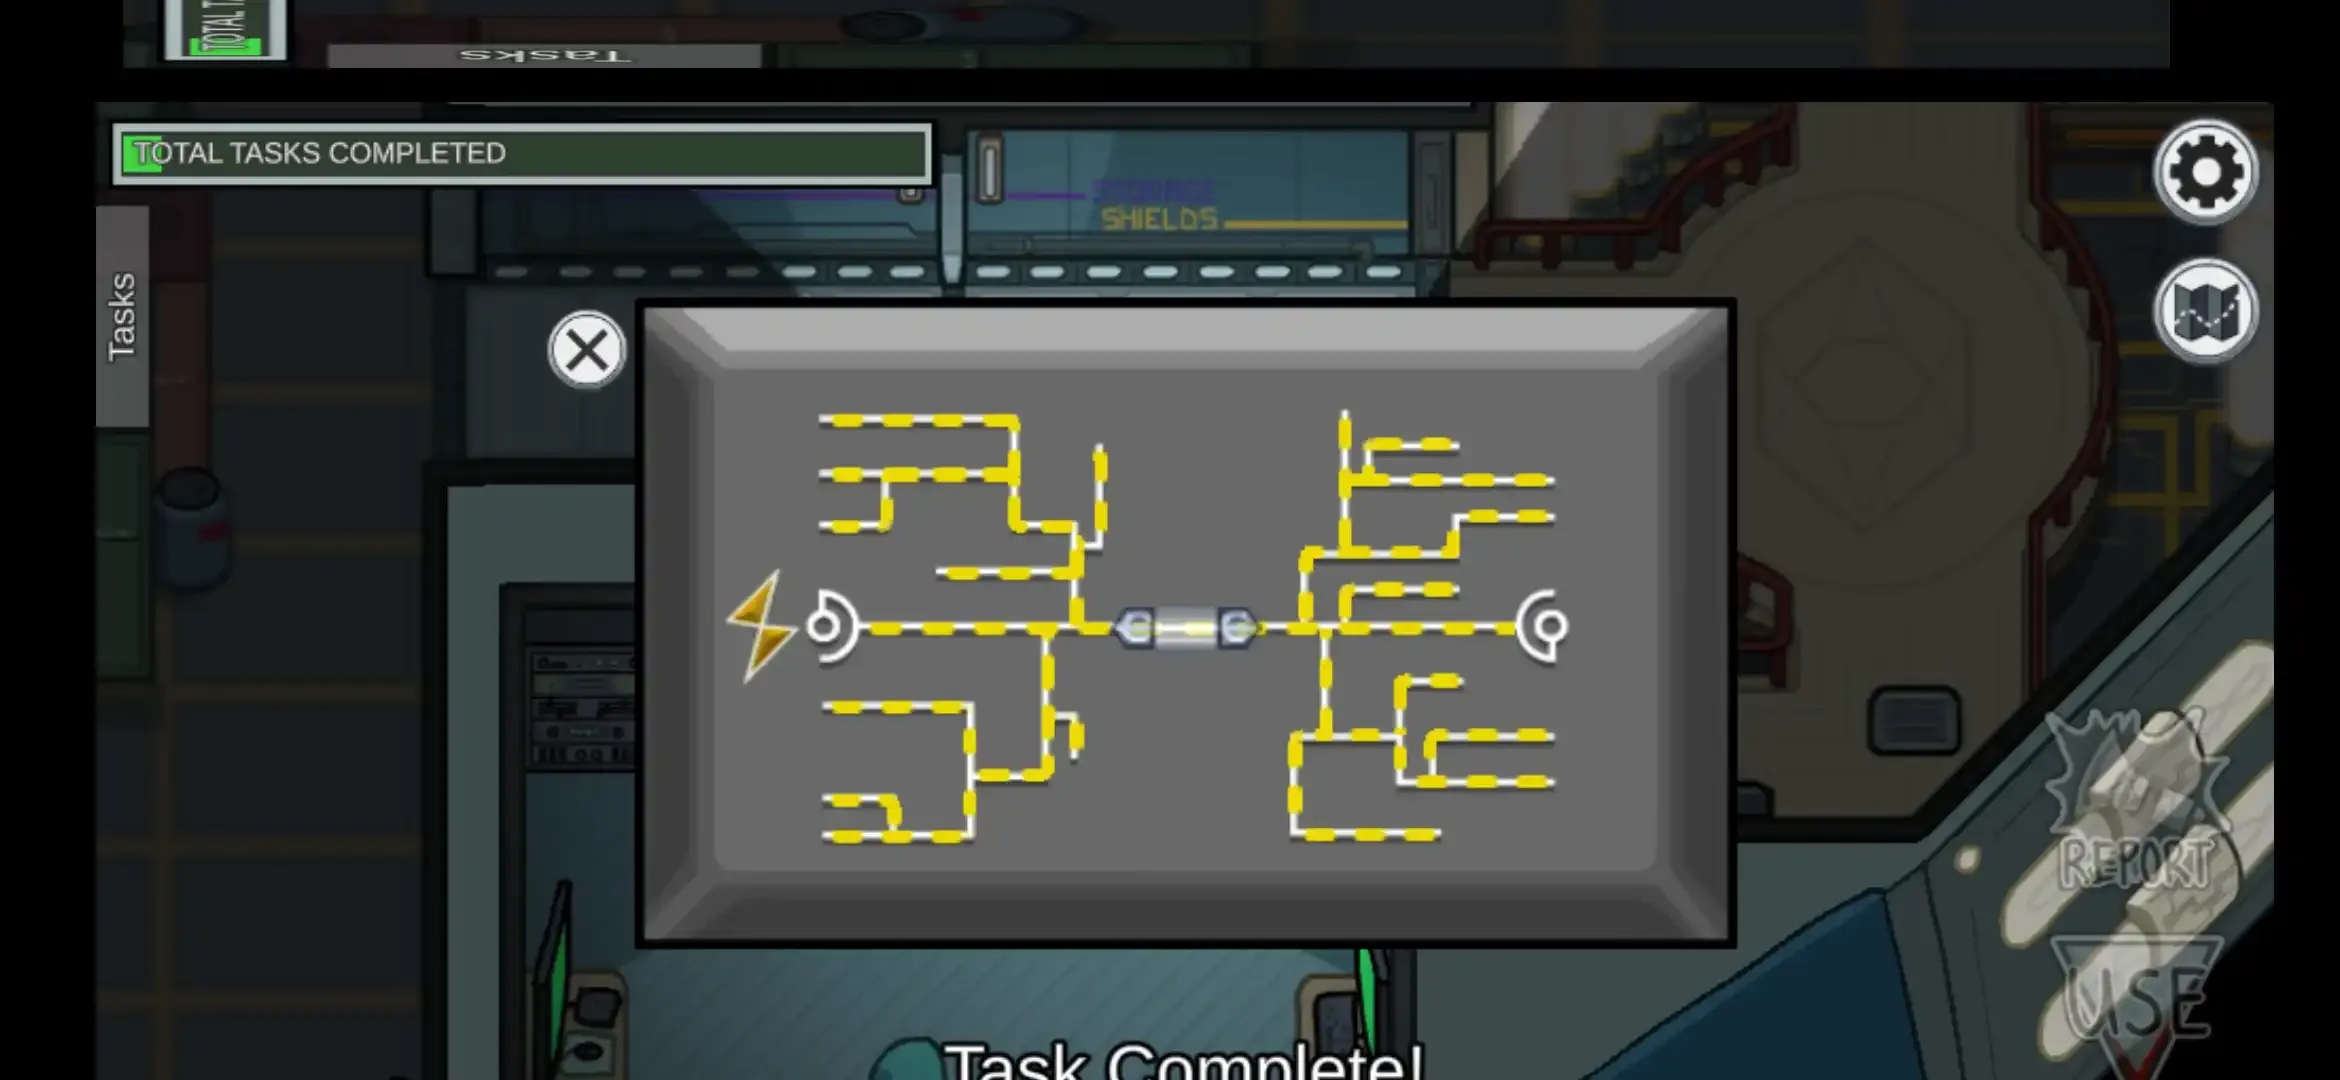
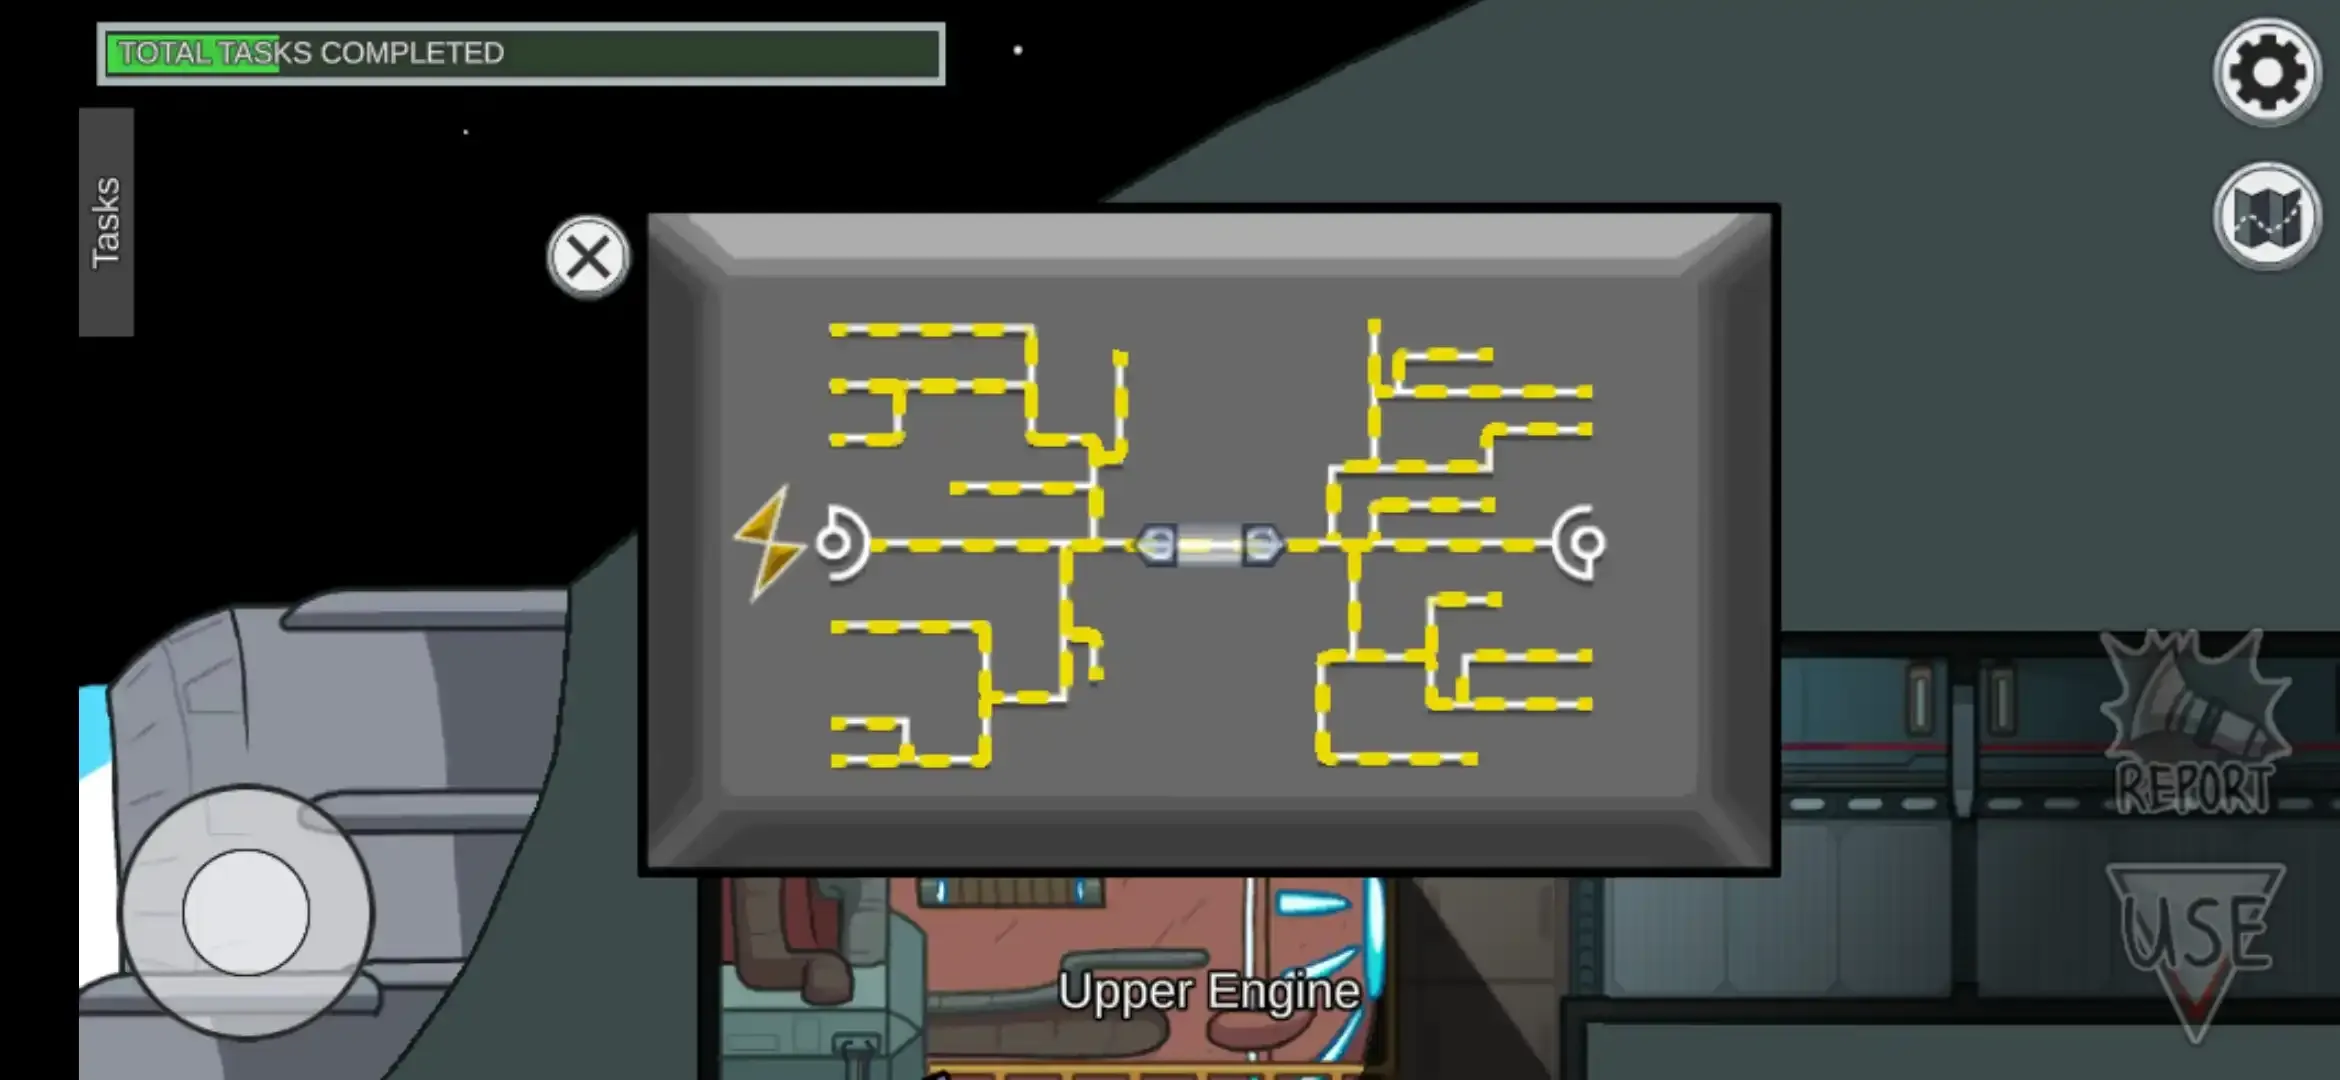
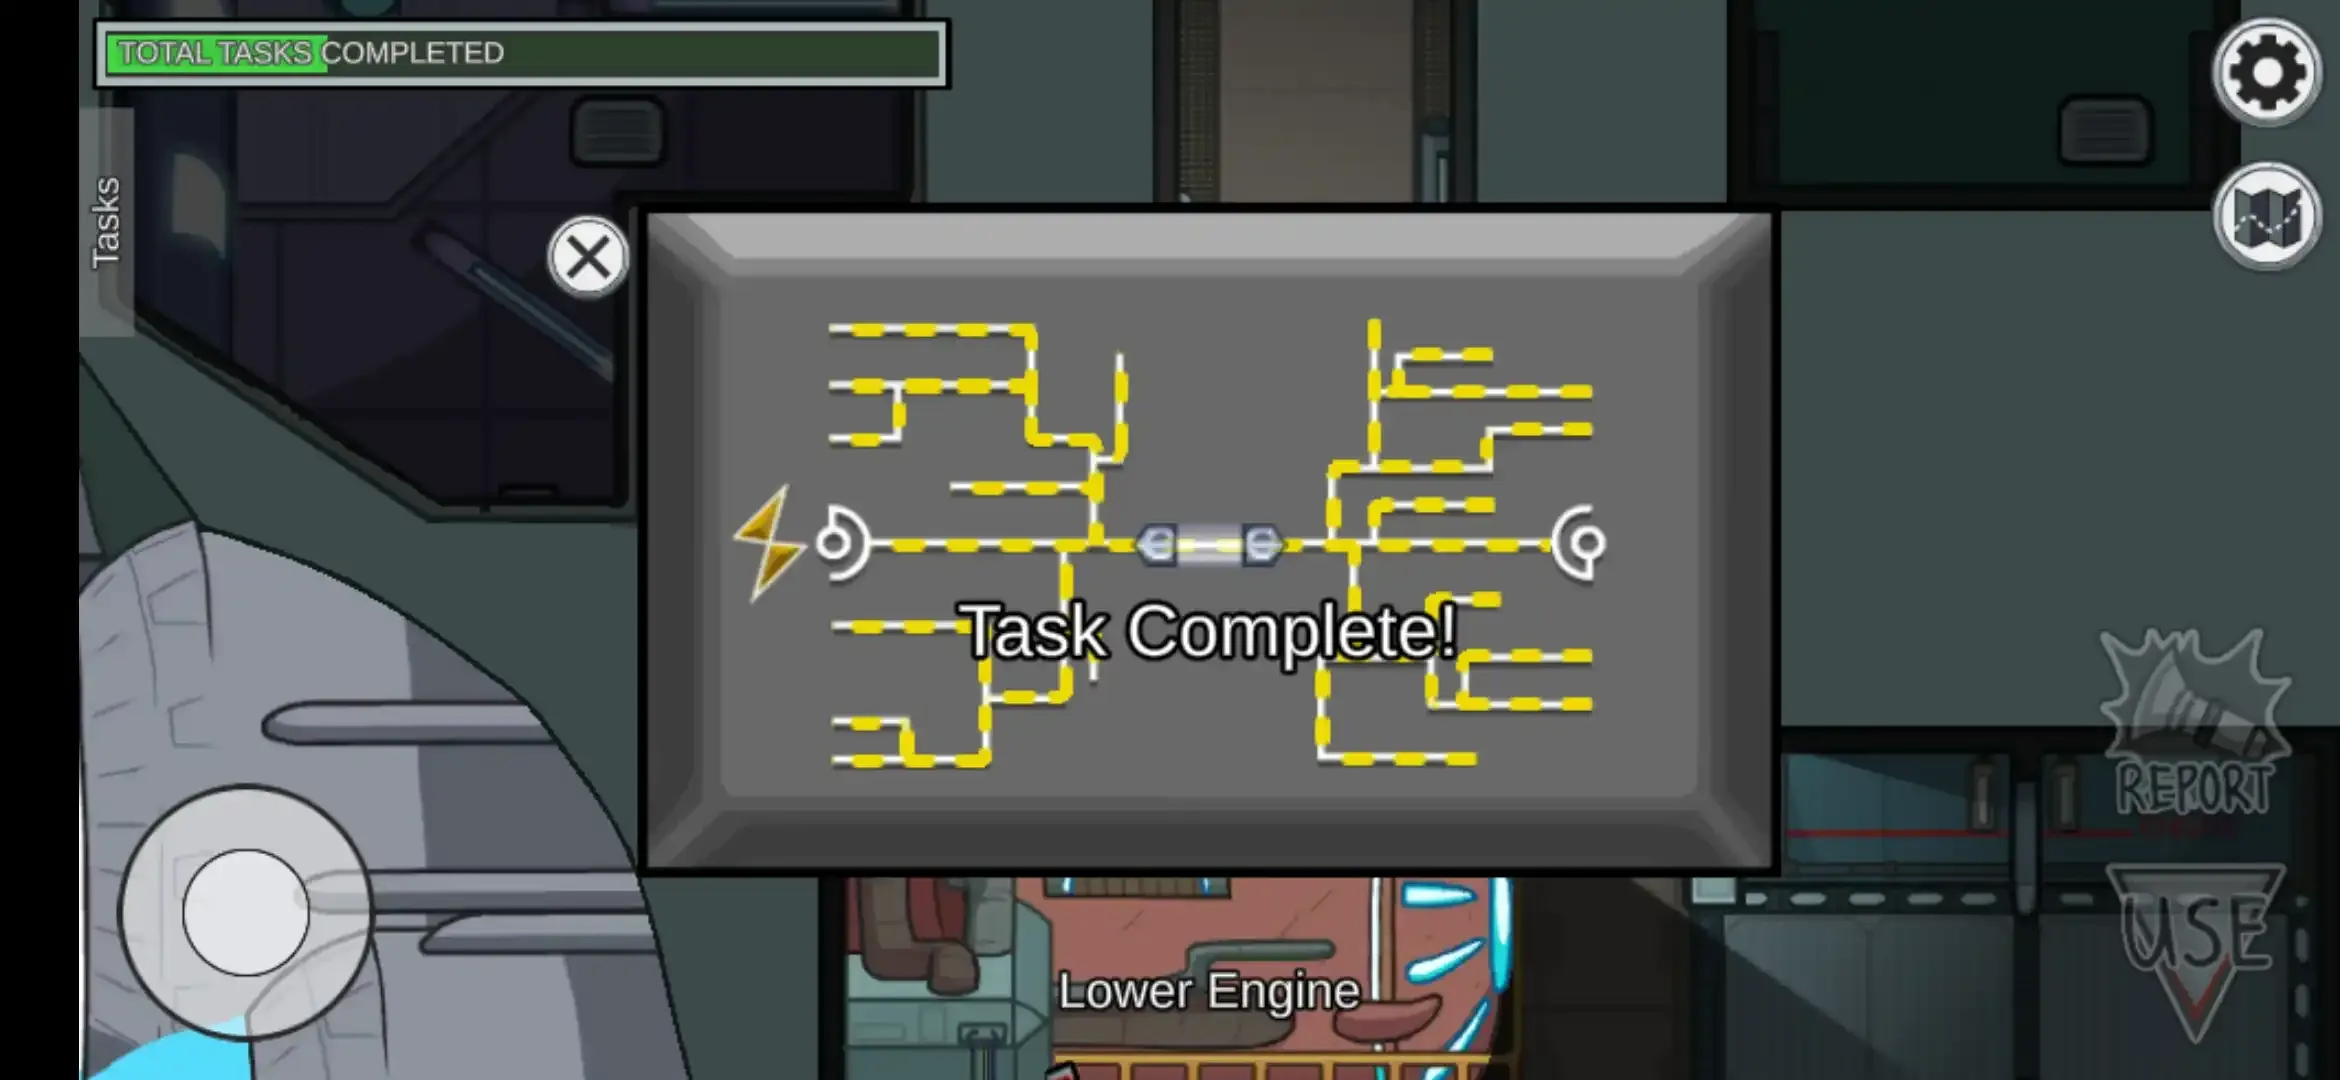
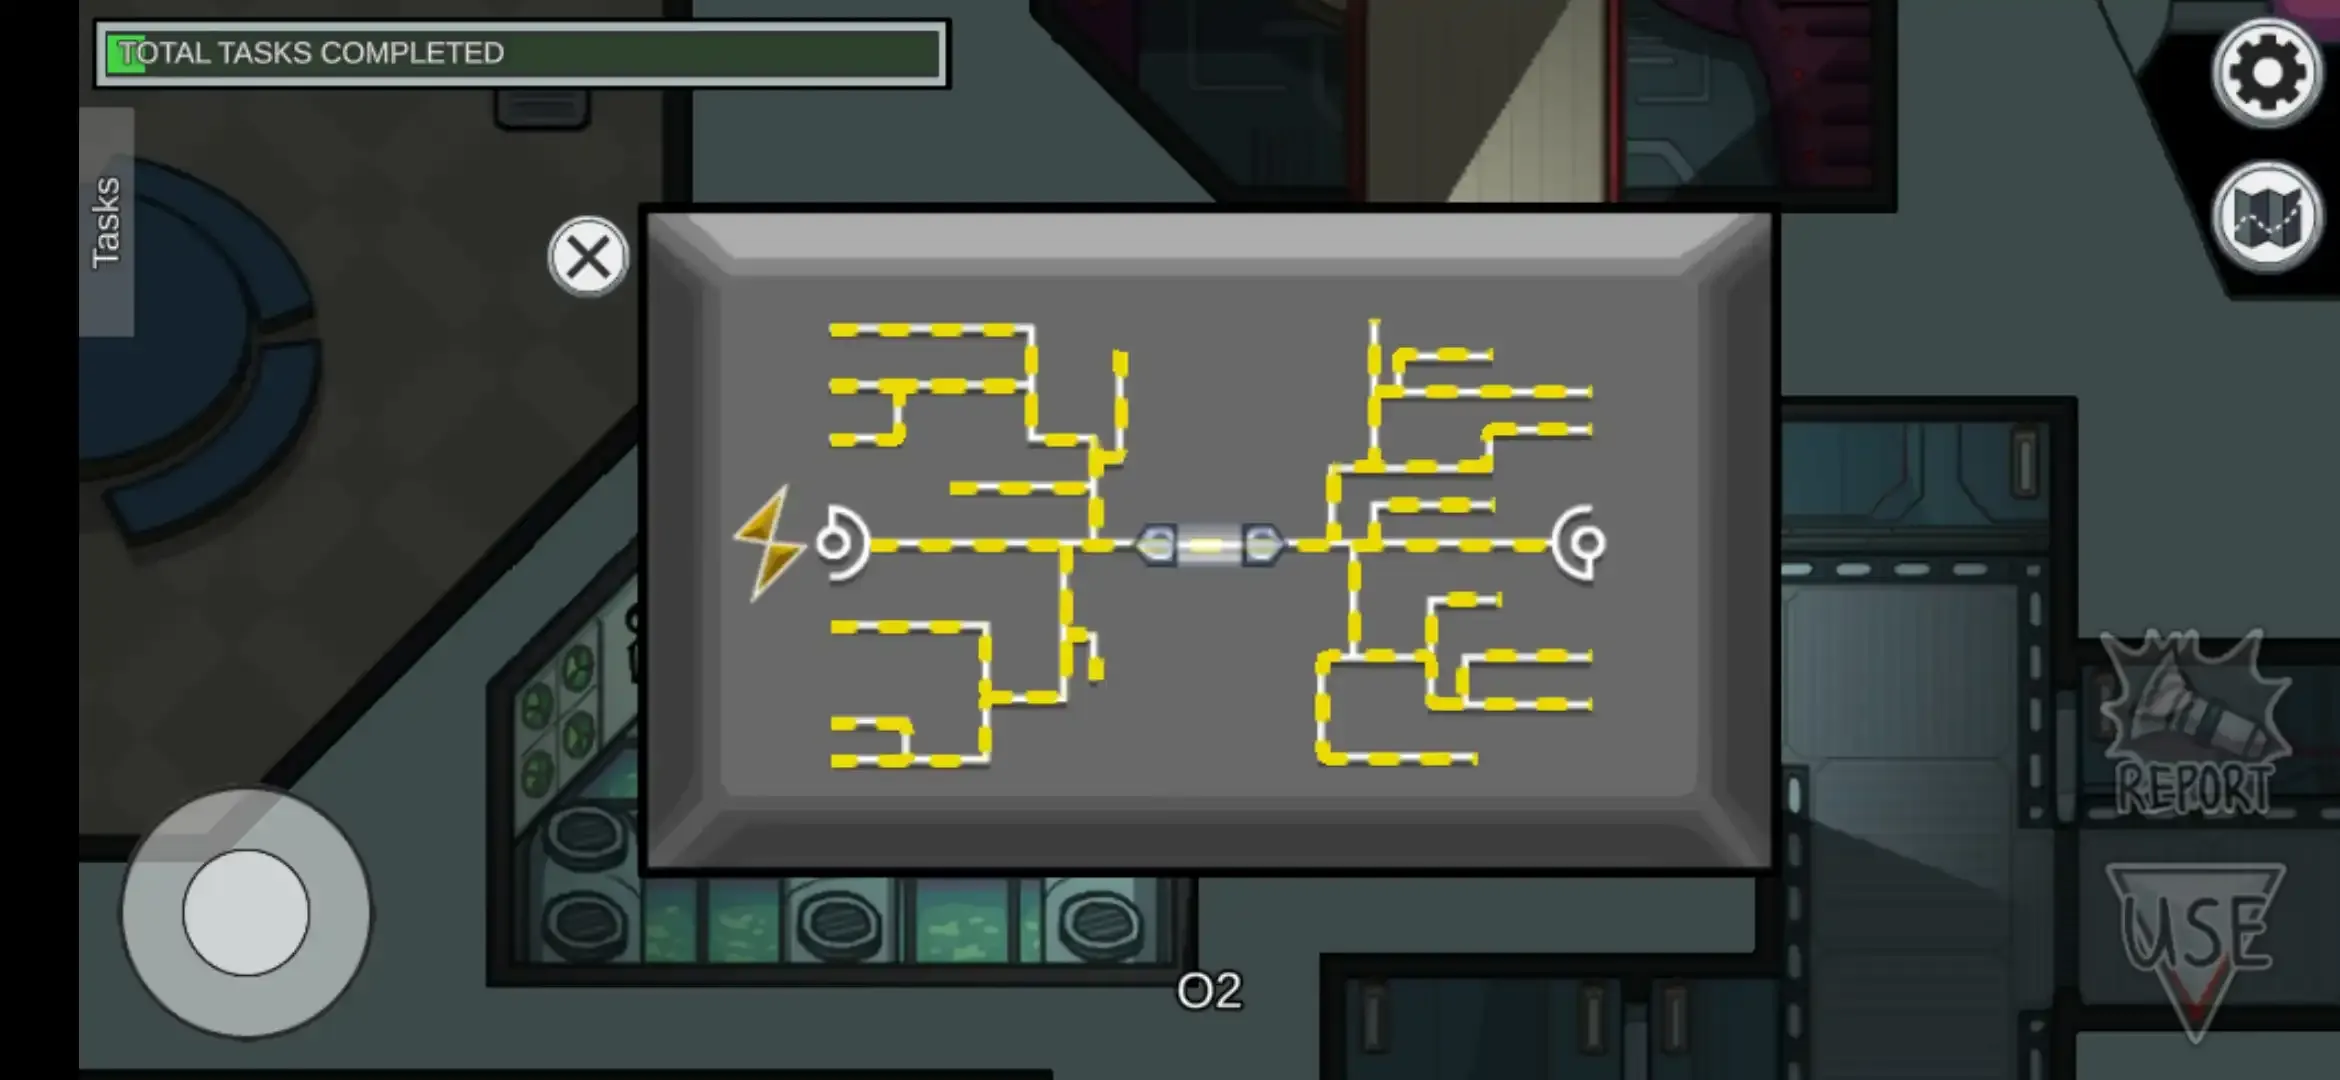
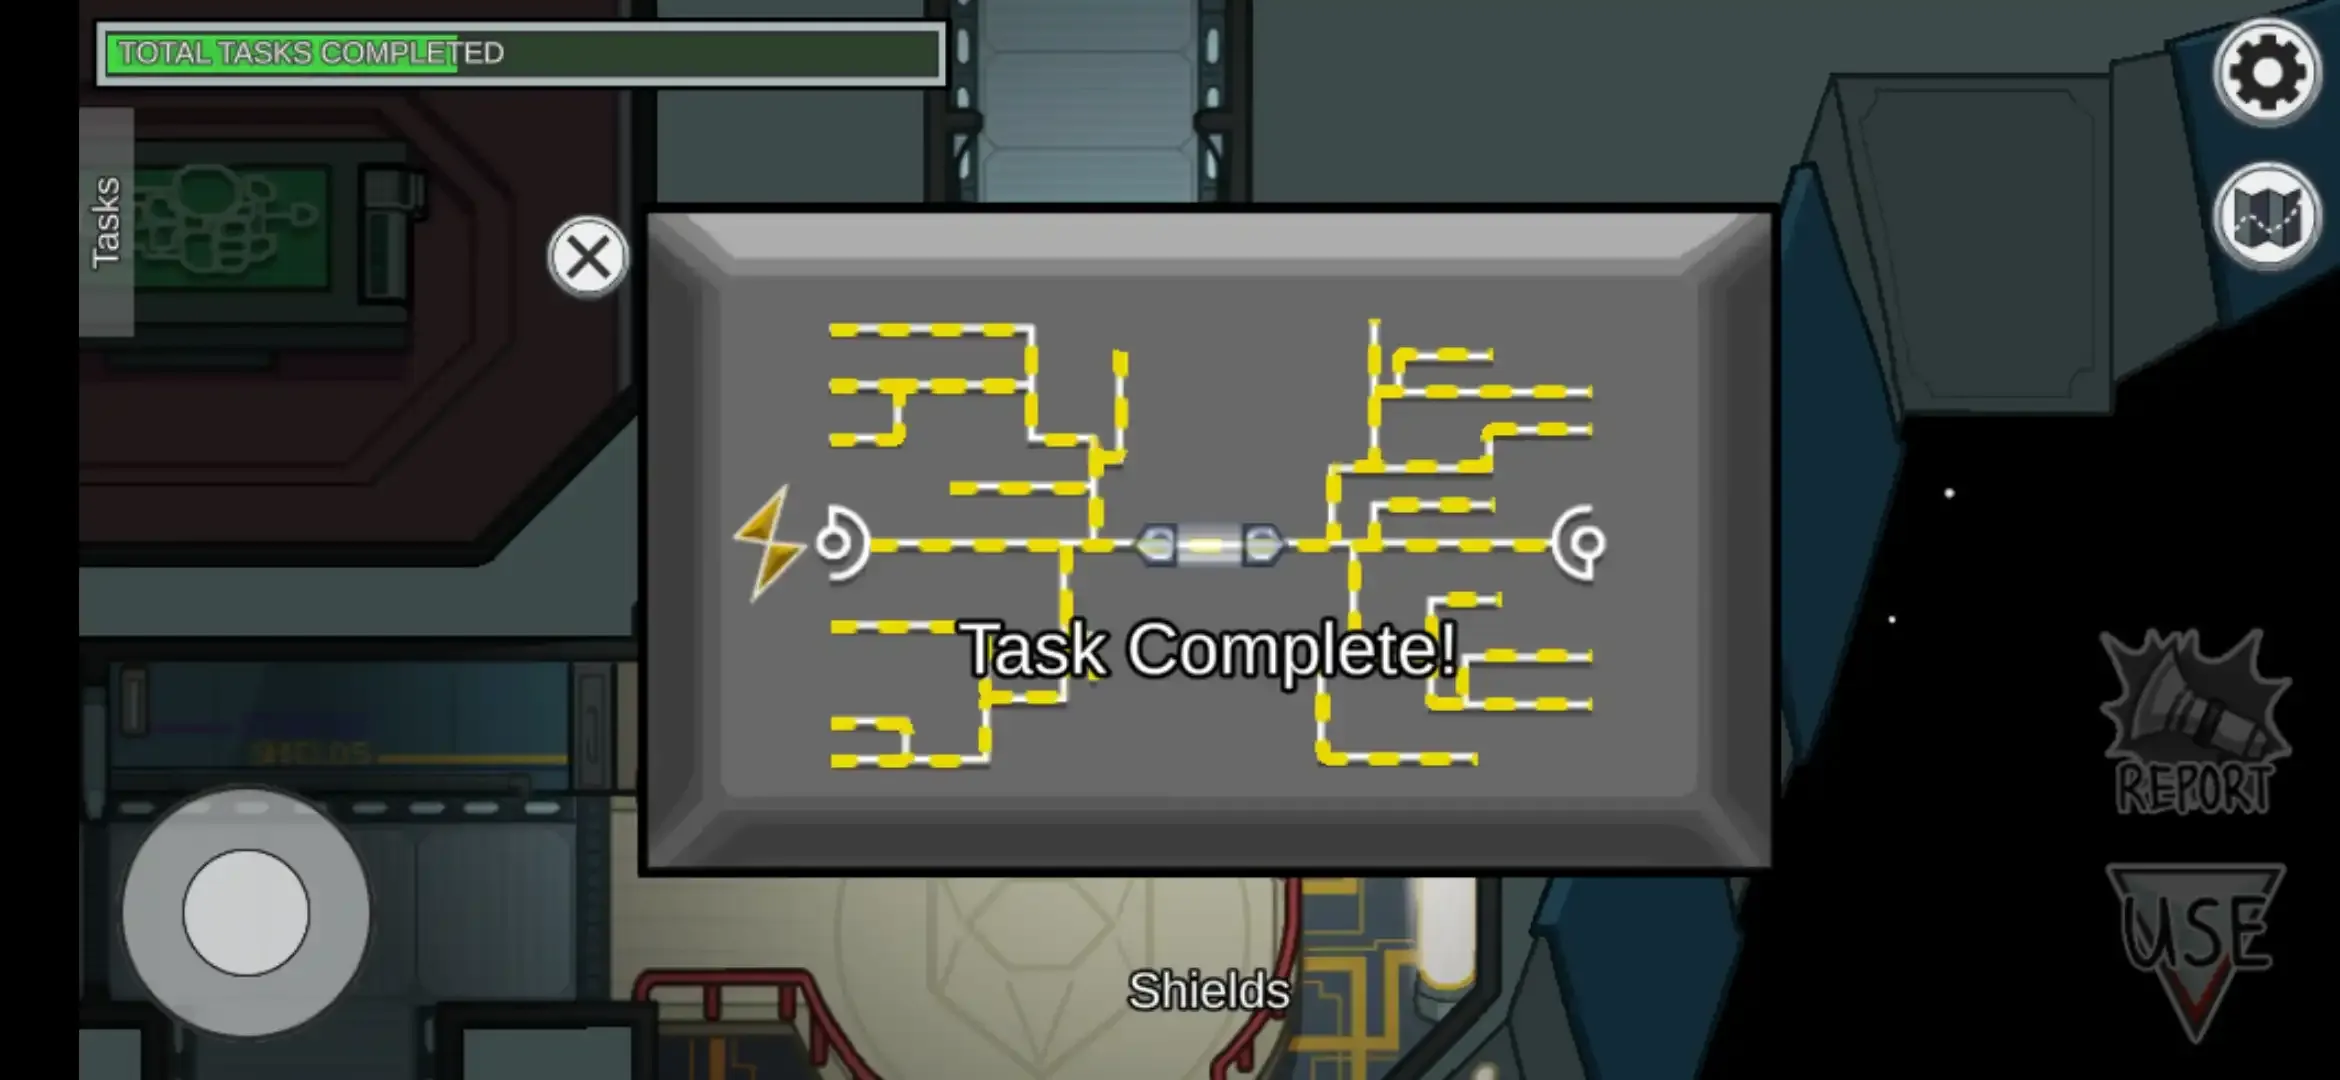
② Fix wiring –
➤ Fix wiring is a long and common task.
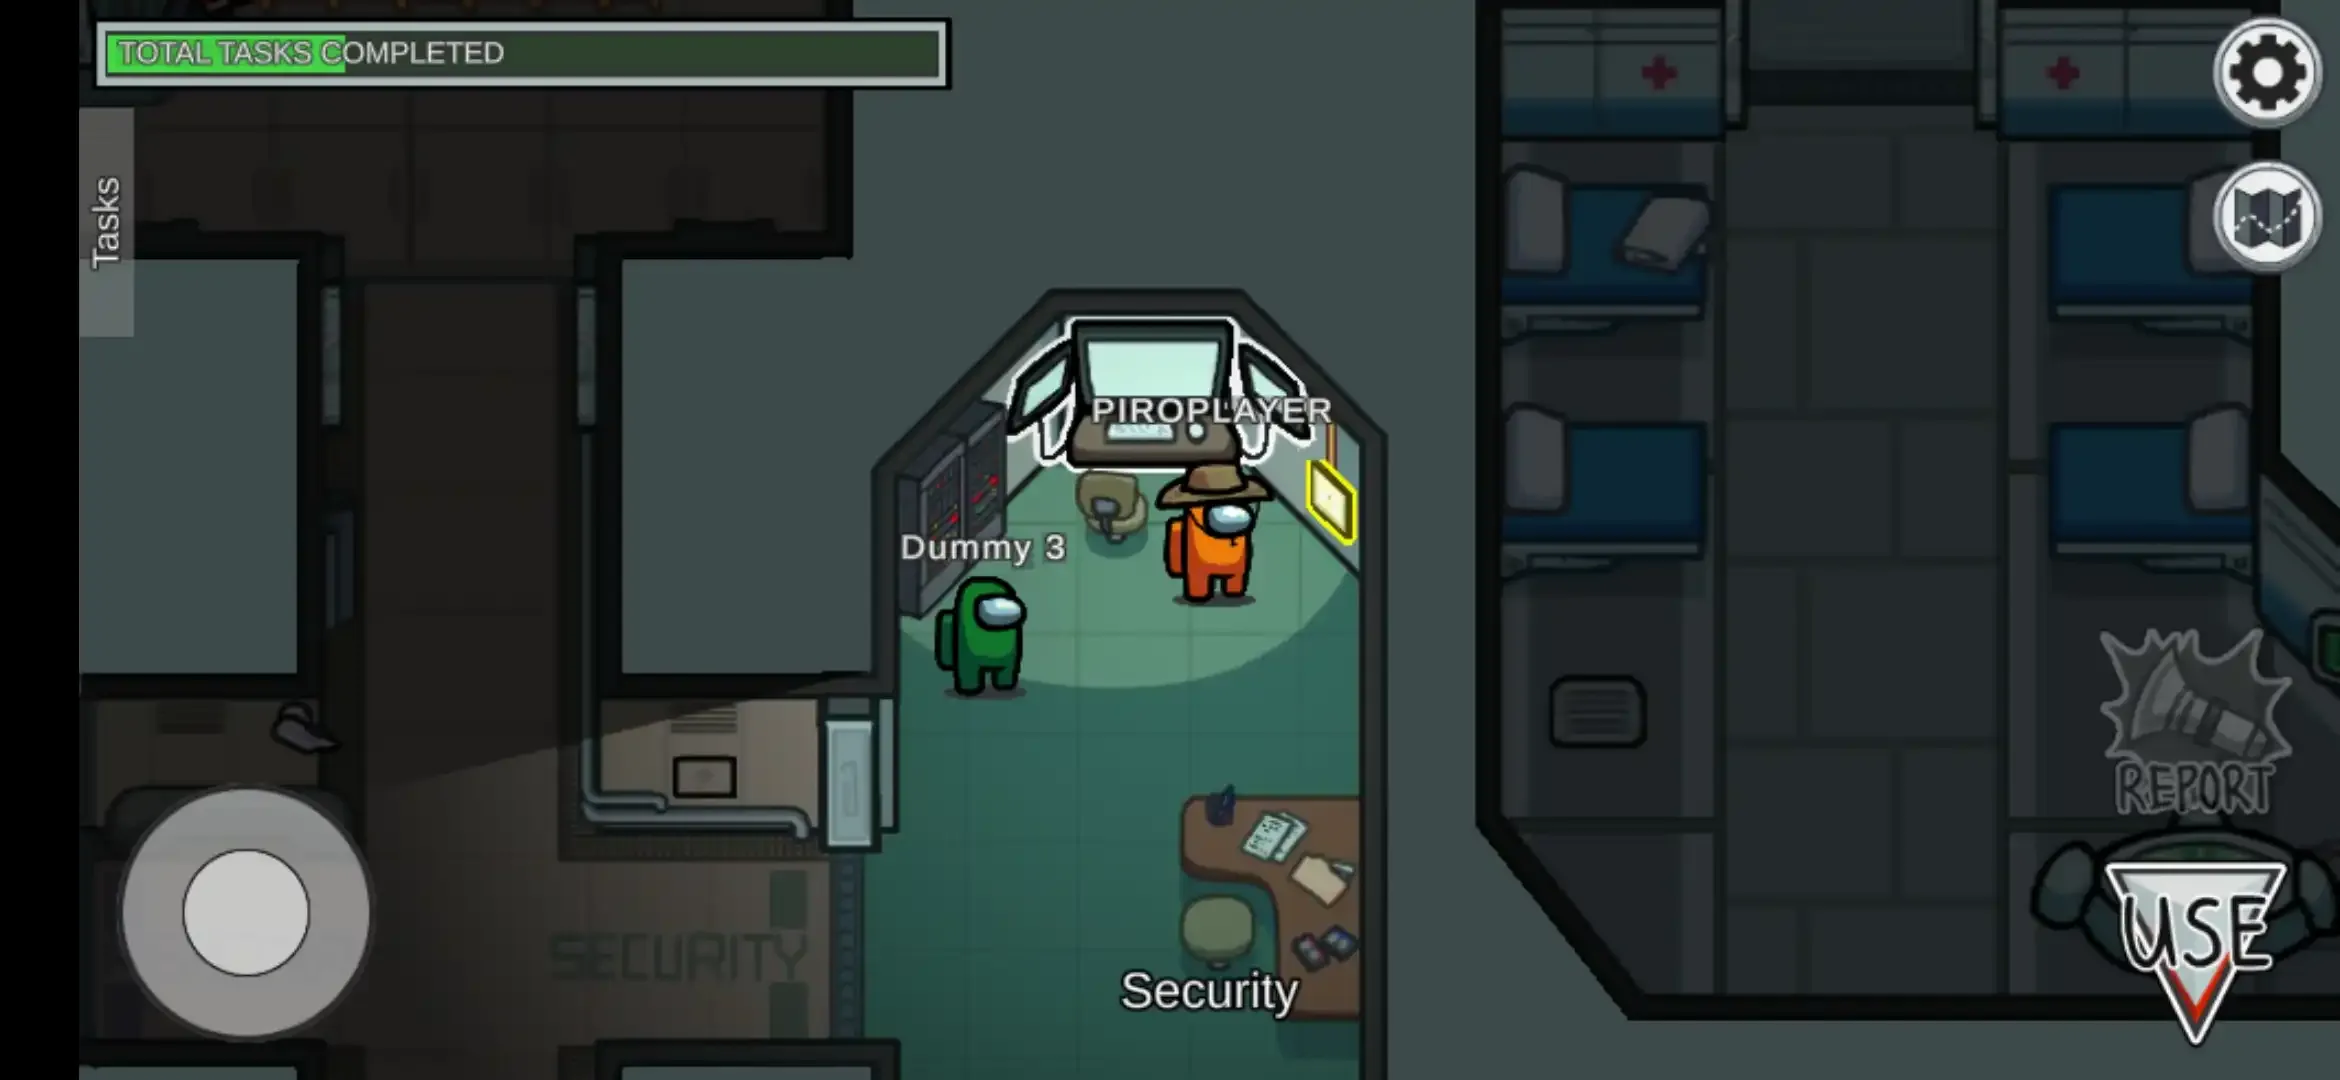
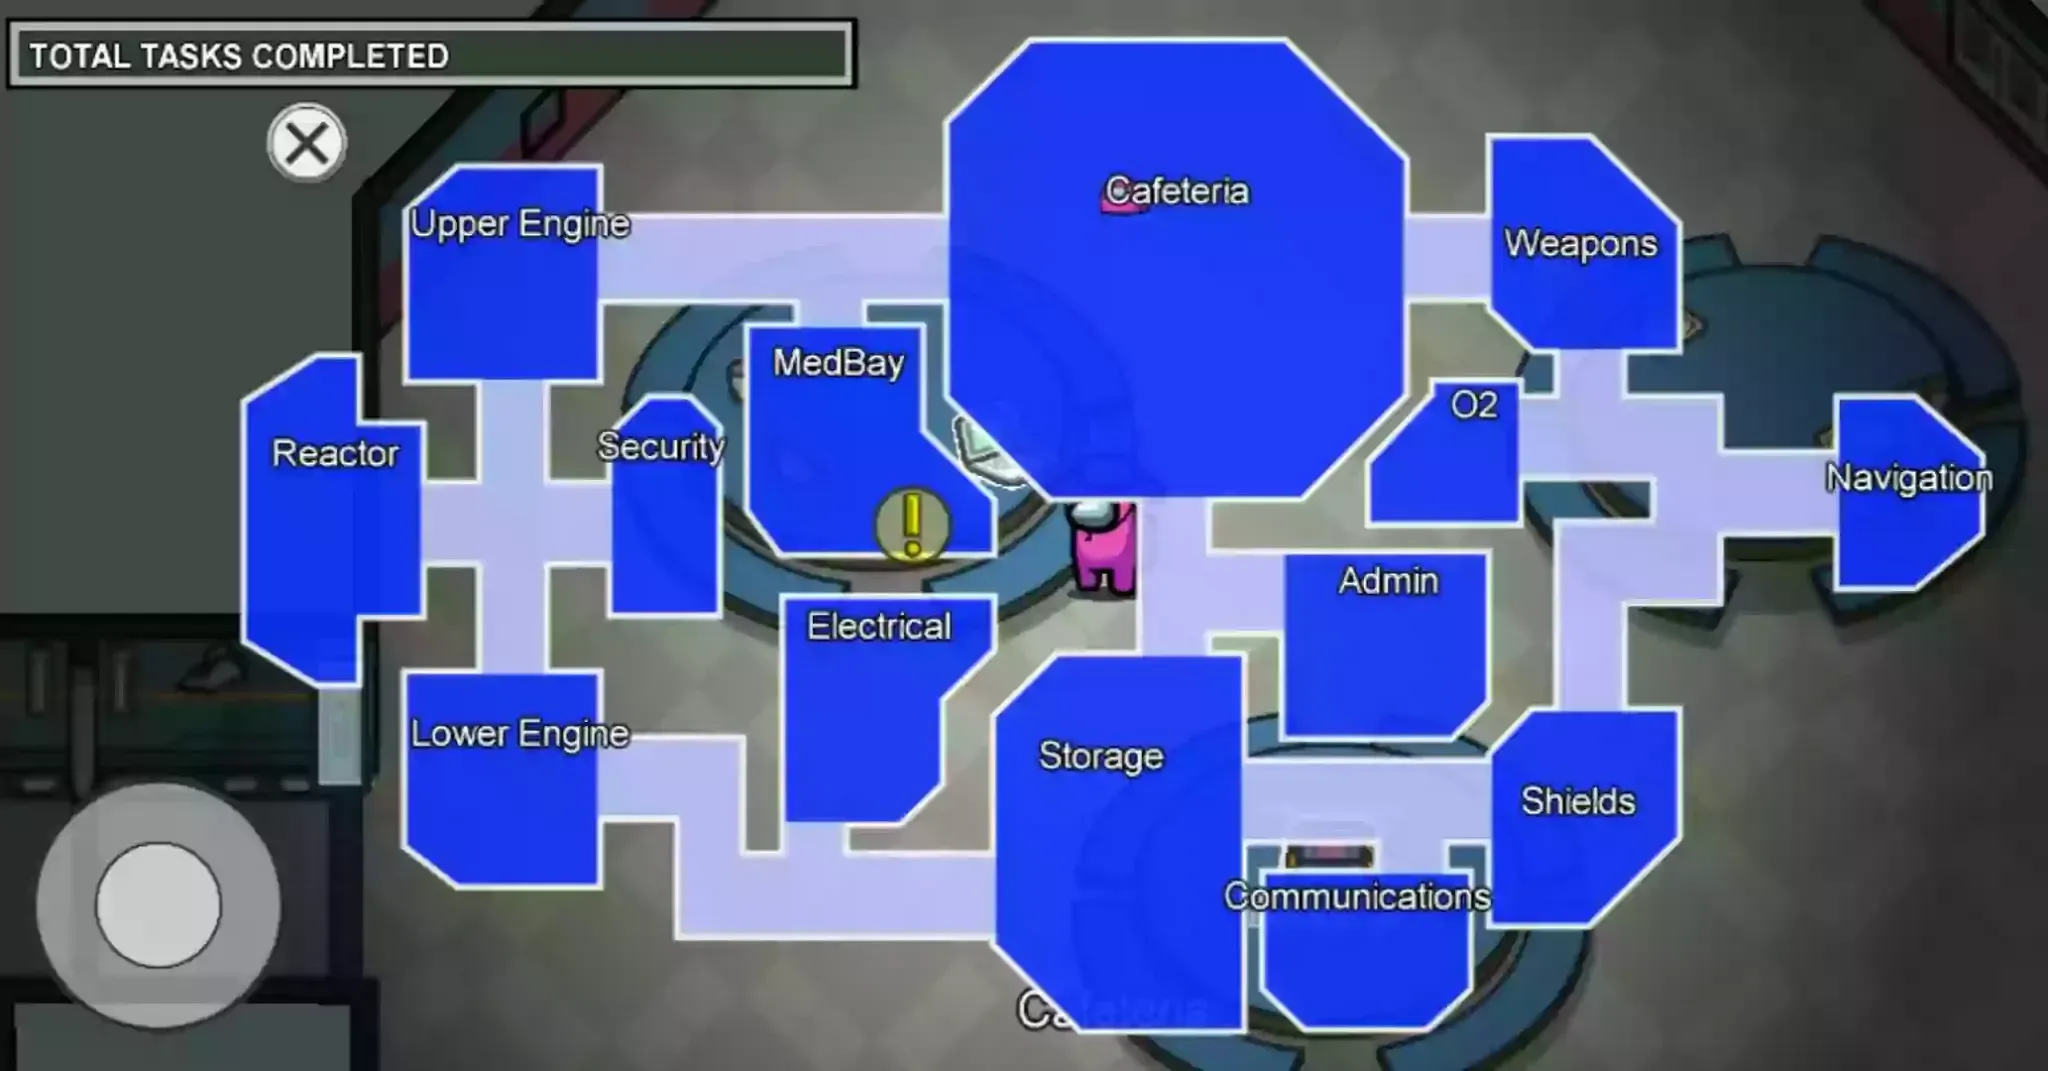
To solve the wiring task you have to go around three random locations namely Electrical, Admin, Security, Cafeteria, Storage, and Navigation.
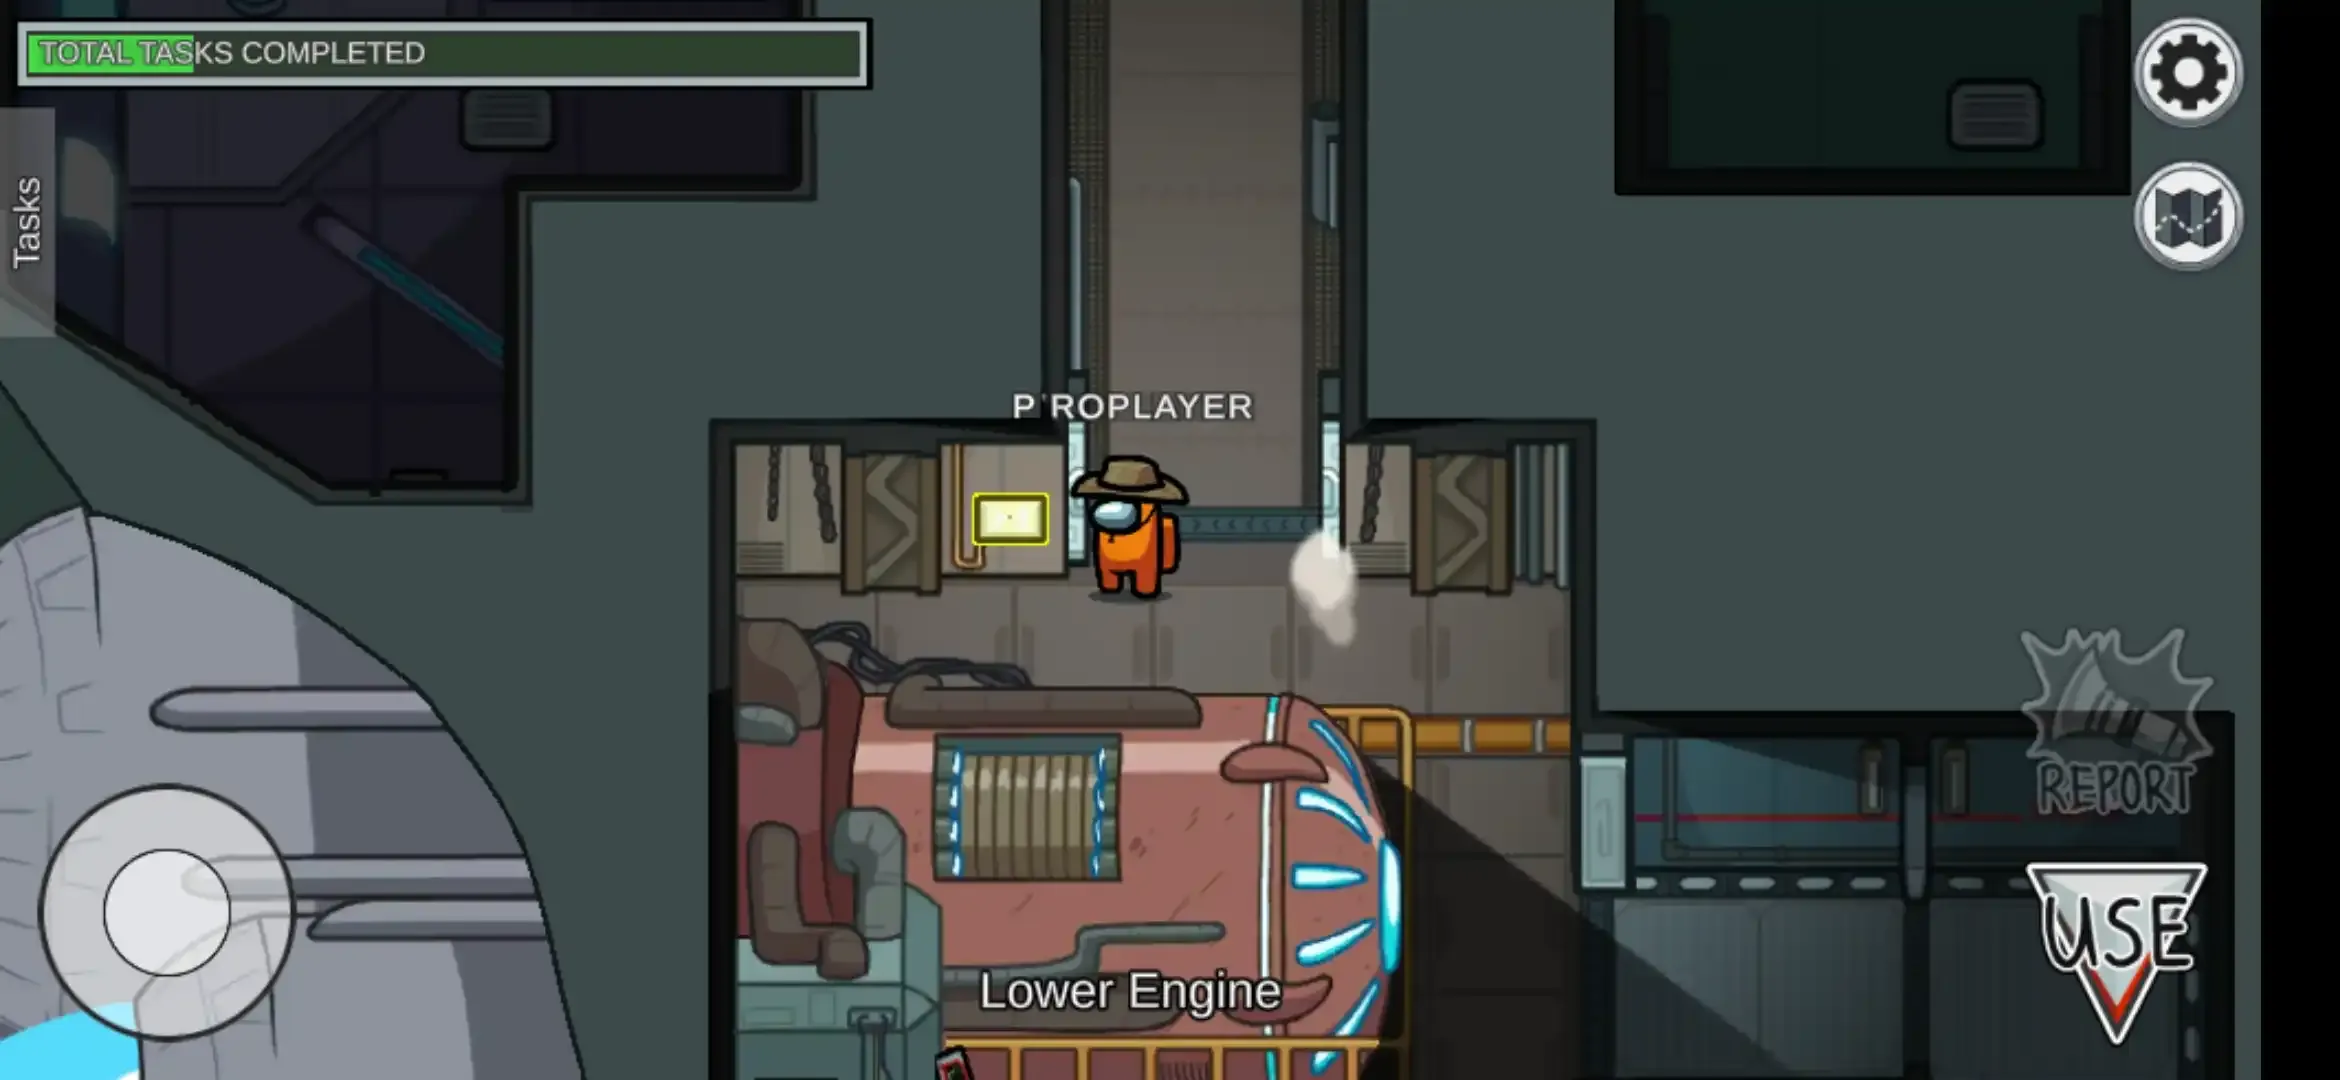
Position of Fix wiring Panel in different locations –
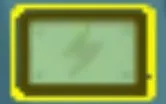
Fix Wiring panel
As you can see in the above picture, the panel has⚡ this sign on it.
Electrical – Panel is located on the upper-central side of the wall. Cafeteria – Panel is located near the upper-left sidewall. Admin – Panel is located on the upper wall side near to the entrance. Navigation – The panel is located on the upper side of the entrance. Storage – Panel is located on the upper side, near the entrance which is close to the Admin room. Security – Panel is located on the entrance.
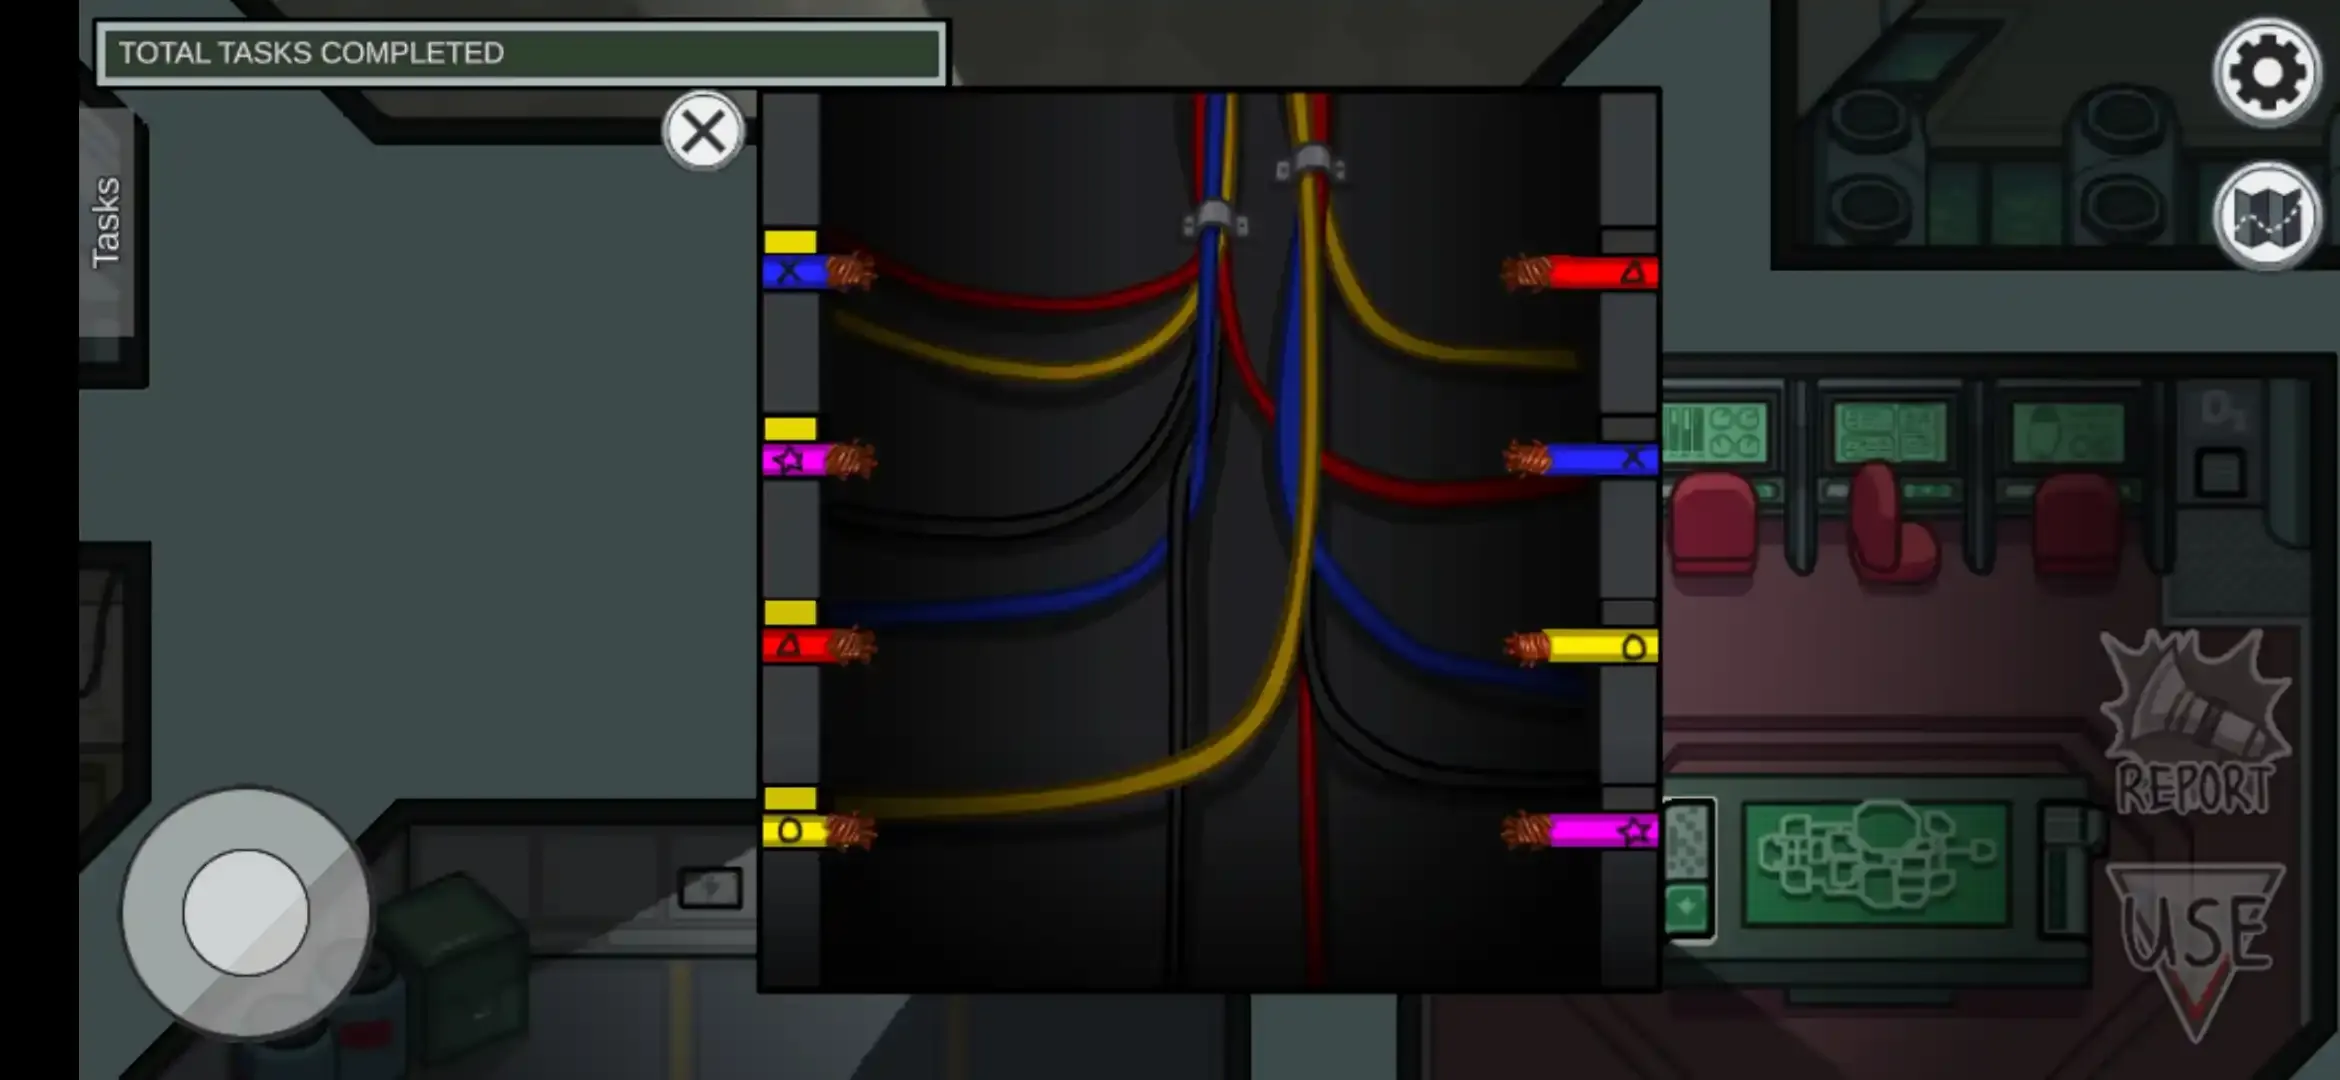
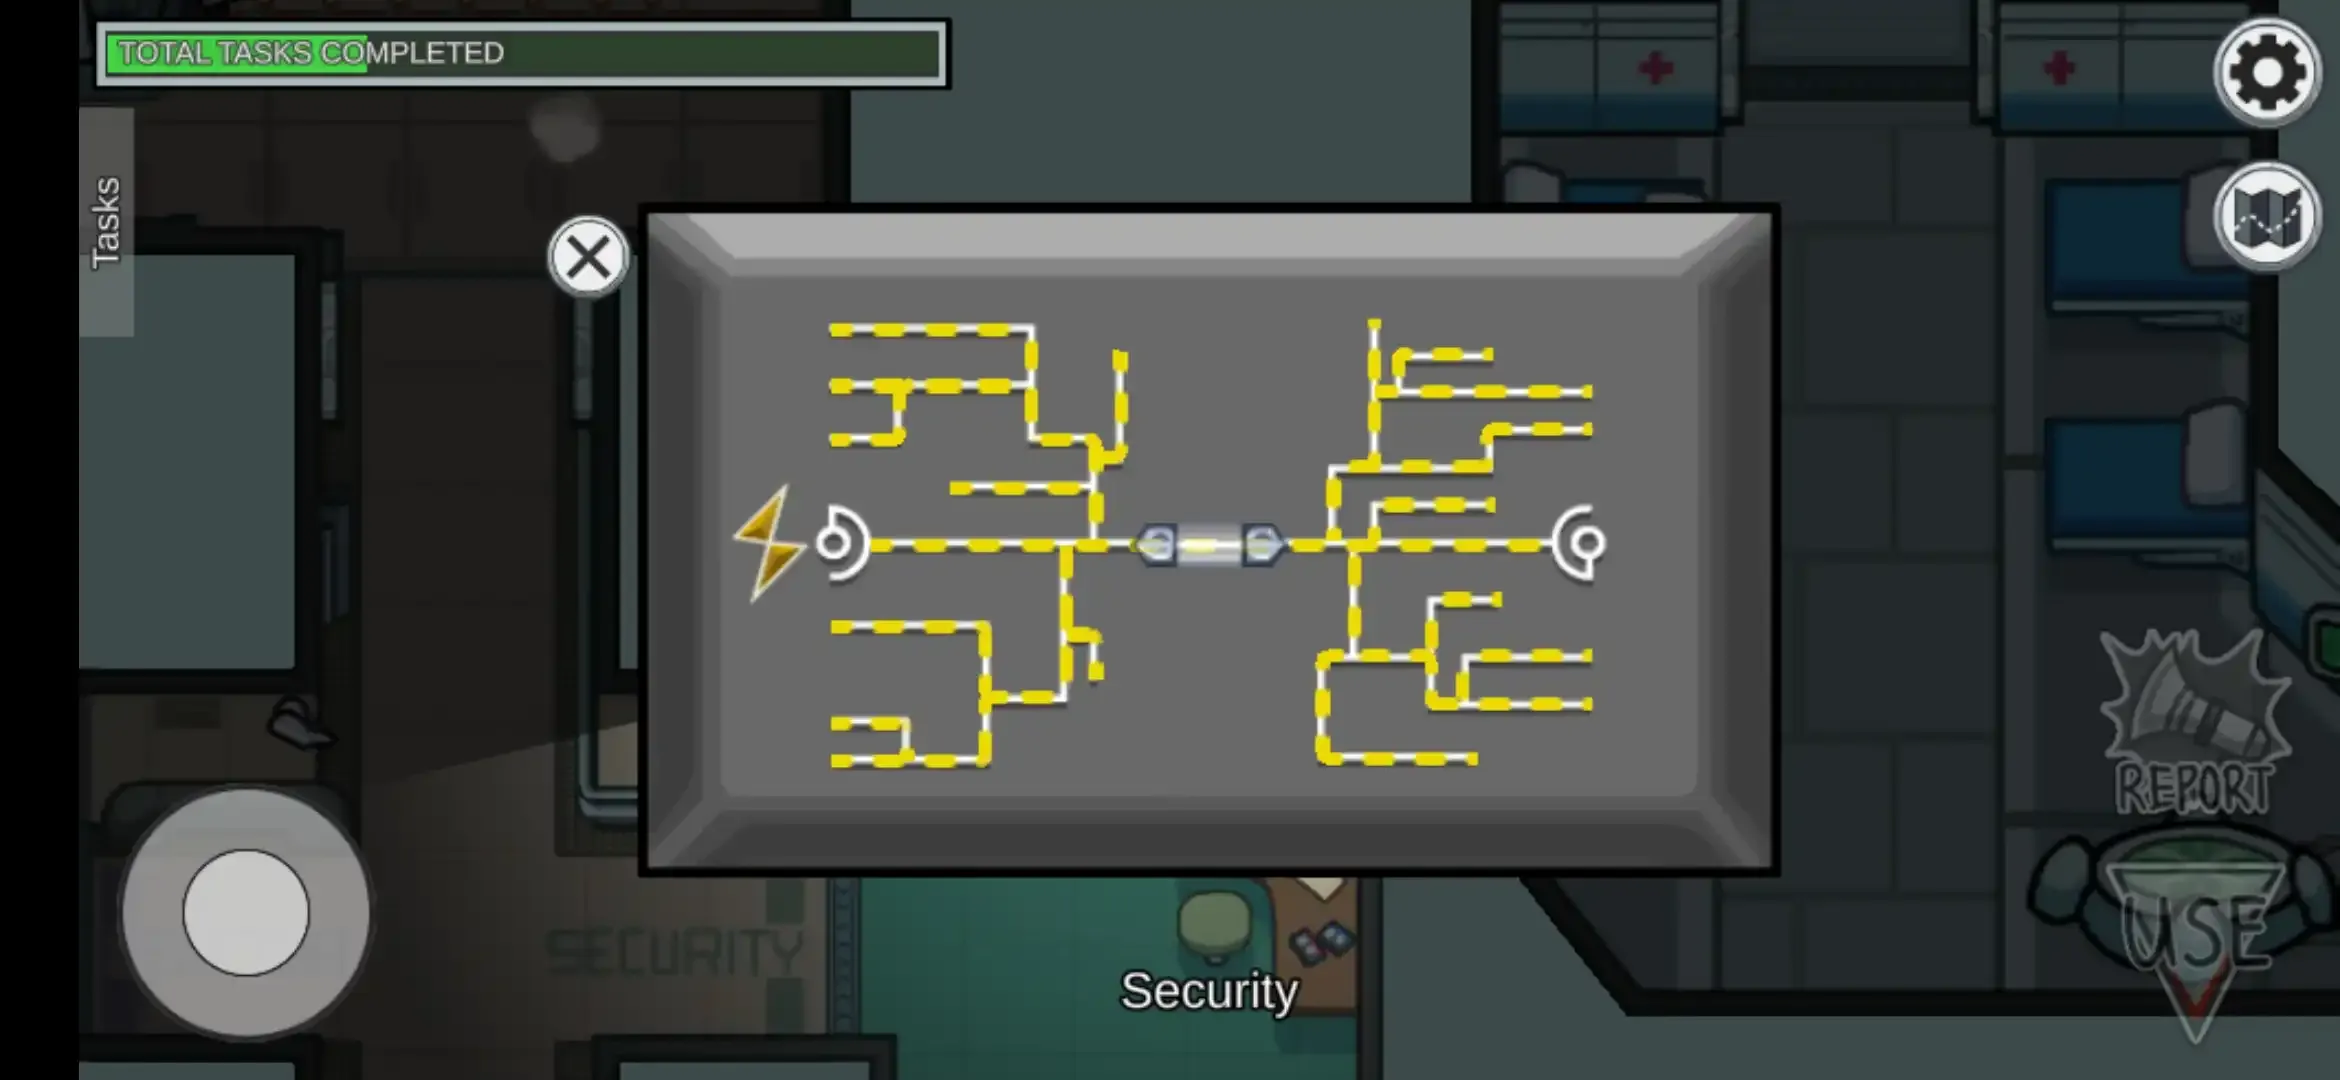
When you go near to these panels tap the use button, then the module having 4 colors wires will be shown to you with particular symbols on them.
Color of wires and symbols used for them –
☆- pink
⨯-blue
о- yellow
△- red
How to complete Fix wiring task?
Now to complete this task go to the first location and connect all 4 matching colored or matching symbol wires by swiping from left to right.
Similarly, follow the
➤ symbol to complete the next two location tasks.
If you close the window of fixing wire accidentally without completing it then you have to start fixing of wires from the beginning.
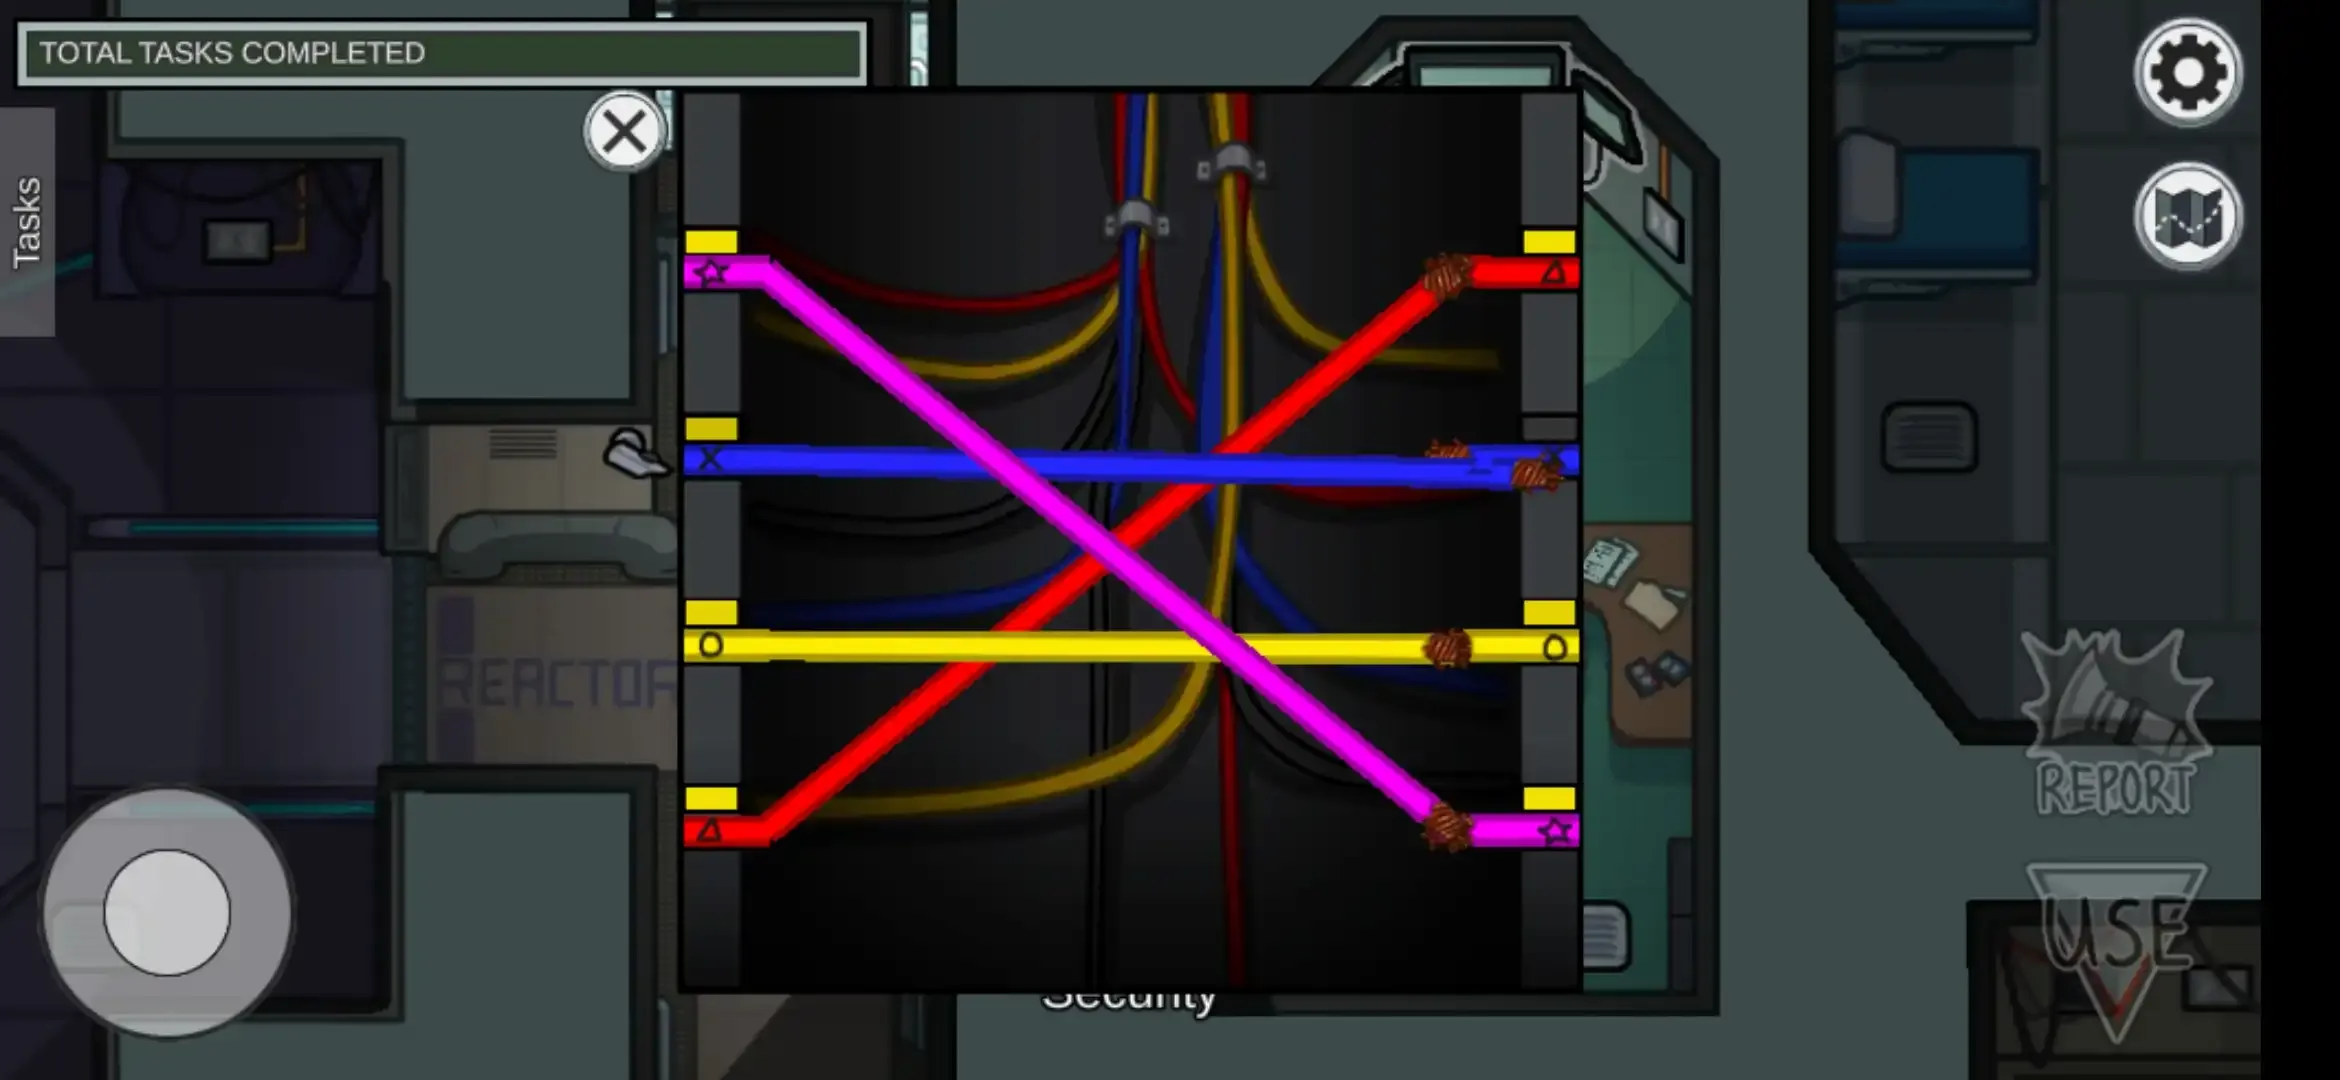
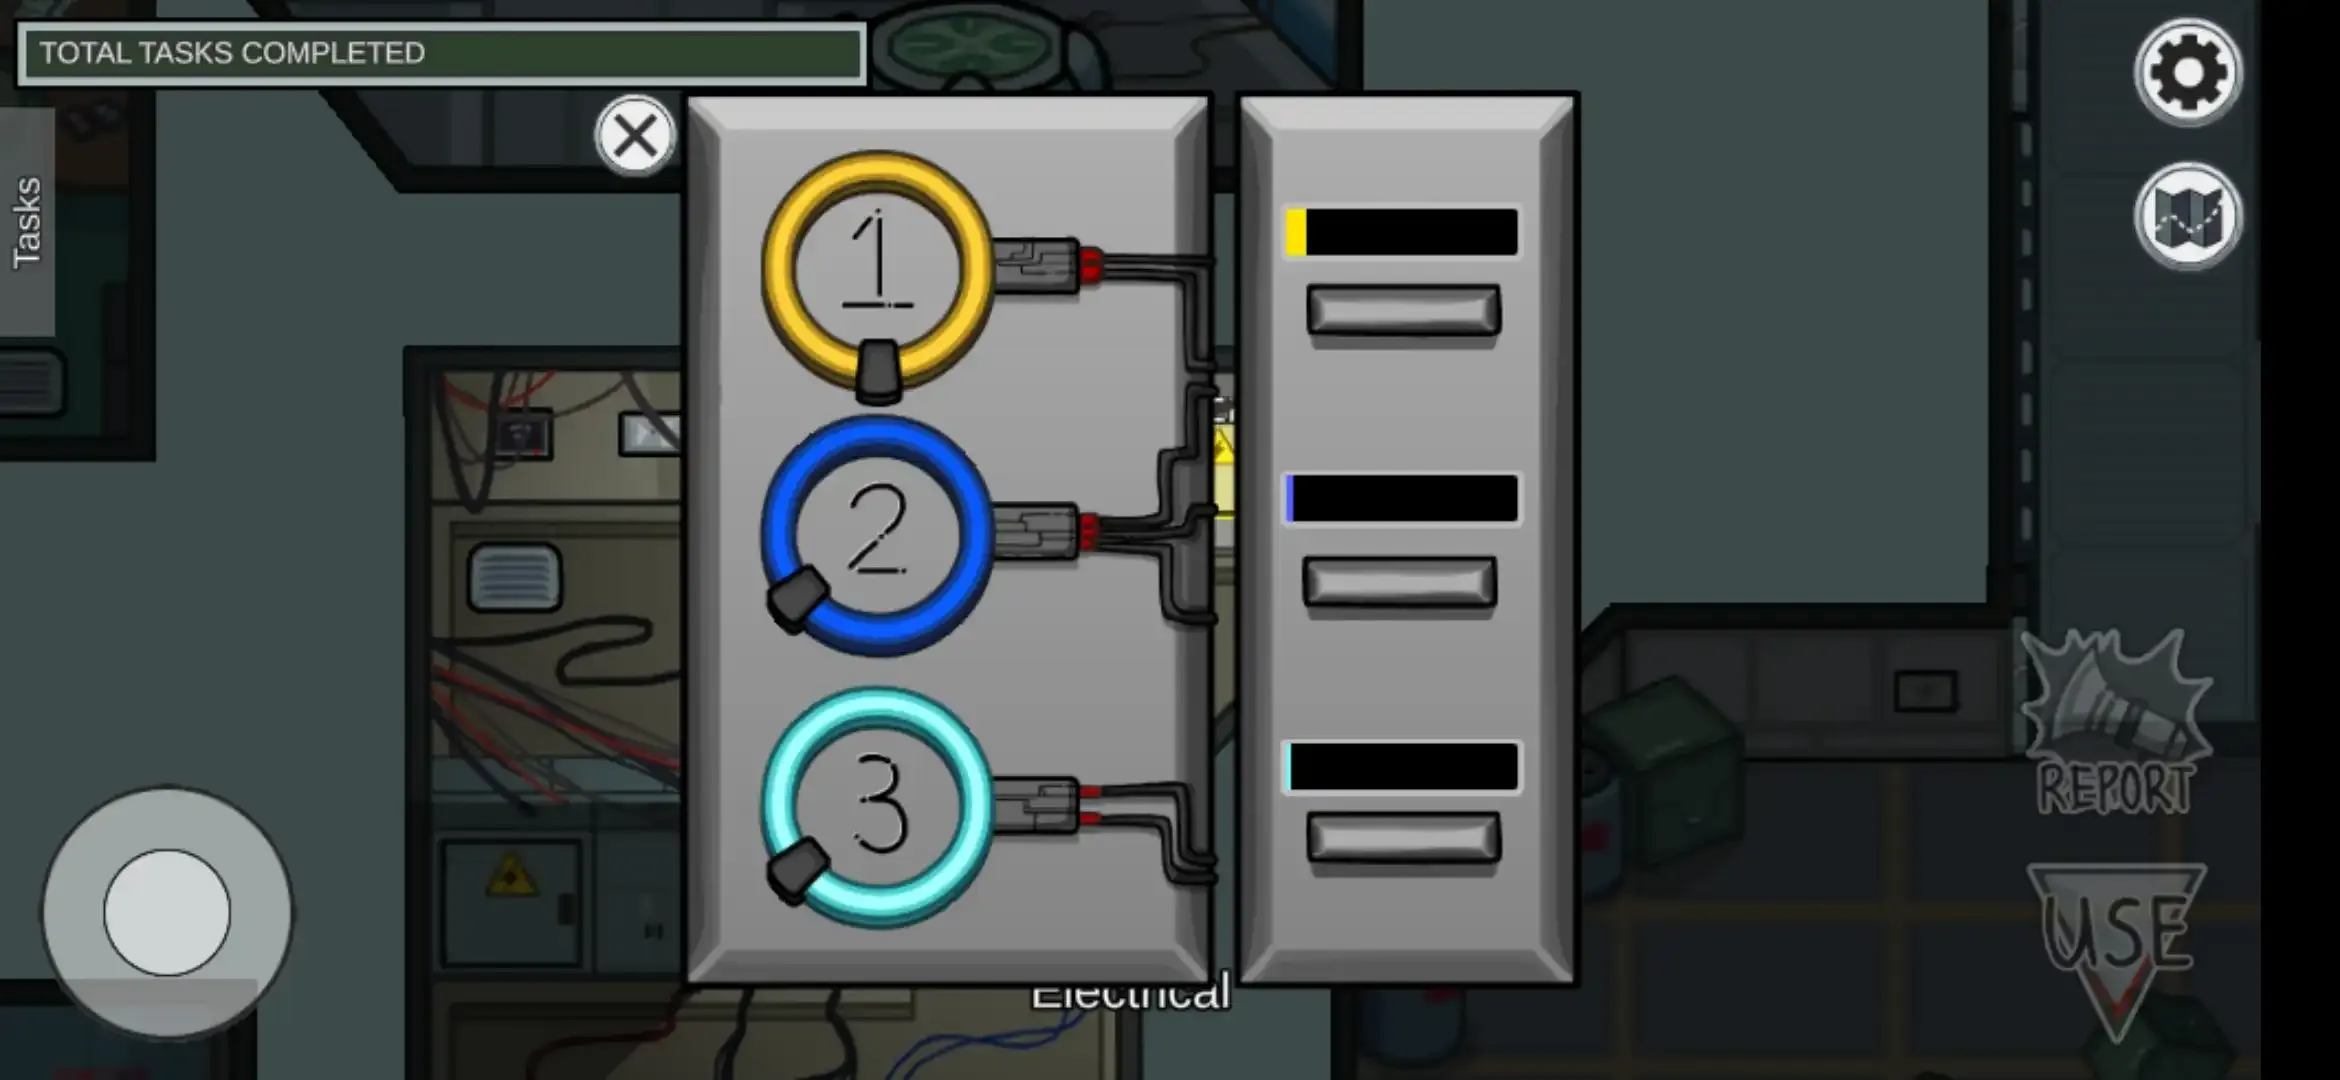
③ Calibrate distributor –
➤ It is a short and one of the hard tasks.
Go to the upper side of the electrical location, go close near the door with this ⚡ sign, and tap use.
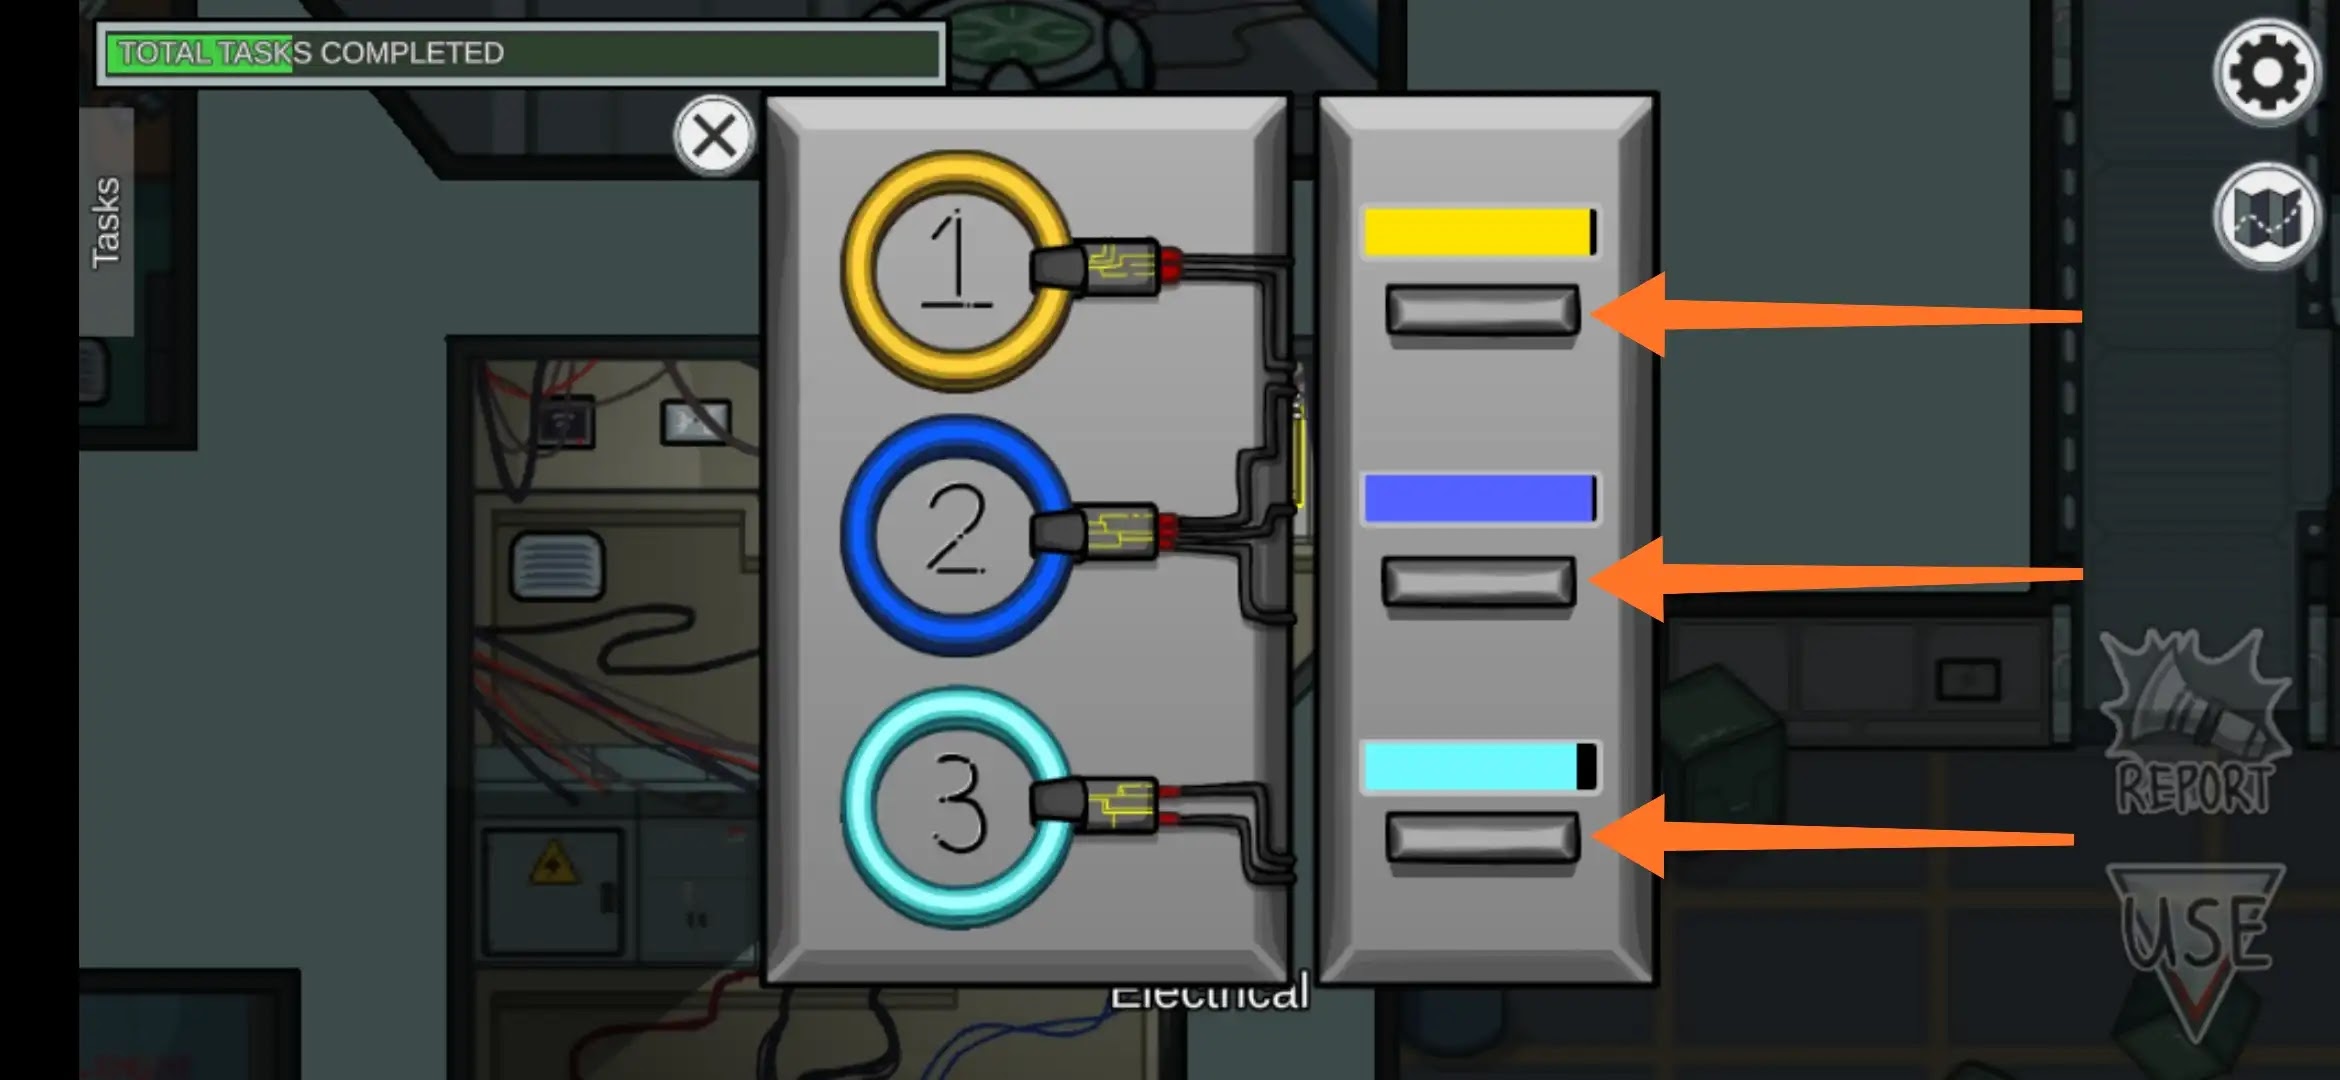
which will open a popup having three circular colored (Yellow, Blue, Neon) connections with numbers on them. On each circle, a node rotates in an anti-clockwise direction.
To complete this task you have to tap or click the button given just below the bar that we have shown with arrows in front of each connector when a node is at the rightmost position of that circle.
After some time while performing a task, the node will become slower after some time. If you close the popup window accidentally or tap or click the 2nd or 3rd button at the wrong time then you have to start the task from the beginning.
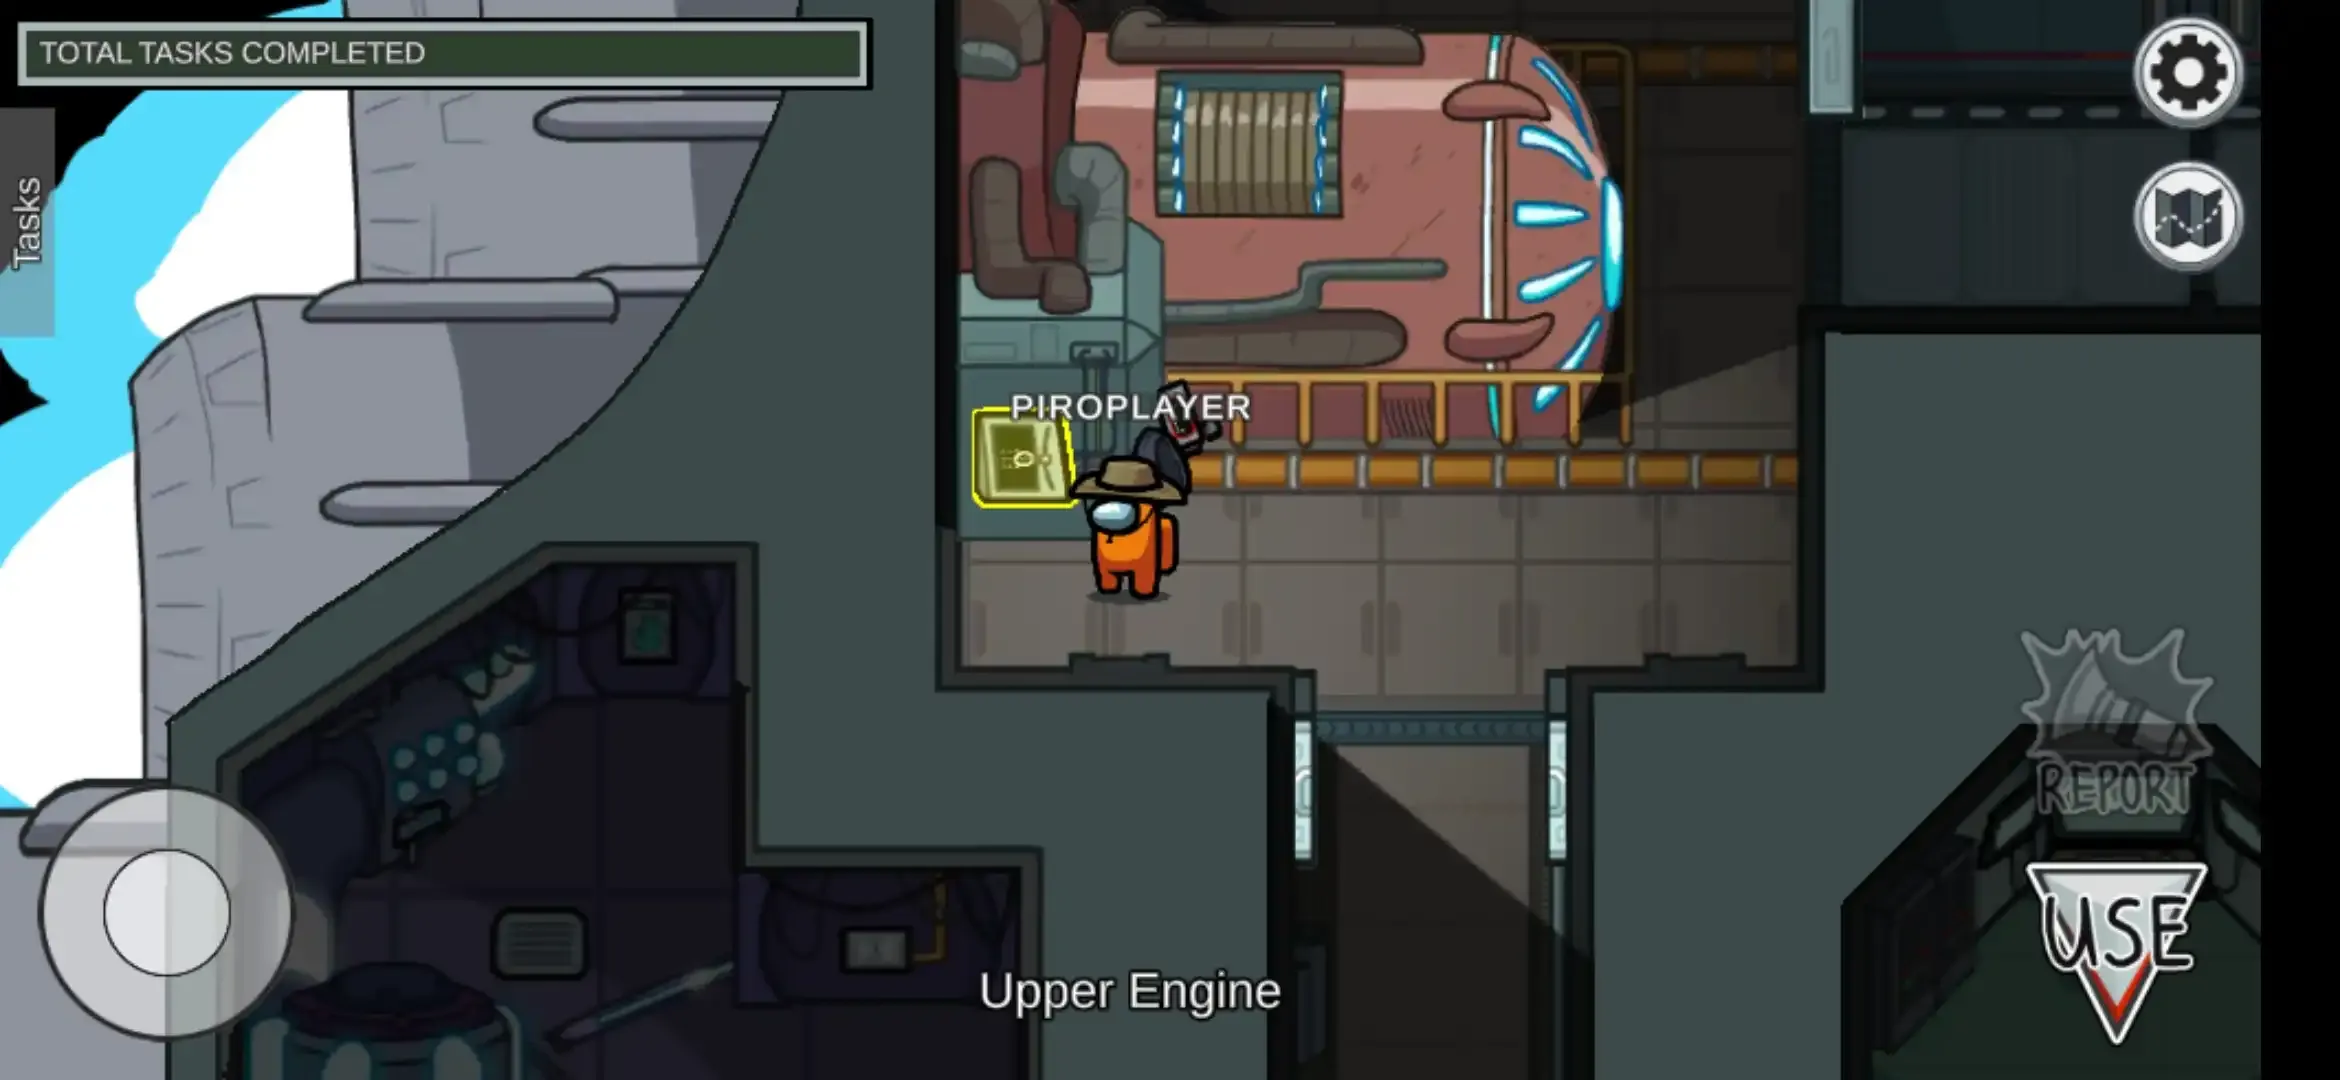
[Ⅴ] Upper Engine:
① Align engine output –
➤ It is a Long task. It divided into two stages.
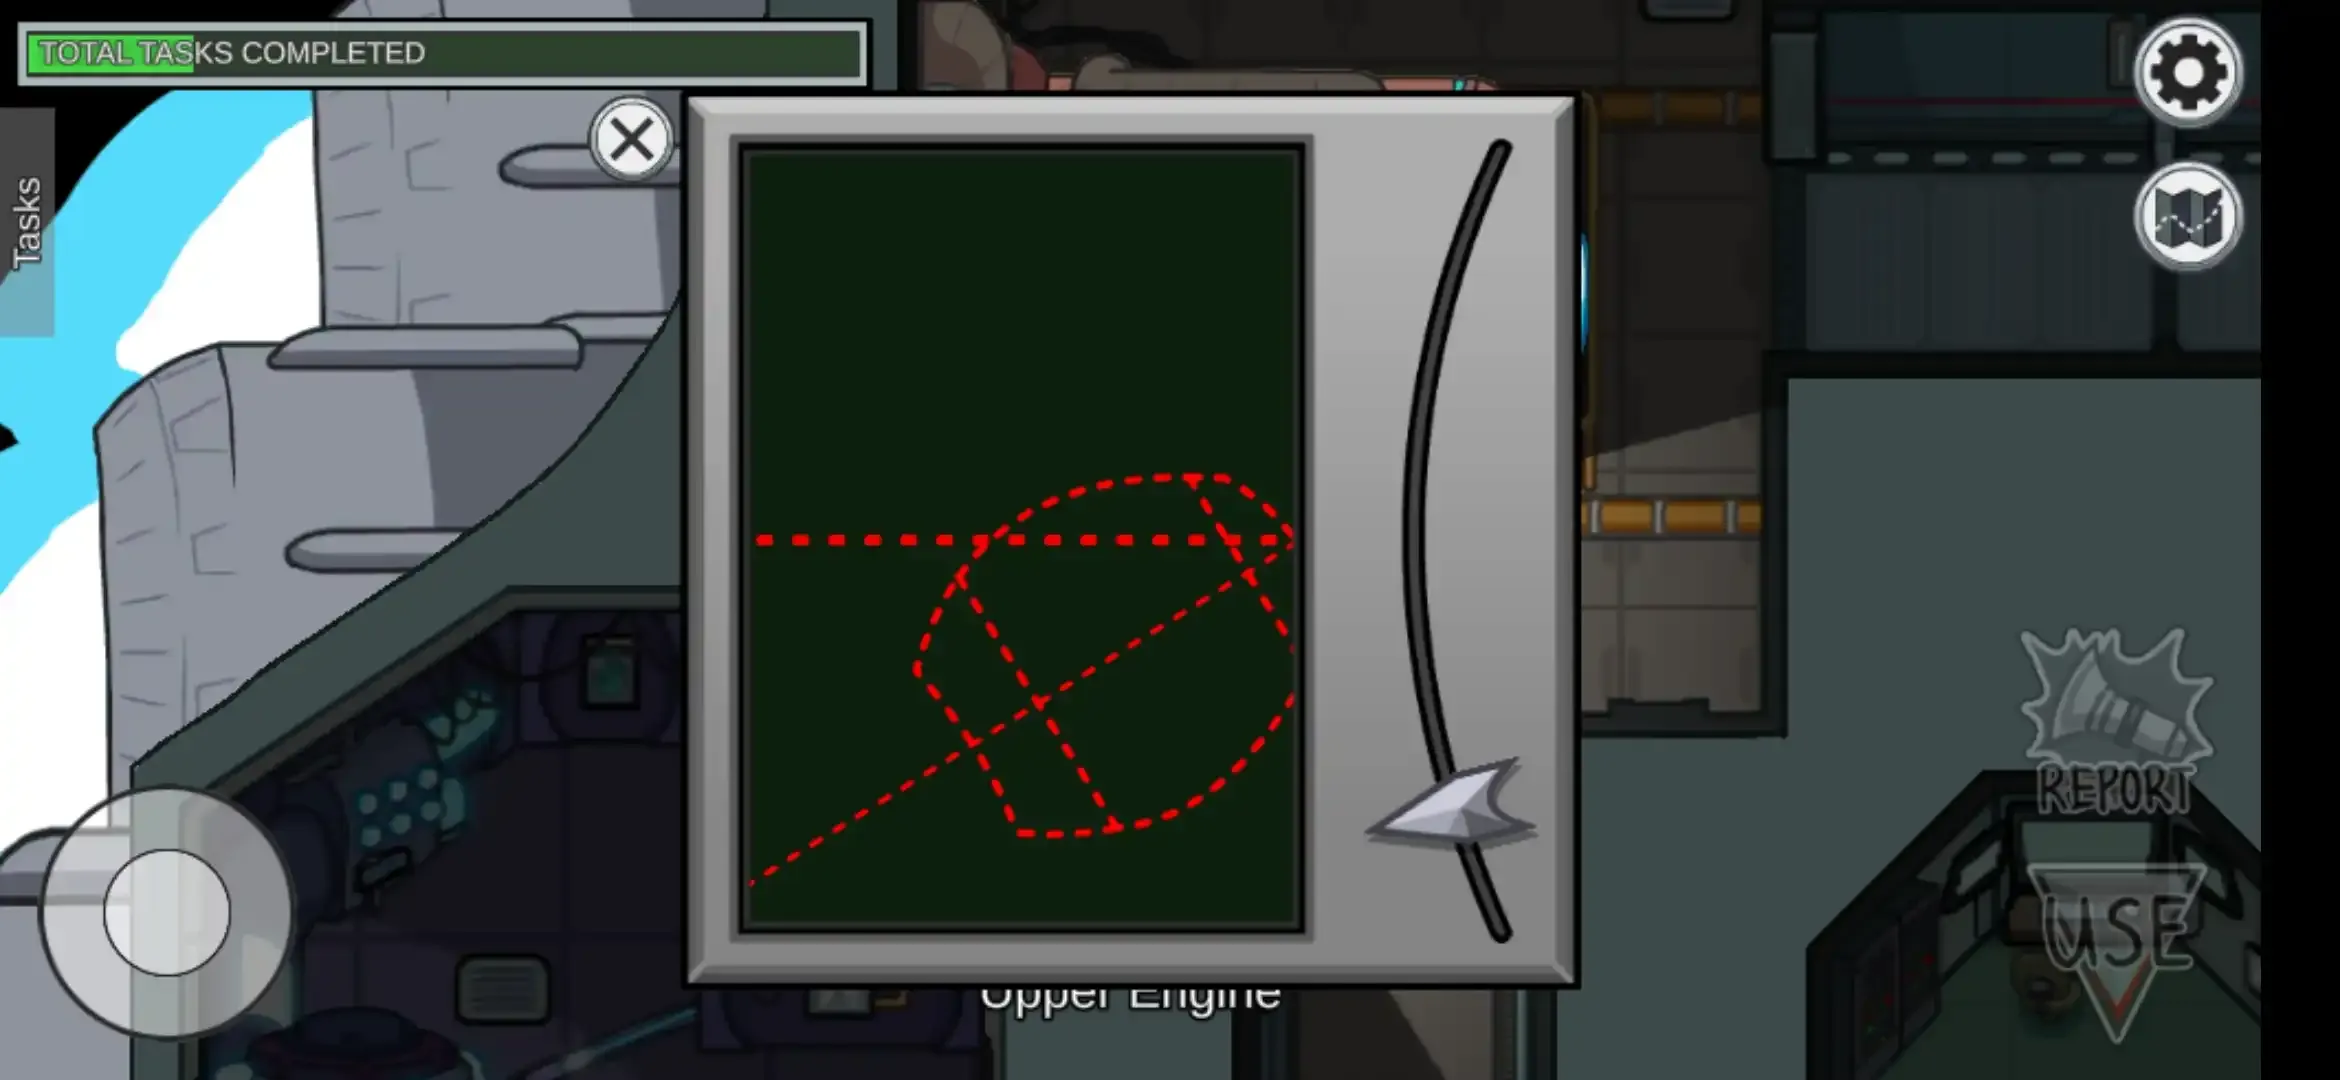
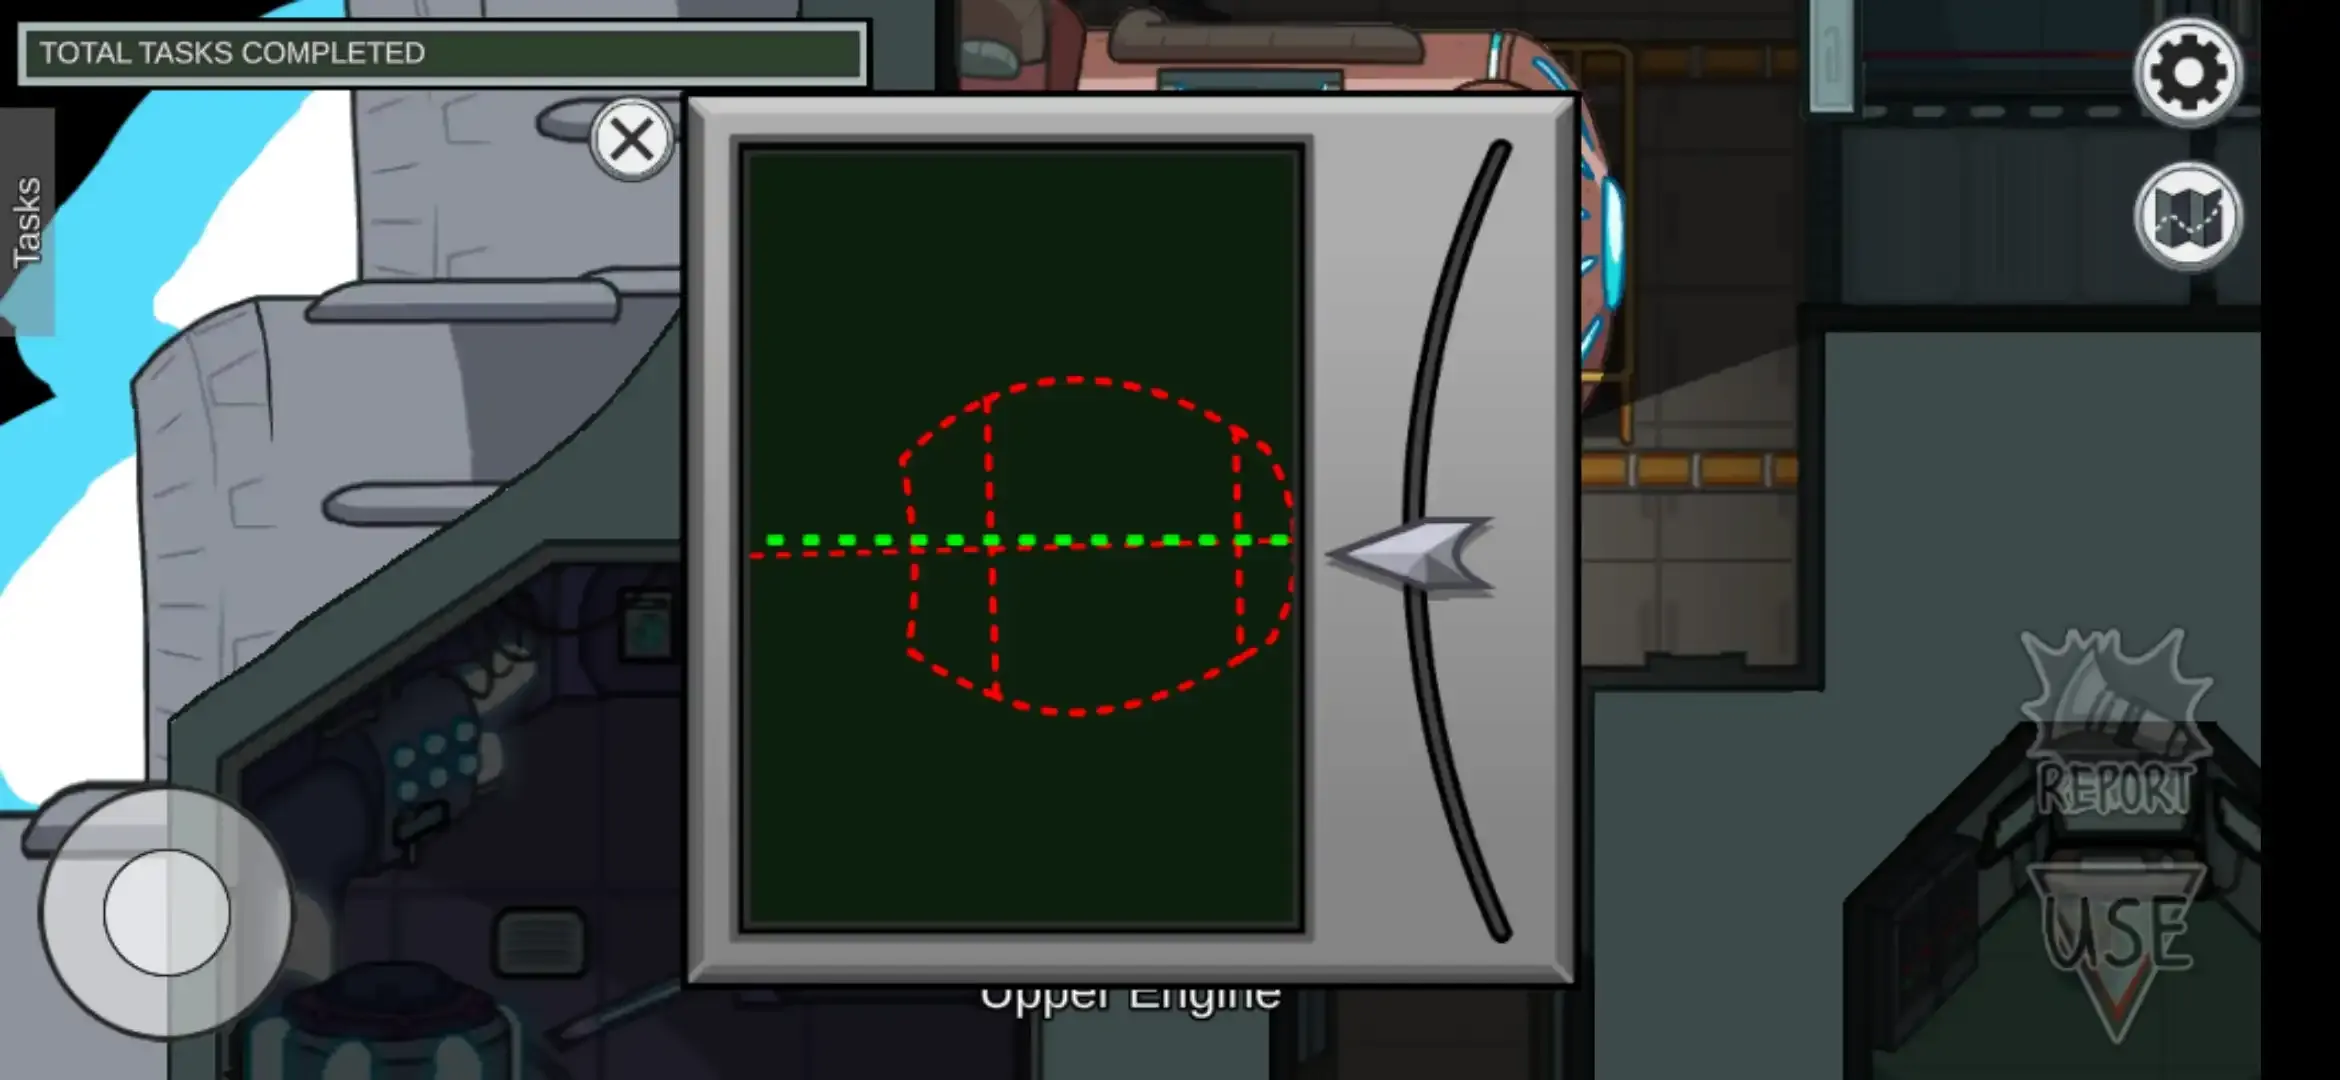
Step 1. Go to the Upper engine location and go near the lower side of the engine and tap use.
Then it will open a control panel having a red dotted line going horizontal, engine image and slider to operate it.
Now you have to move slider to align the engine close to the center red dotted line.
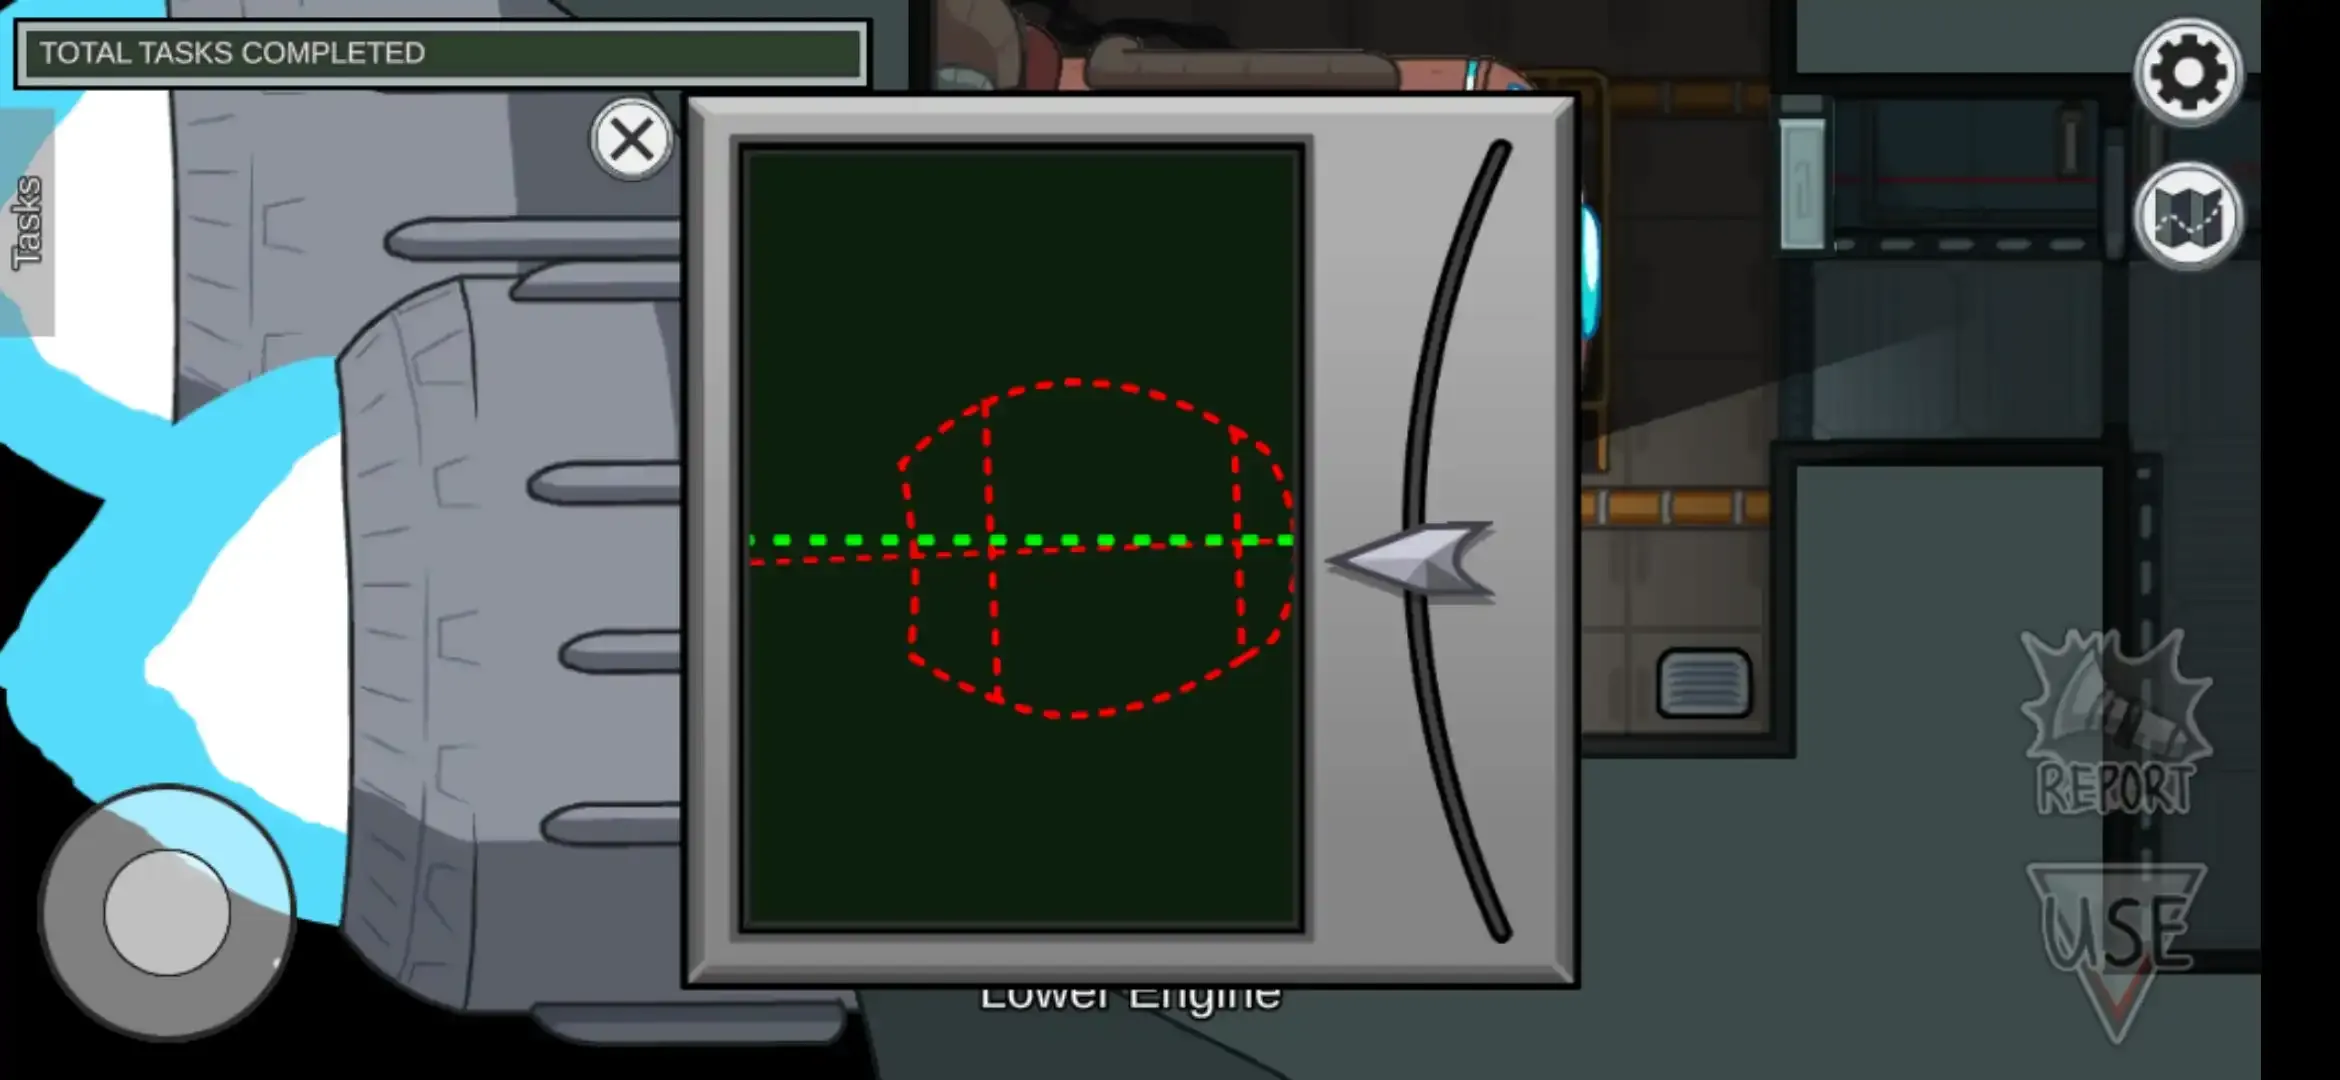
Step 2. Go to the Lower engine location.
And similar to step 1 follow guide to complete the task.
②Divert Power to Upper engine –
➤ It is a long task. It is divided into two stages.
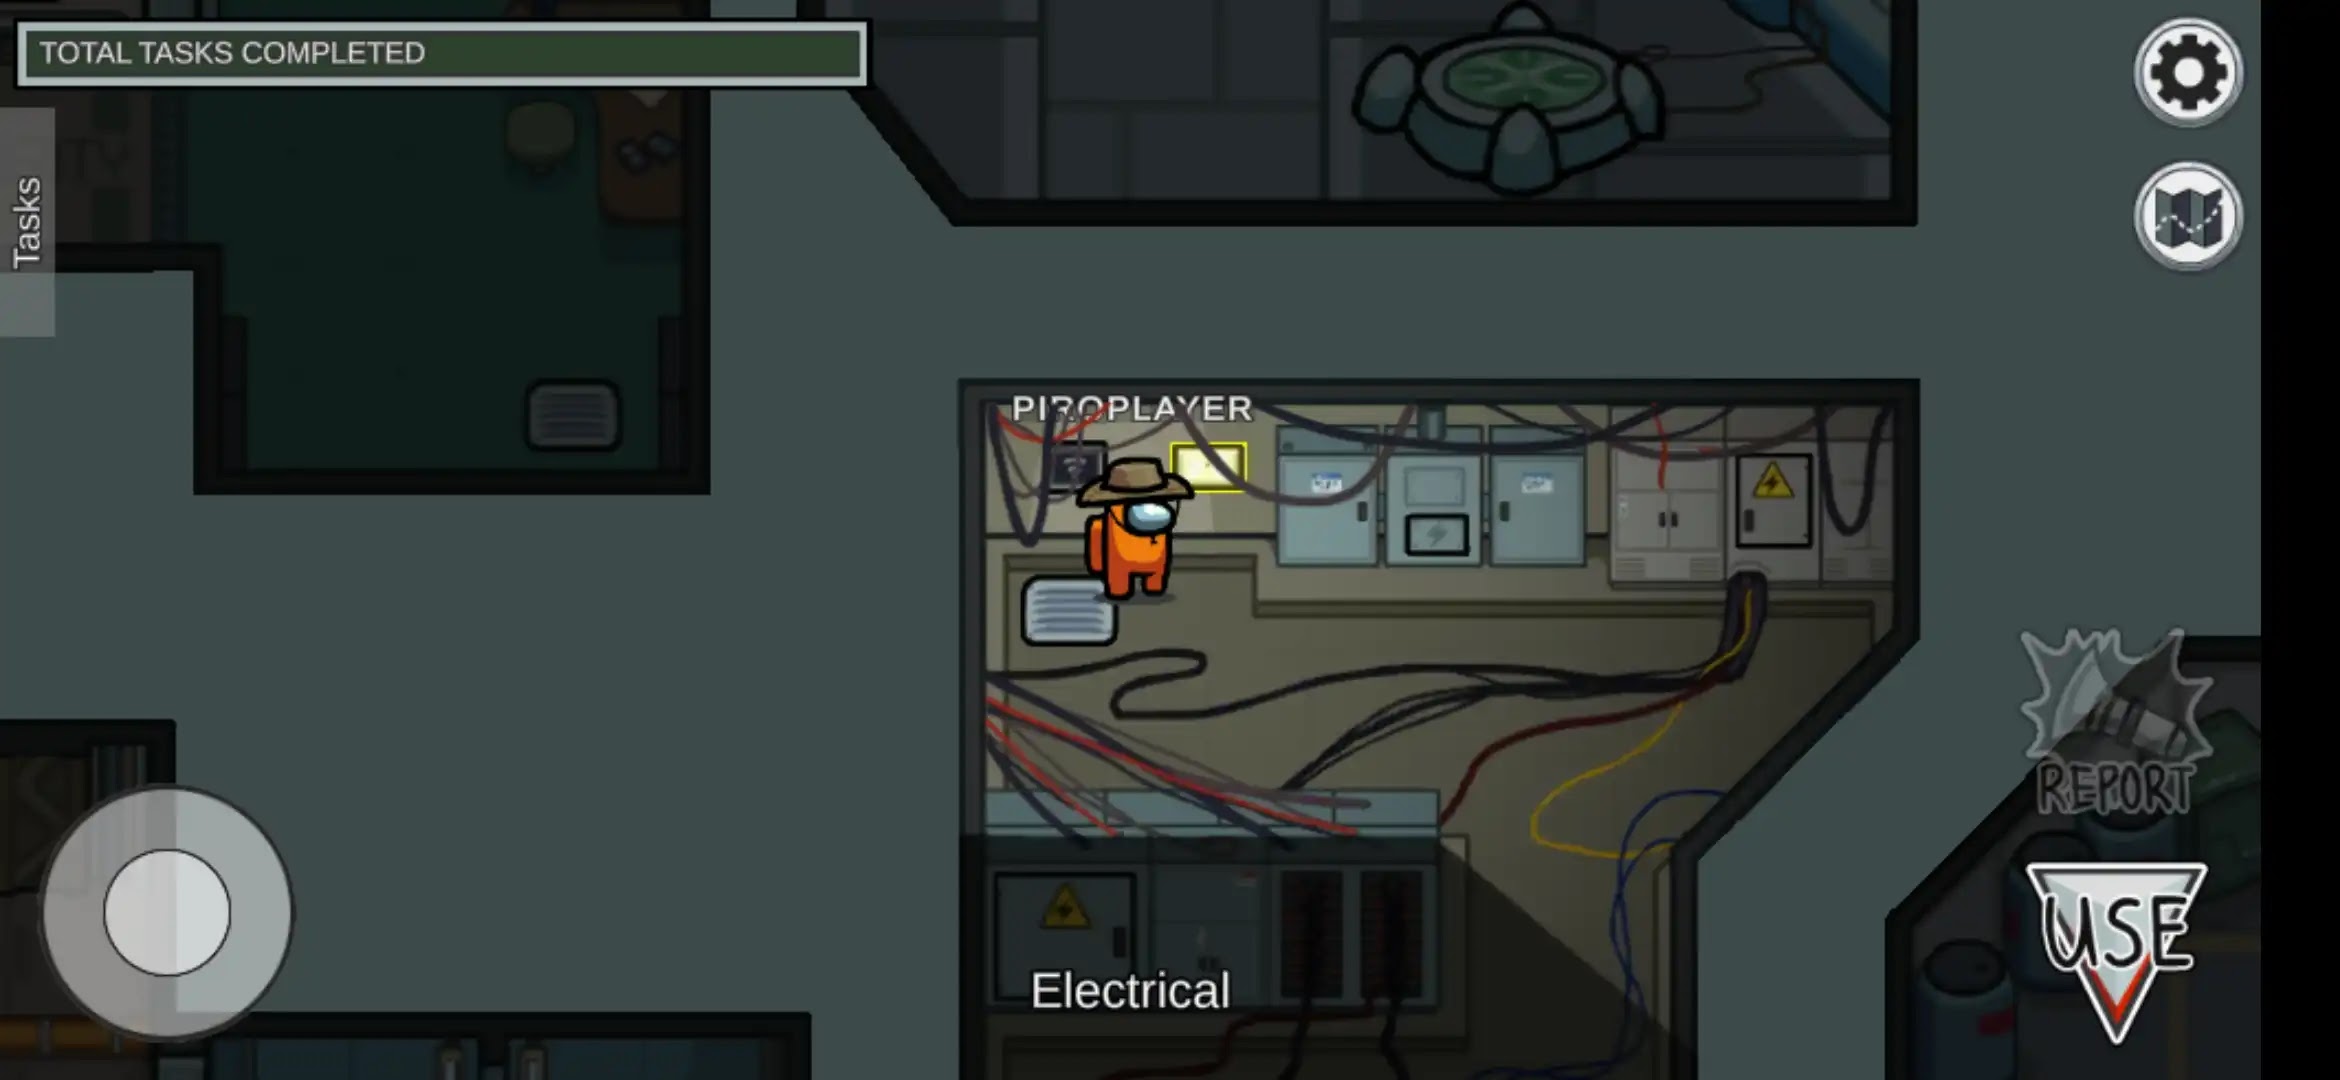
Step 1. Go to the electrical location near the right side of the WI-FI panel and tap use.
Now it will open an electric supply board.
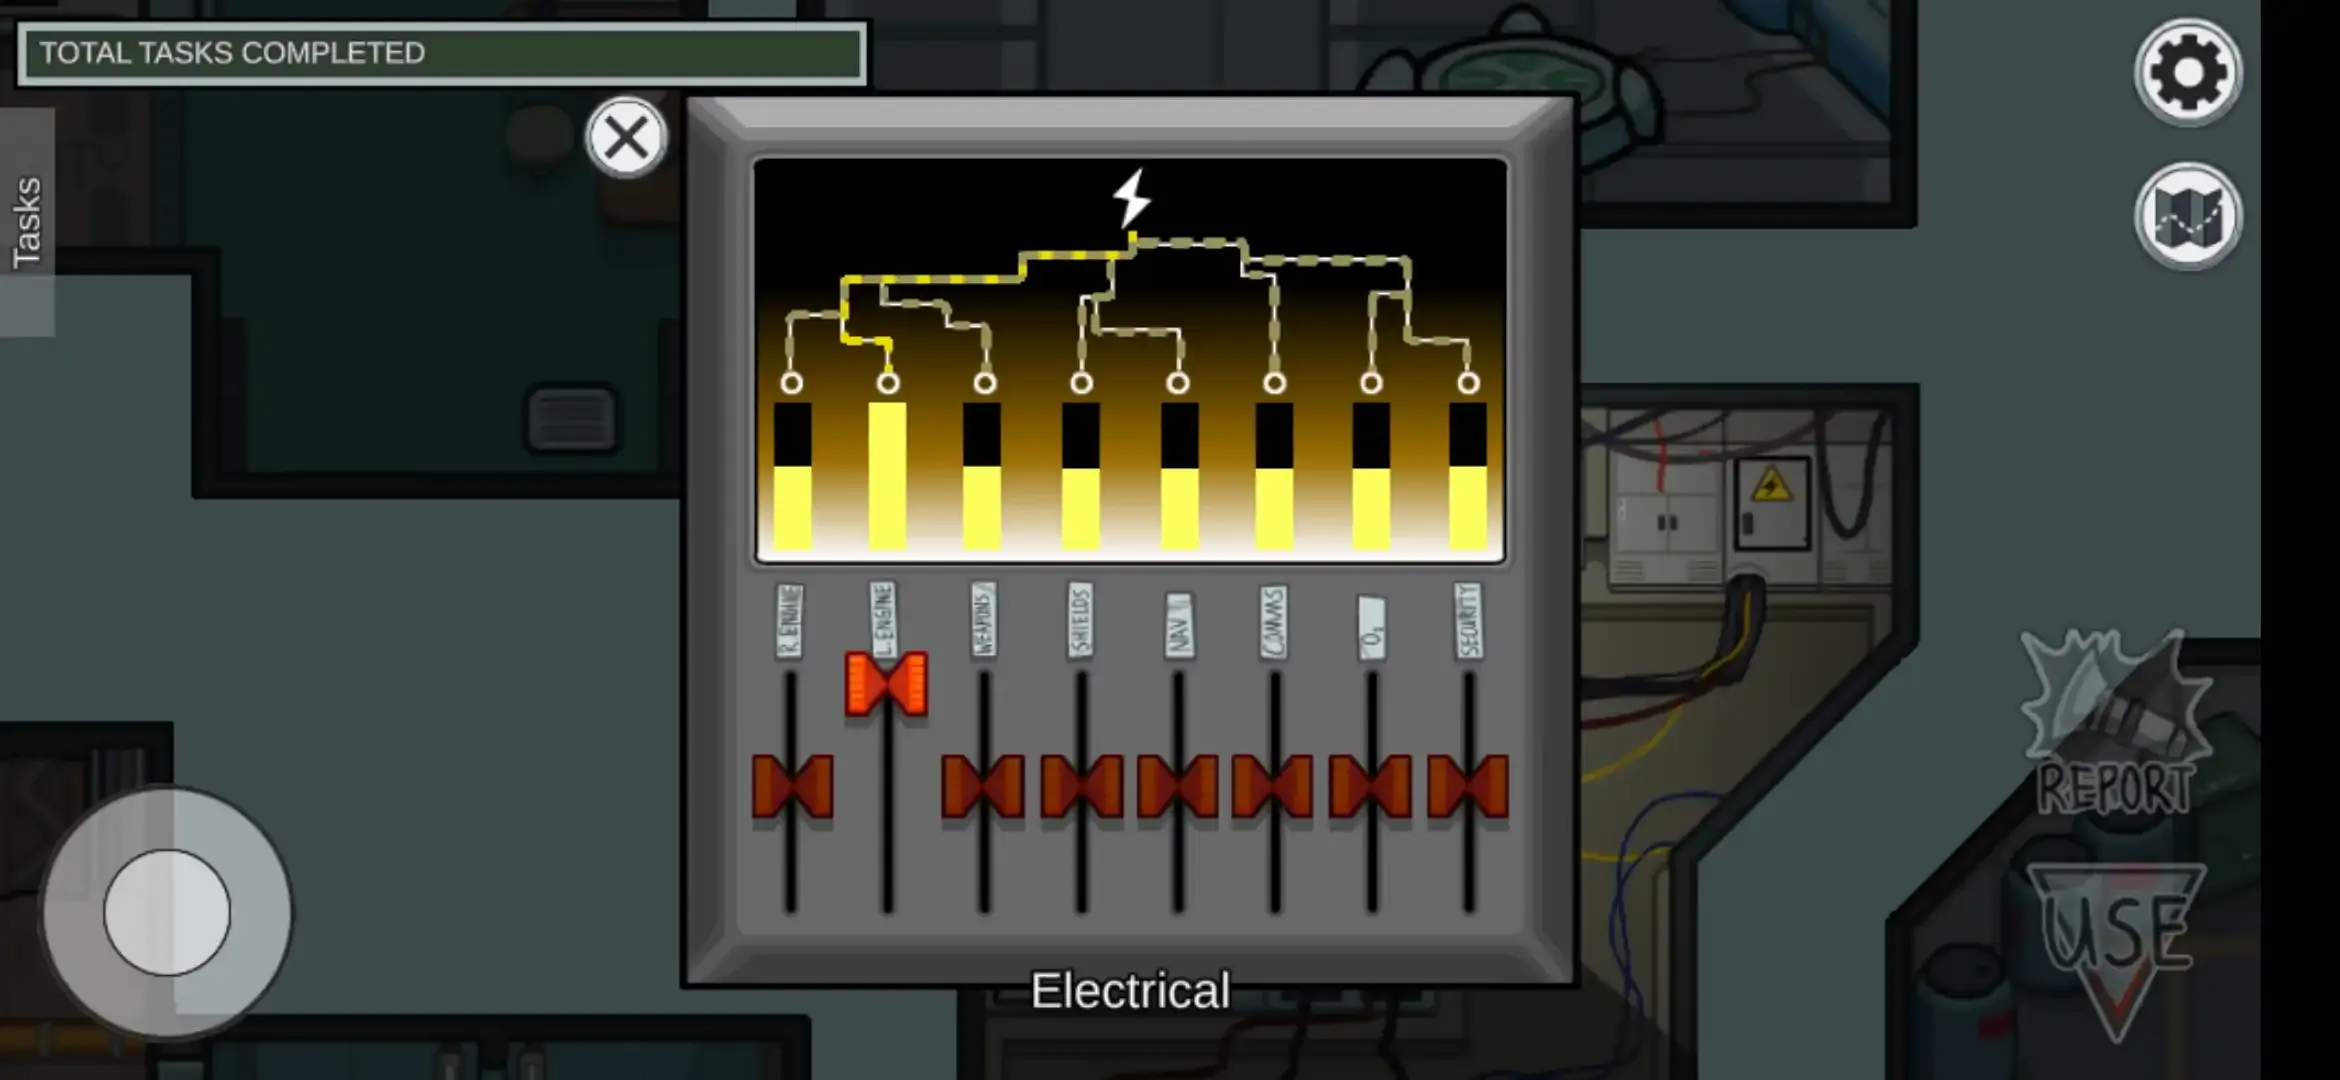
Now find the highlighted red switch with the ‘L.Engine’ tag. As the task is about to divert power to the Upper(left) engineroom, slide the switch to the upper side.
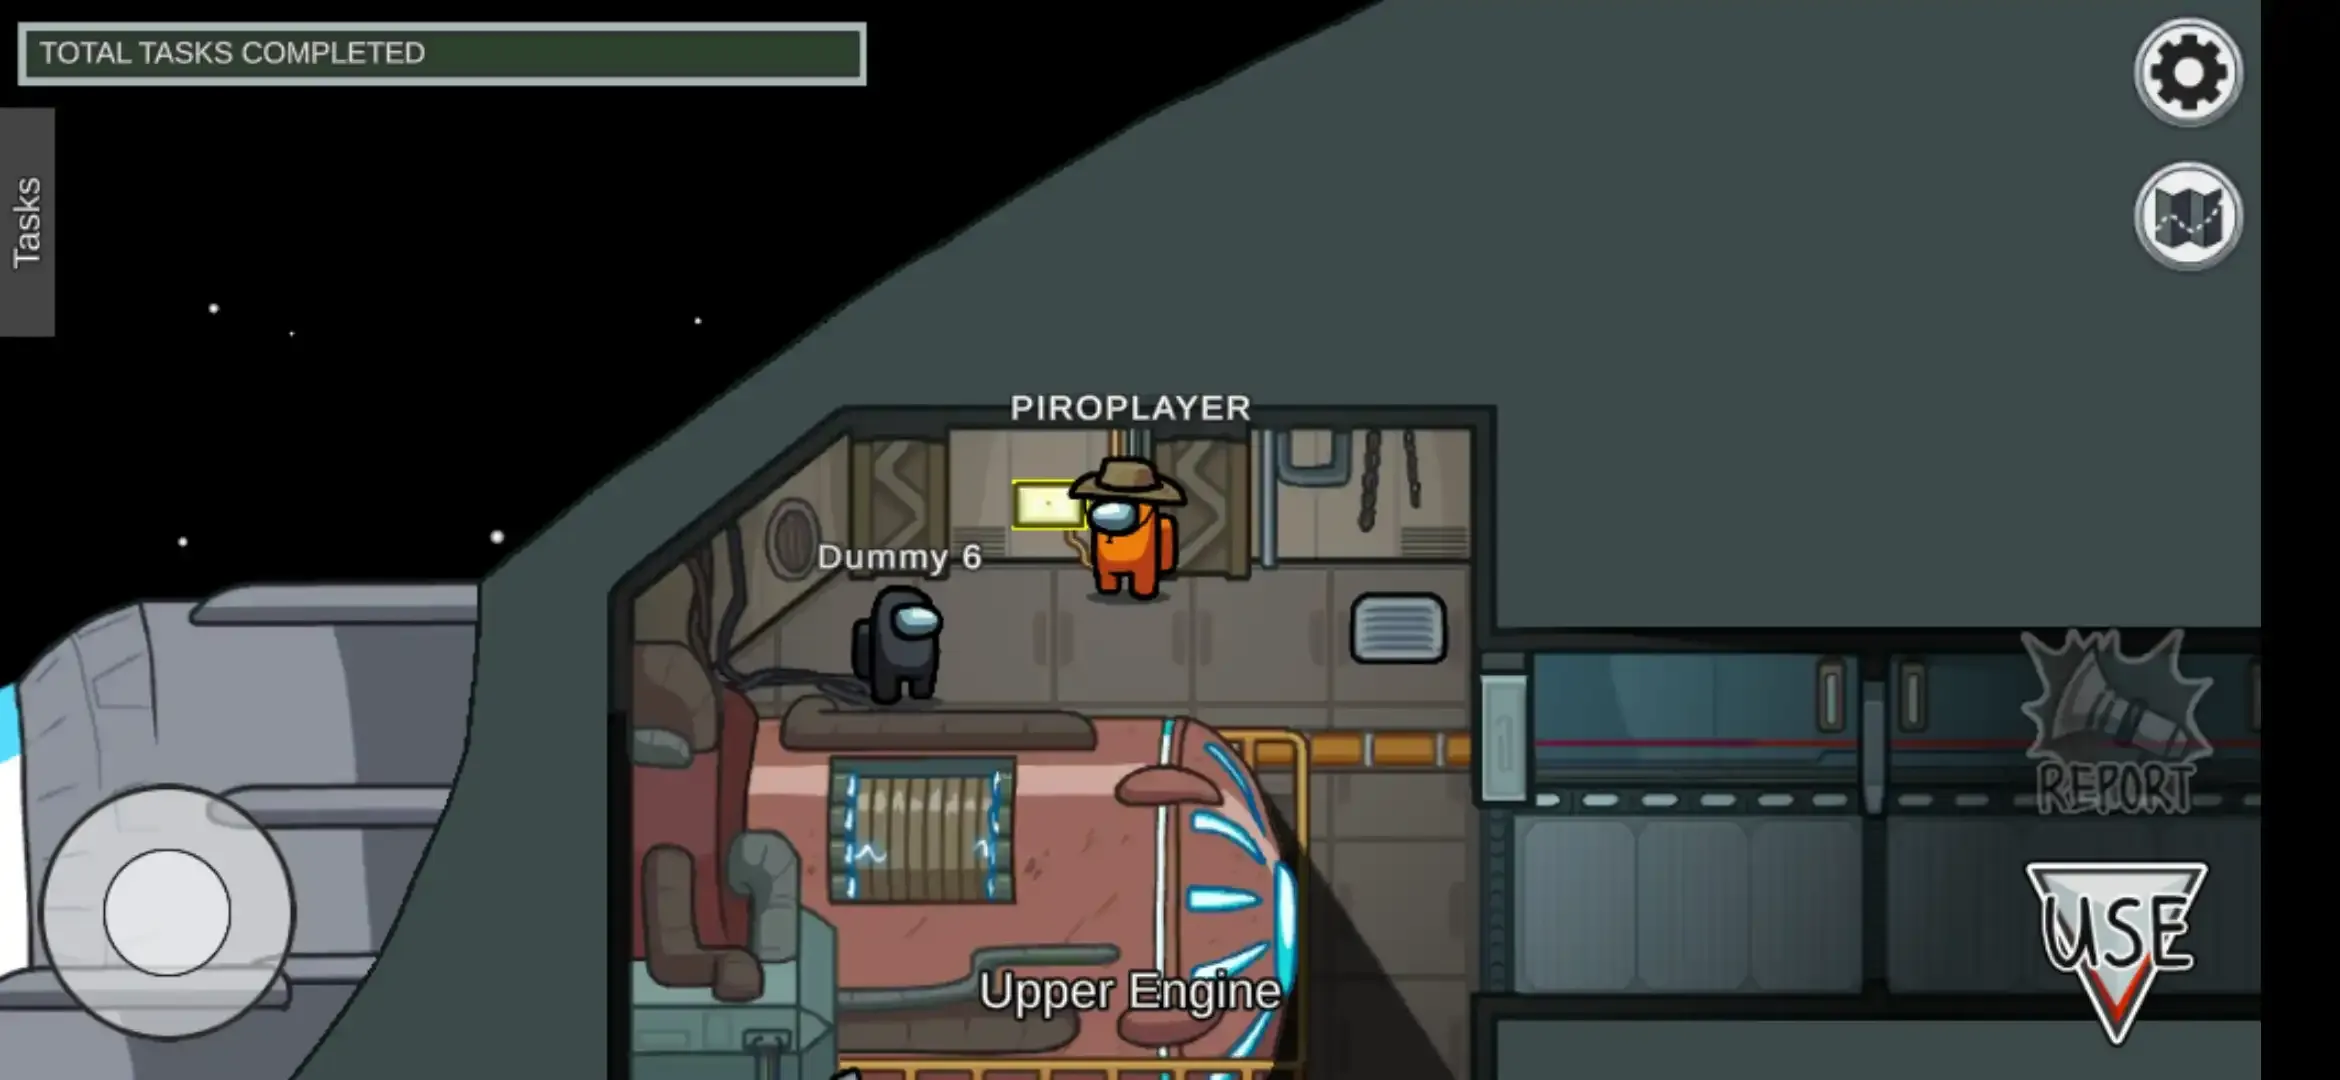
Step 2. Now follow the➤ symbol which will carry you to the power control panel located in the Upper Engine room and tap use.
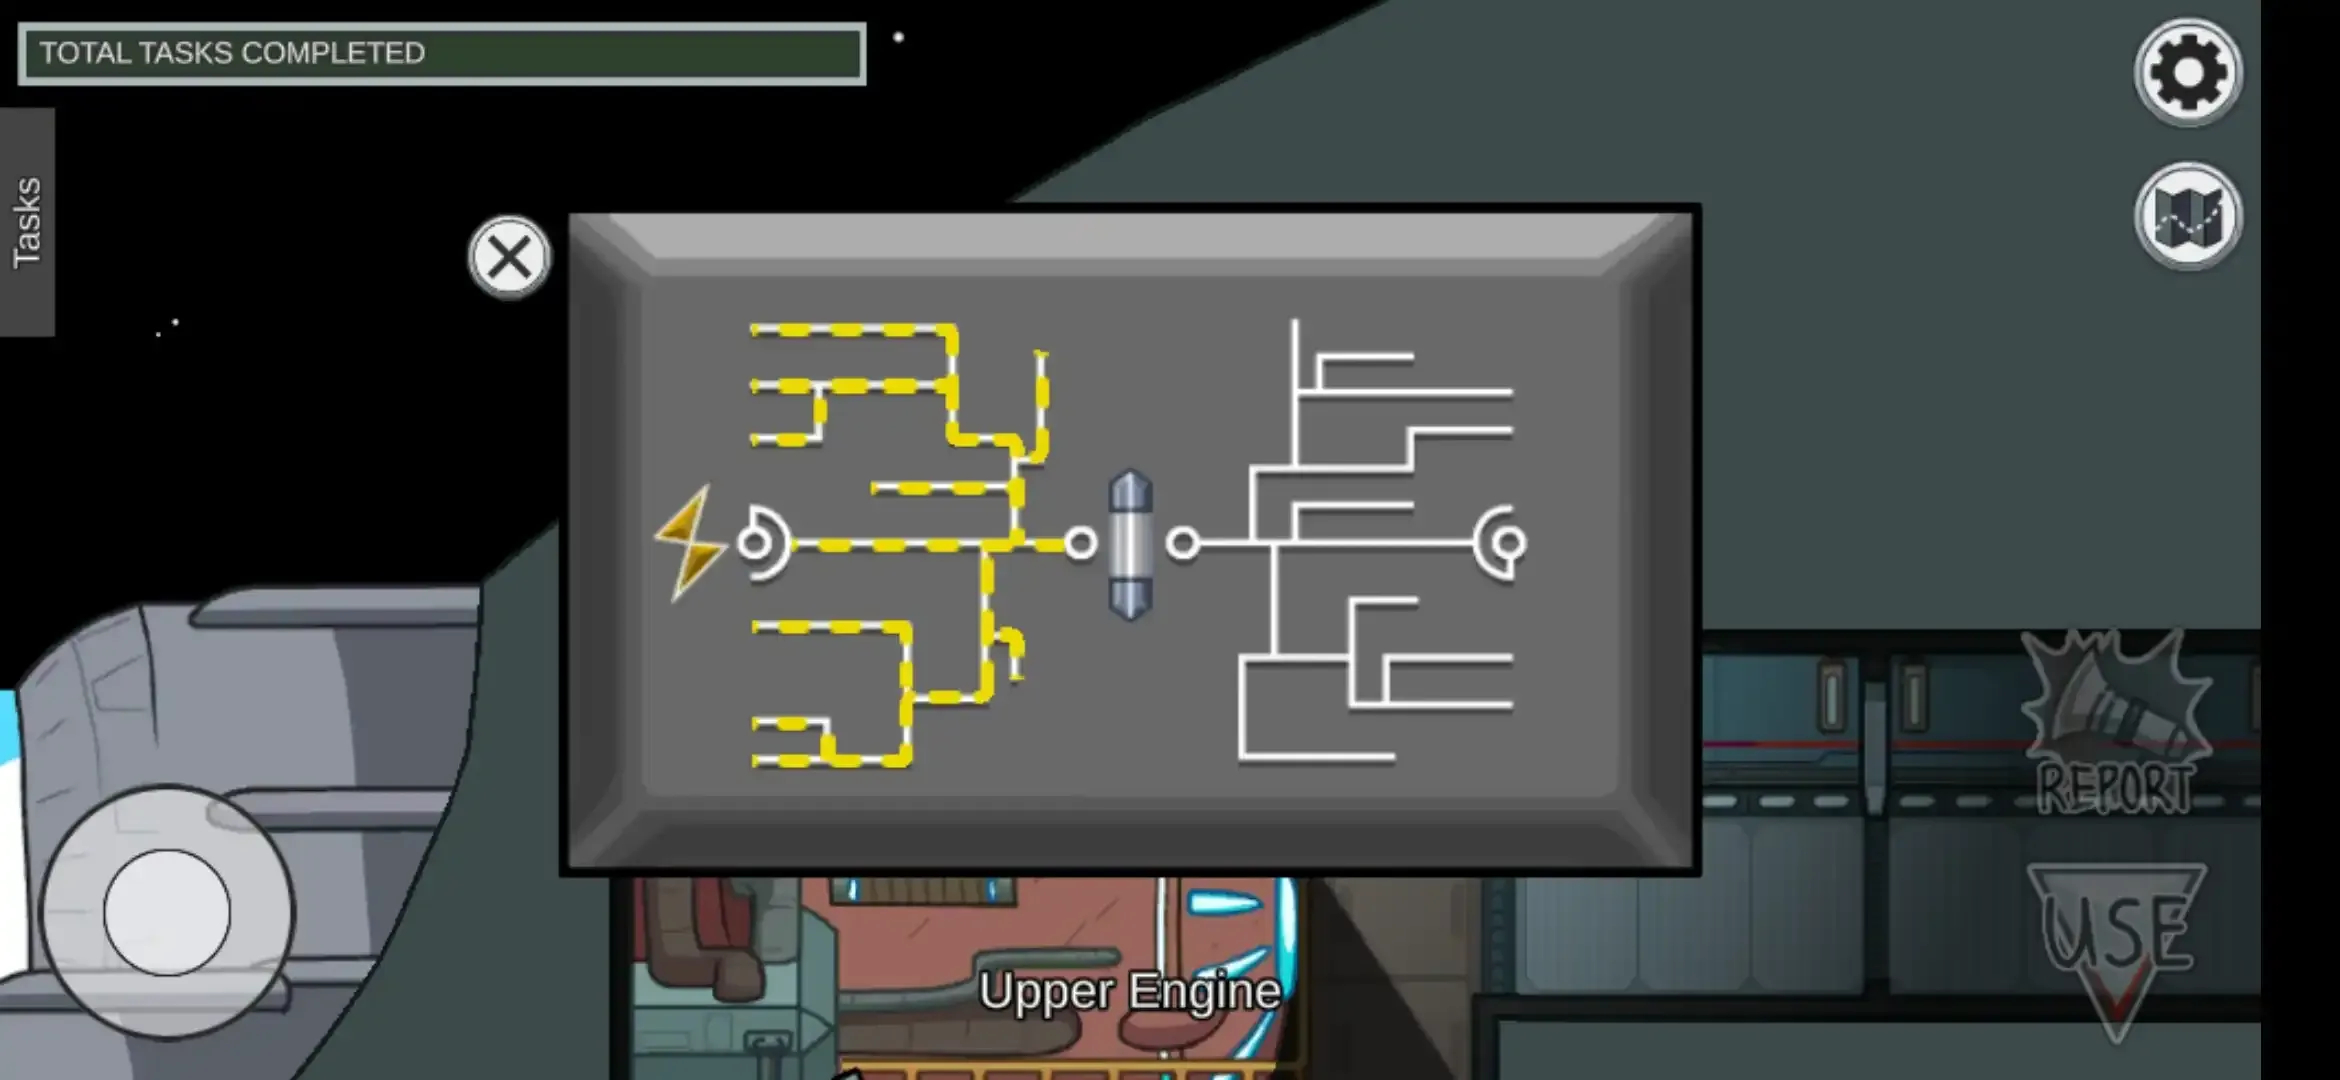
Next, it will open the power supply control box.
Now tap the switch located in the center which will turn on the electric supply to the Upper Engine room and the task will be completed.
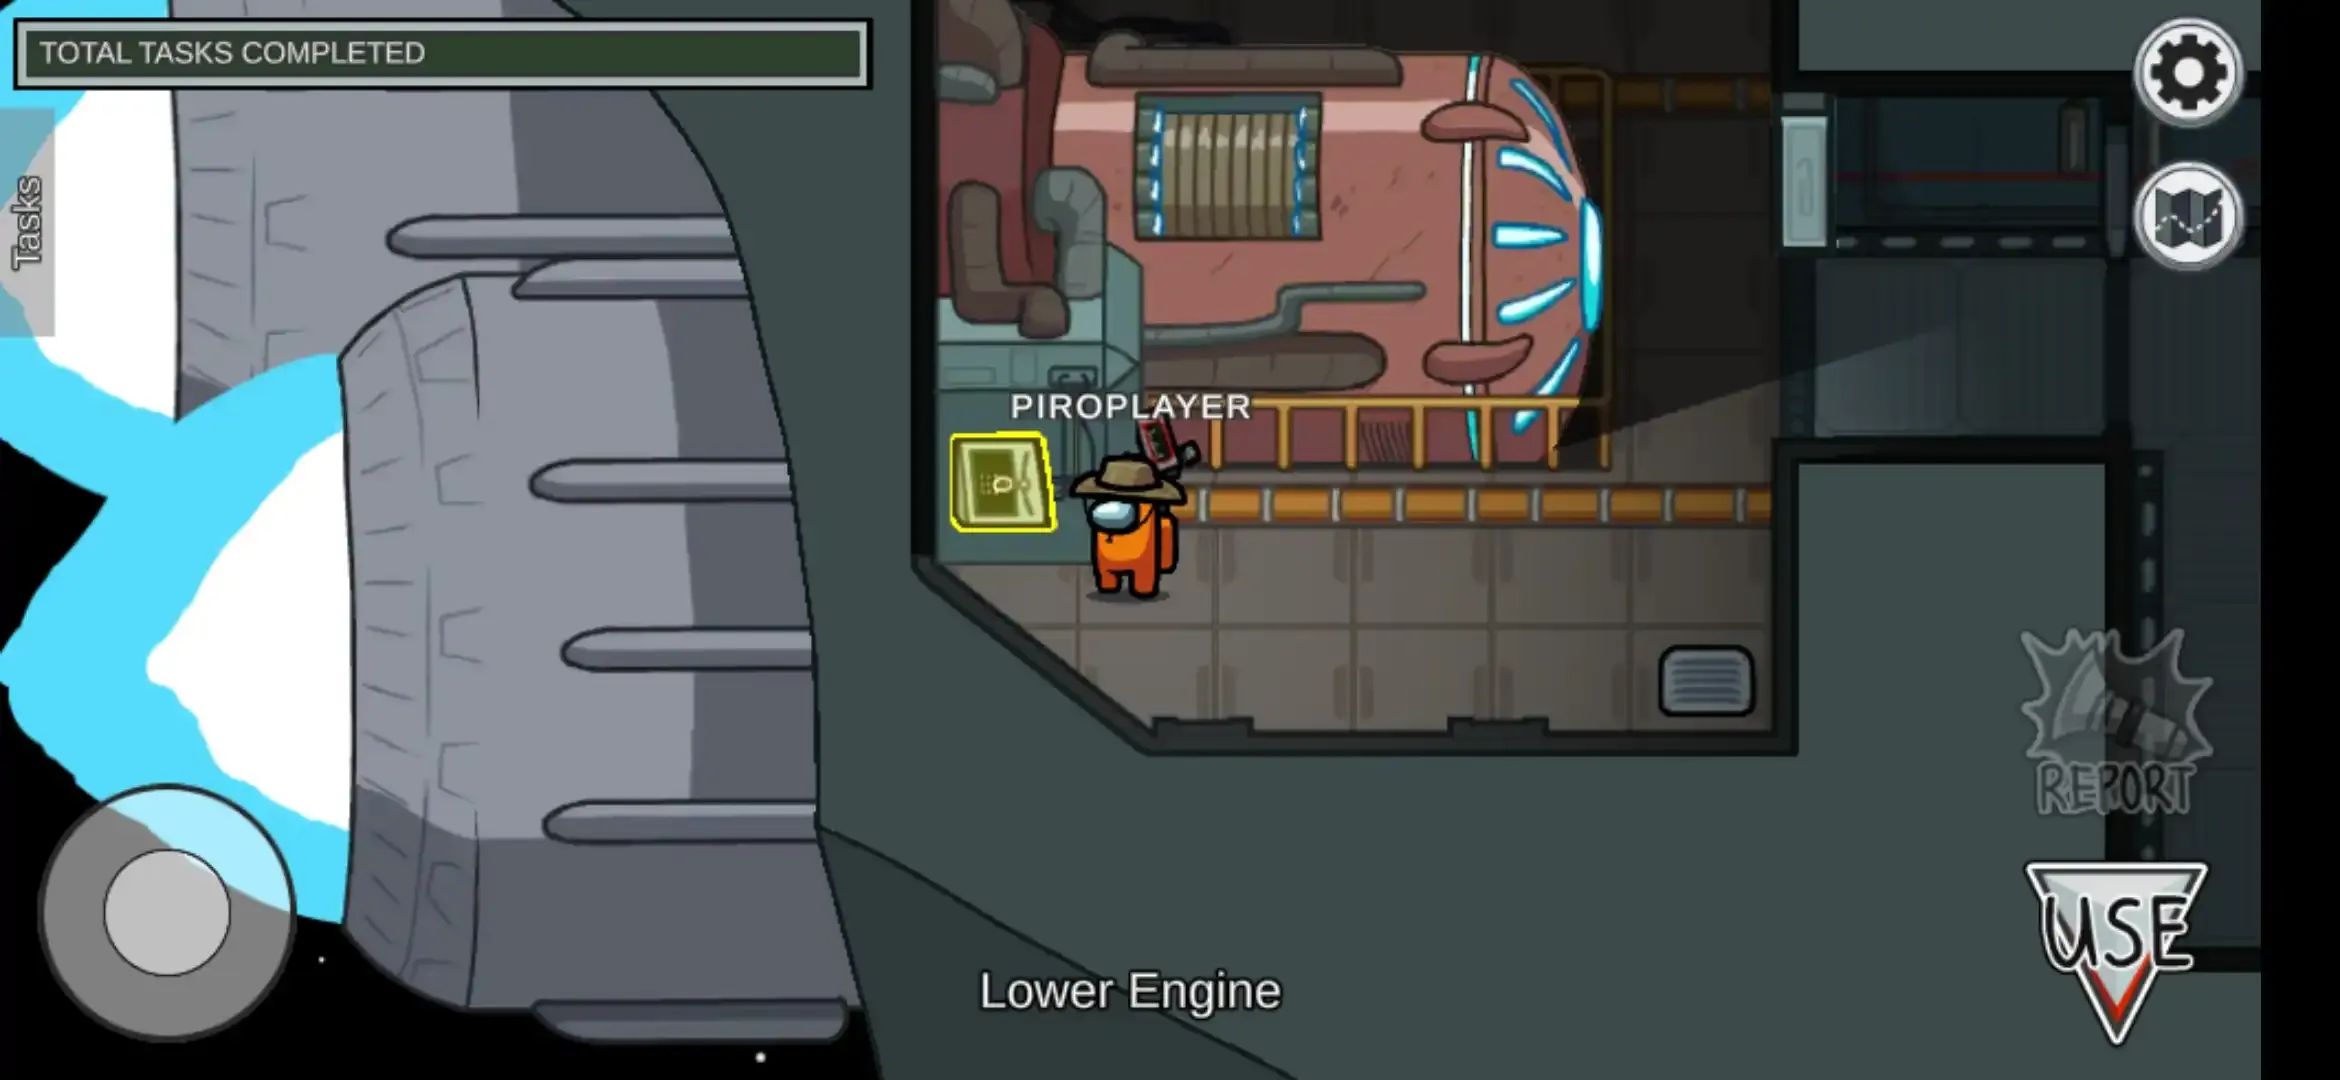
[Ⅵ] Lower Engine
➤ It is also a long task. It is divided into two stages.
Step 1. Go to the electrical location near the right side of the WI-FI panel and tap use.
which will open an electric supply board. Now find the highlighted red switch with the ‘R.Engine’ tag. As the task is about to divert power to the Lower(Right) engineroom, slide the switch to the upper side.
Step 2. Now follow the➤ symbol which will carry you to the power control panel located in the Lower Engine room and tap use.
which will open the power supply control box. Now tap the switch located in the center which will turn on the electric supply to the Lower Engine room and the task will be completed.
[Ⅶ] MedBay:
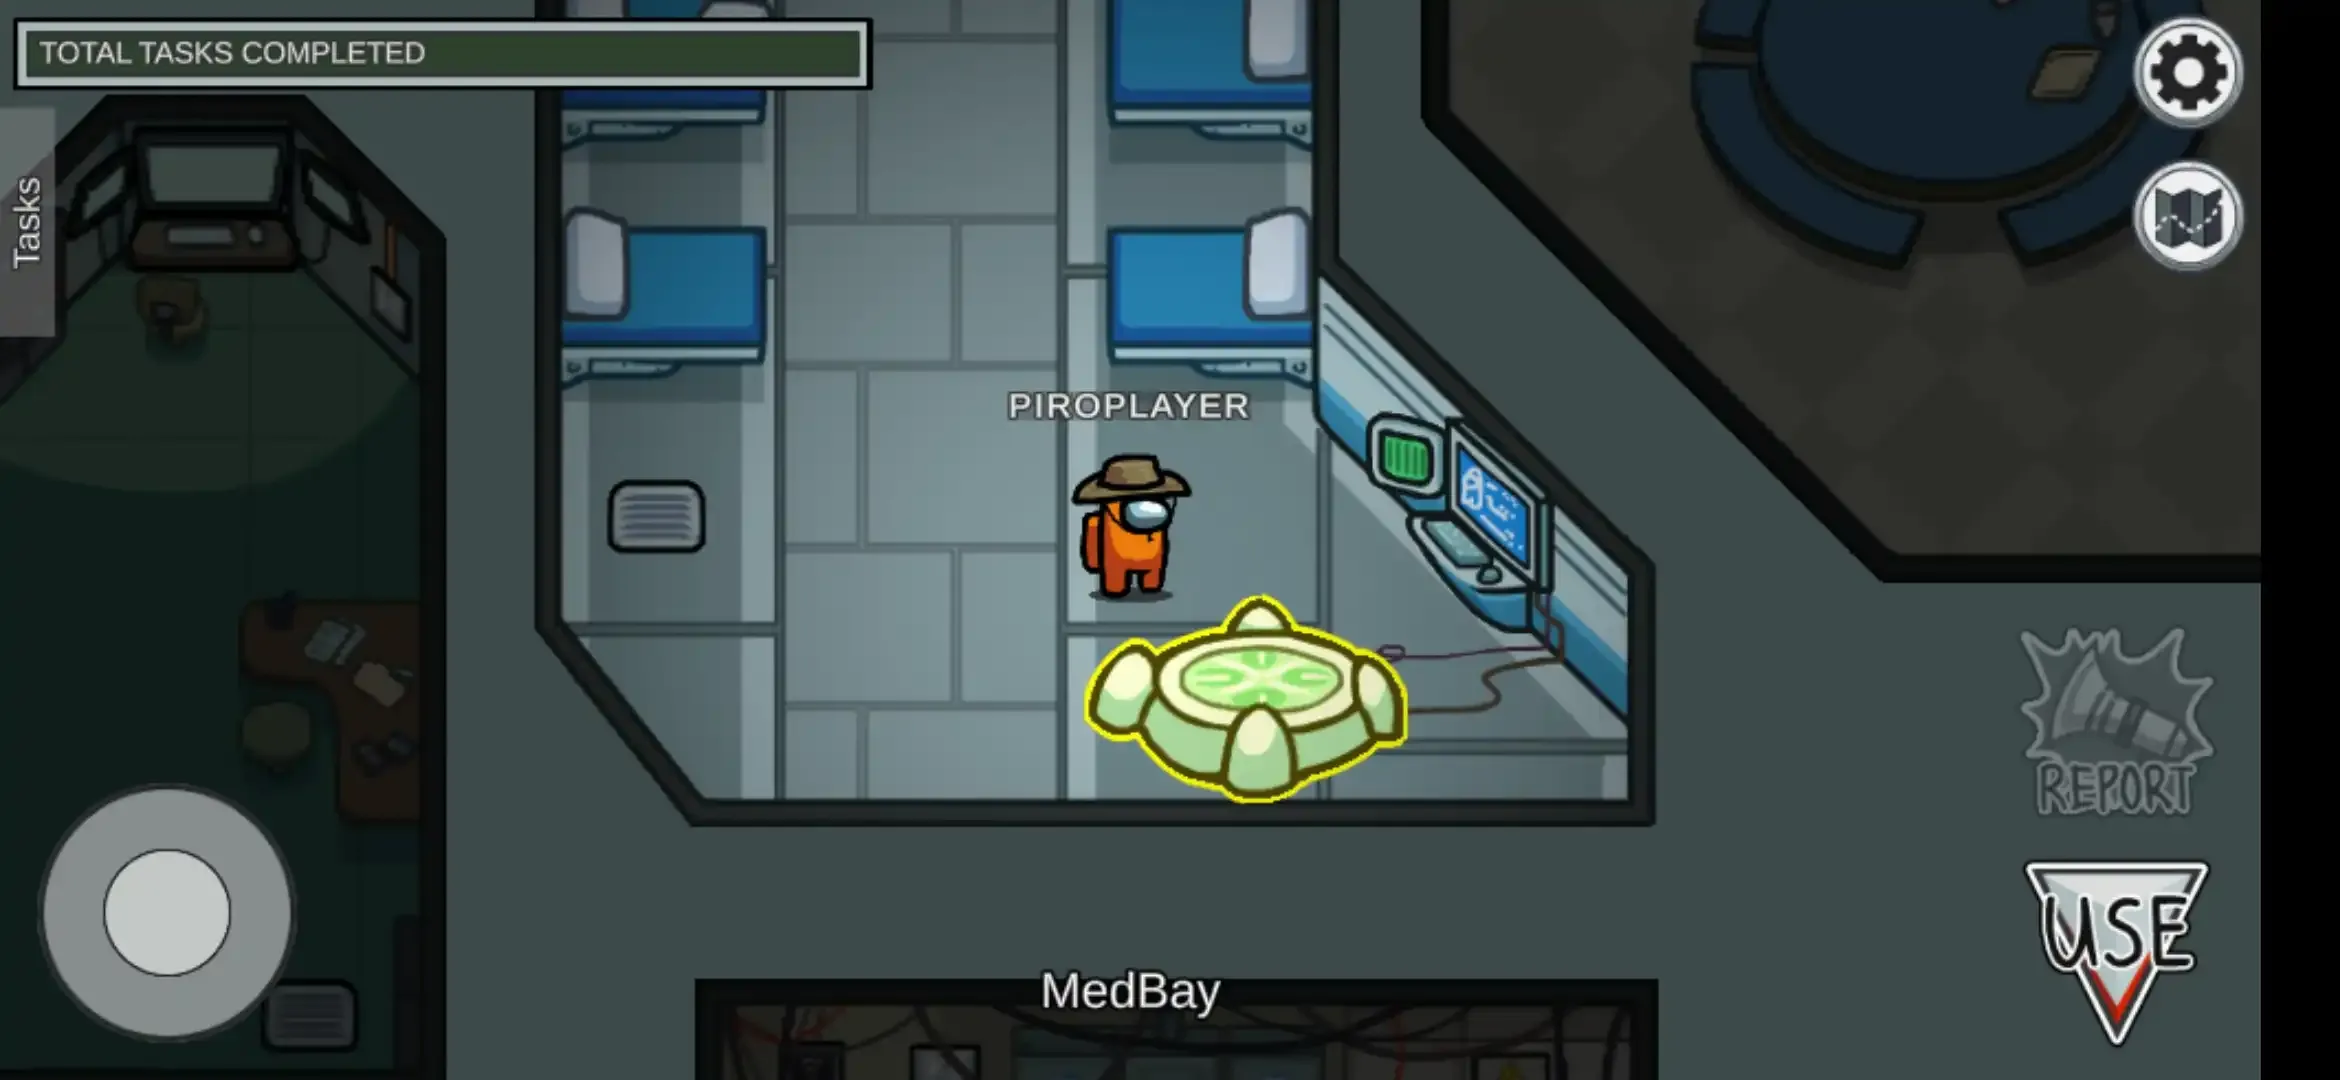
① Submit Scan –
➤ It is a long and visual task.
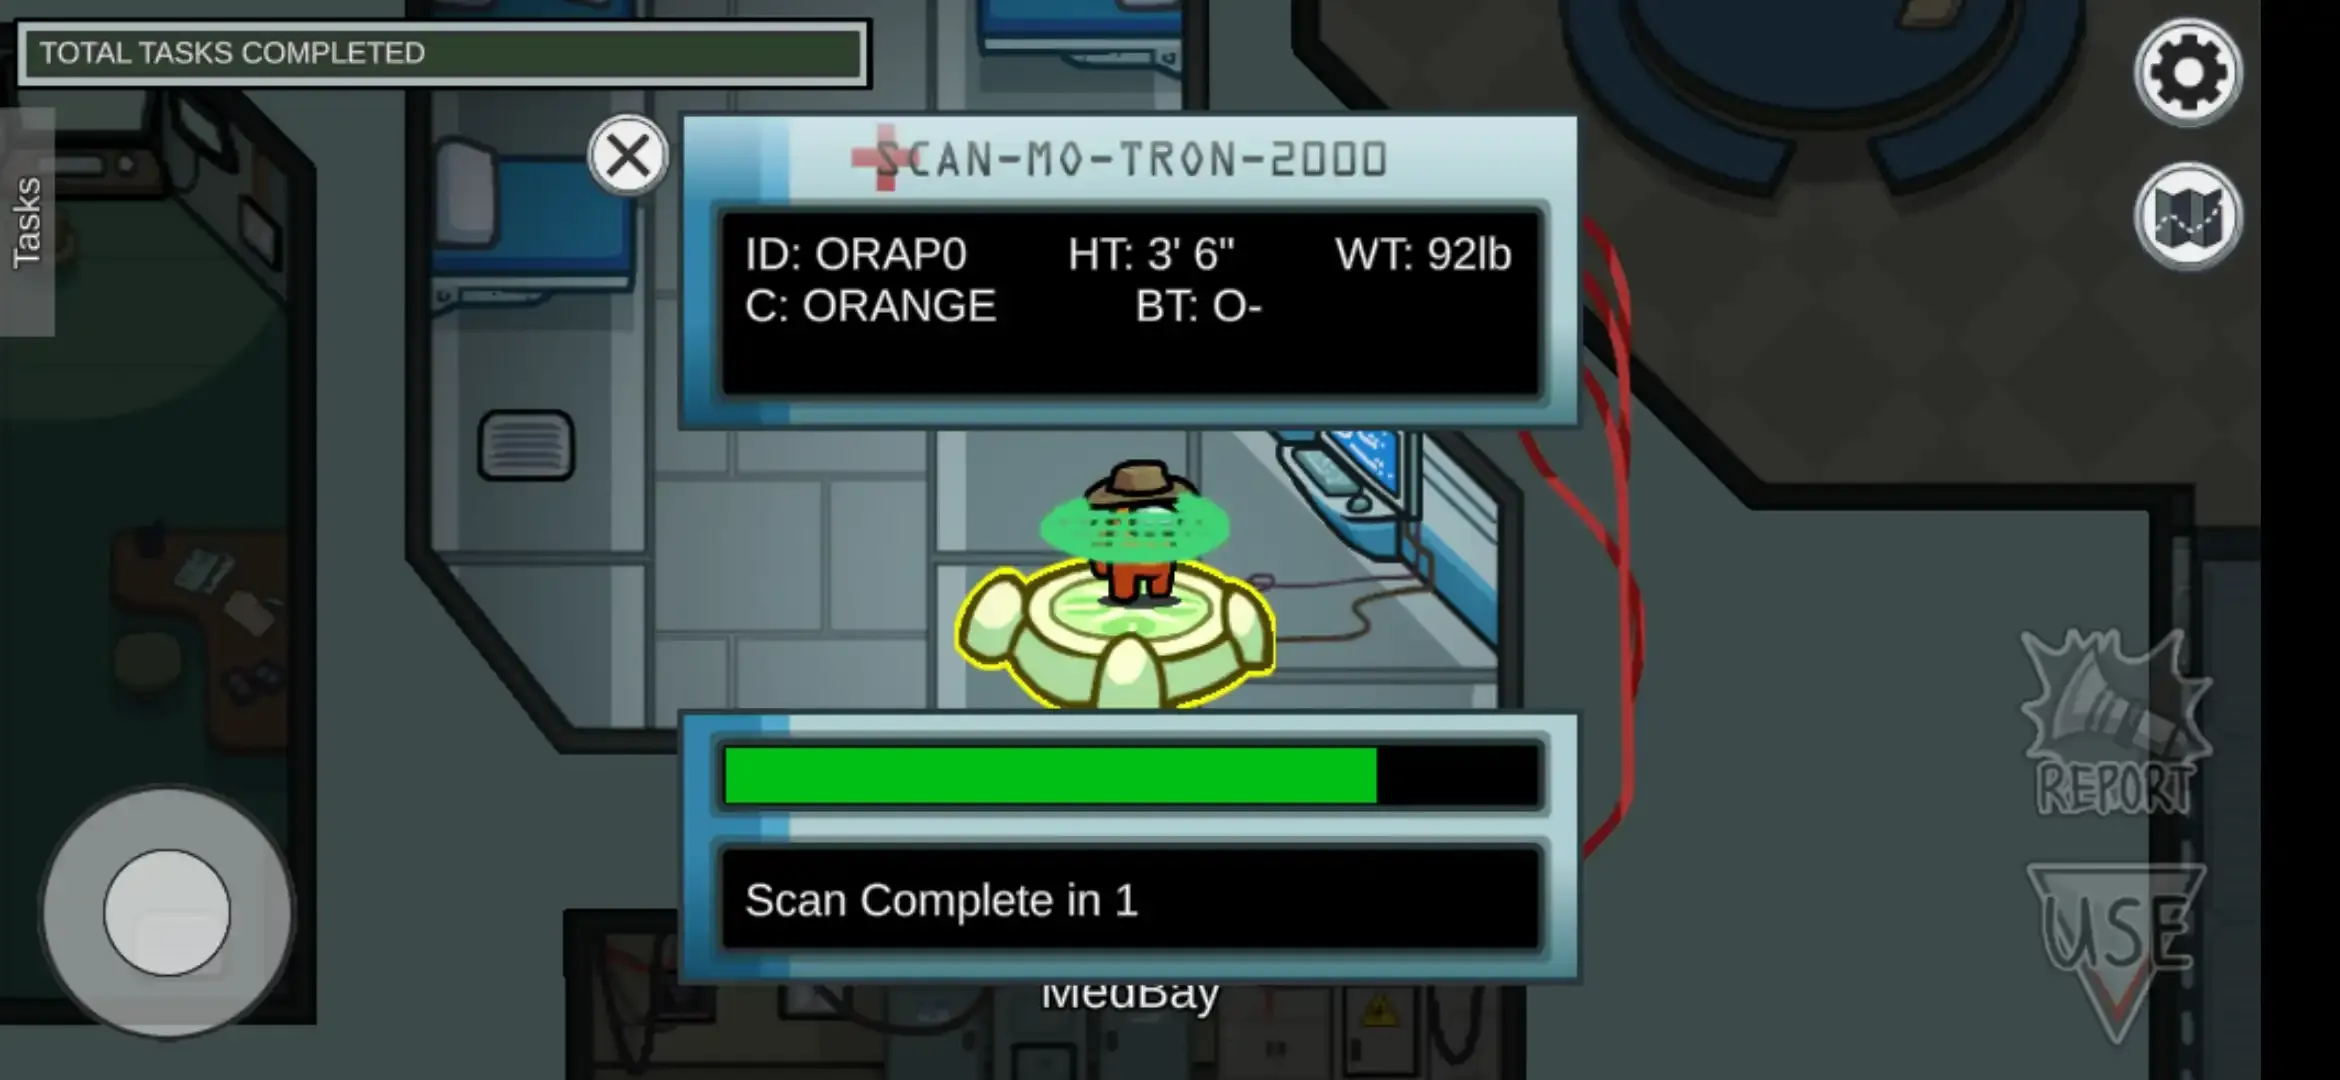
Go to the MedBay location and stand near the platform as shown in the following image and tap the use.
Now it will take 10 seconds to scan that’s it, you have completed the task. While the scanning it will show your ID, height(HT), weight(WT), body-color, and blood type of your character.
Color ↓
ID
HT(in feet and inches)
WT(in lb)
BT
Fortegreen
REDP*
3’6″
132
Random
BLUP*
Purple
PURP*
3’6″
92
Random
Red
REDP*
3’6″
92
Random
Brown
BROP*
3’6″
92
Random
Green
GREP*
3’6″
92
Random
Pink
PINP*
3’6″
92
Random
Yellow
YELP*
3’6″
92
Random
Cyan
CYAP*
3’6″
92
Random
Orange
ORAP*
3’6″
92
Random
Blue
BLUP*
3’6″
92
Random
Lime
LIMP*
3’6″
92
Random
White
WHIP*
3’6″
92
Random
Black
BLAP*
3’6″
92
Random
* stands for the number of joining of player in a game from 0 to 9, for example, if a player joined the game in 4th position then that * will be 3.
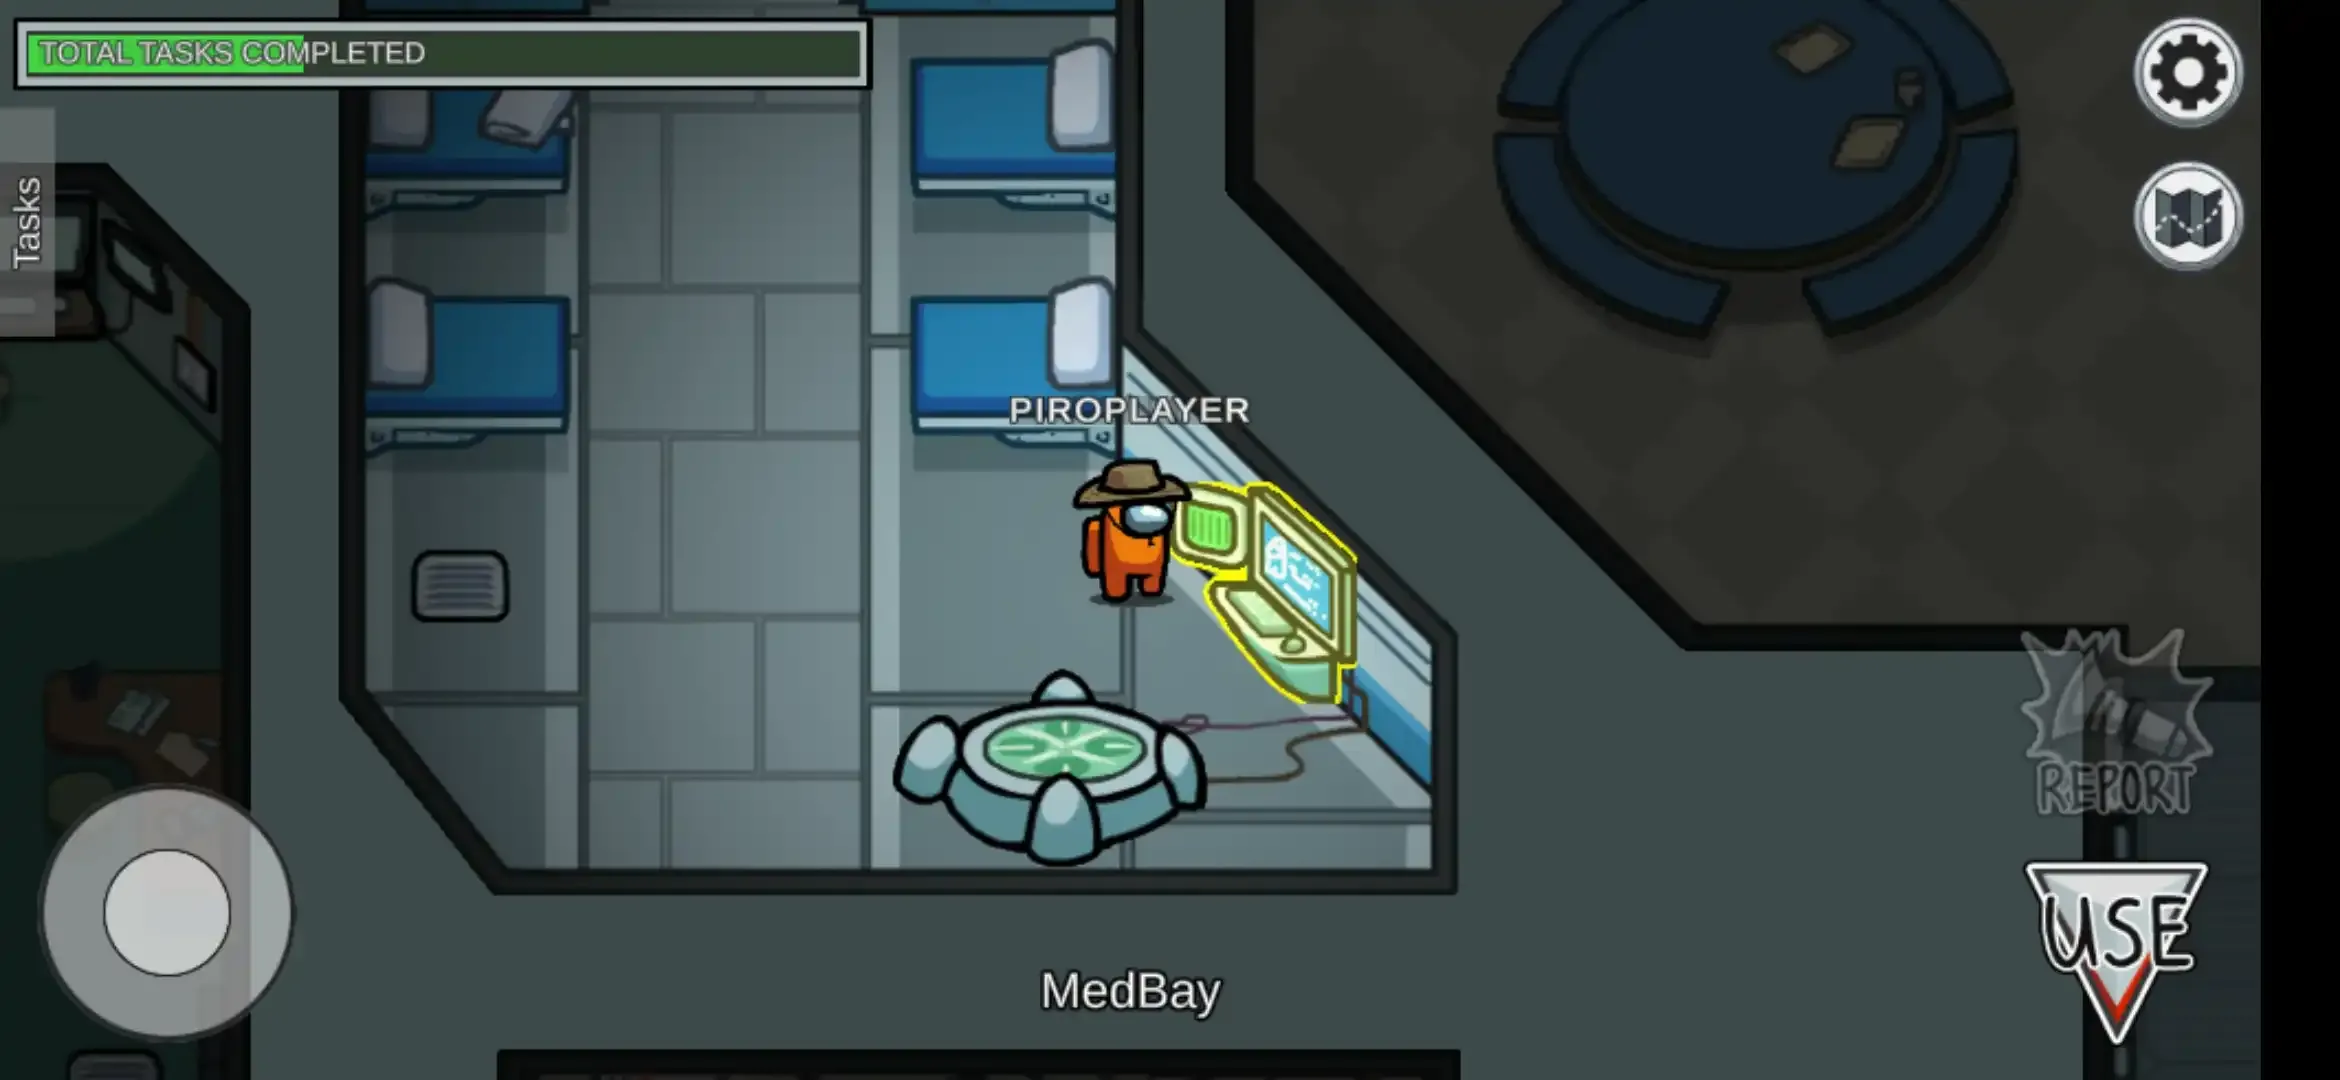
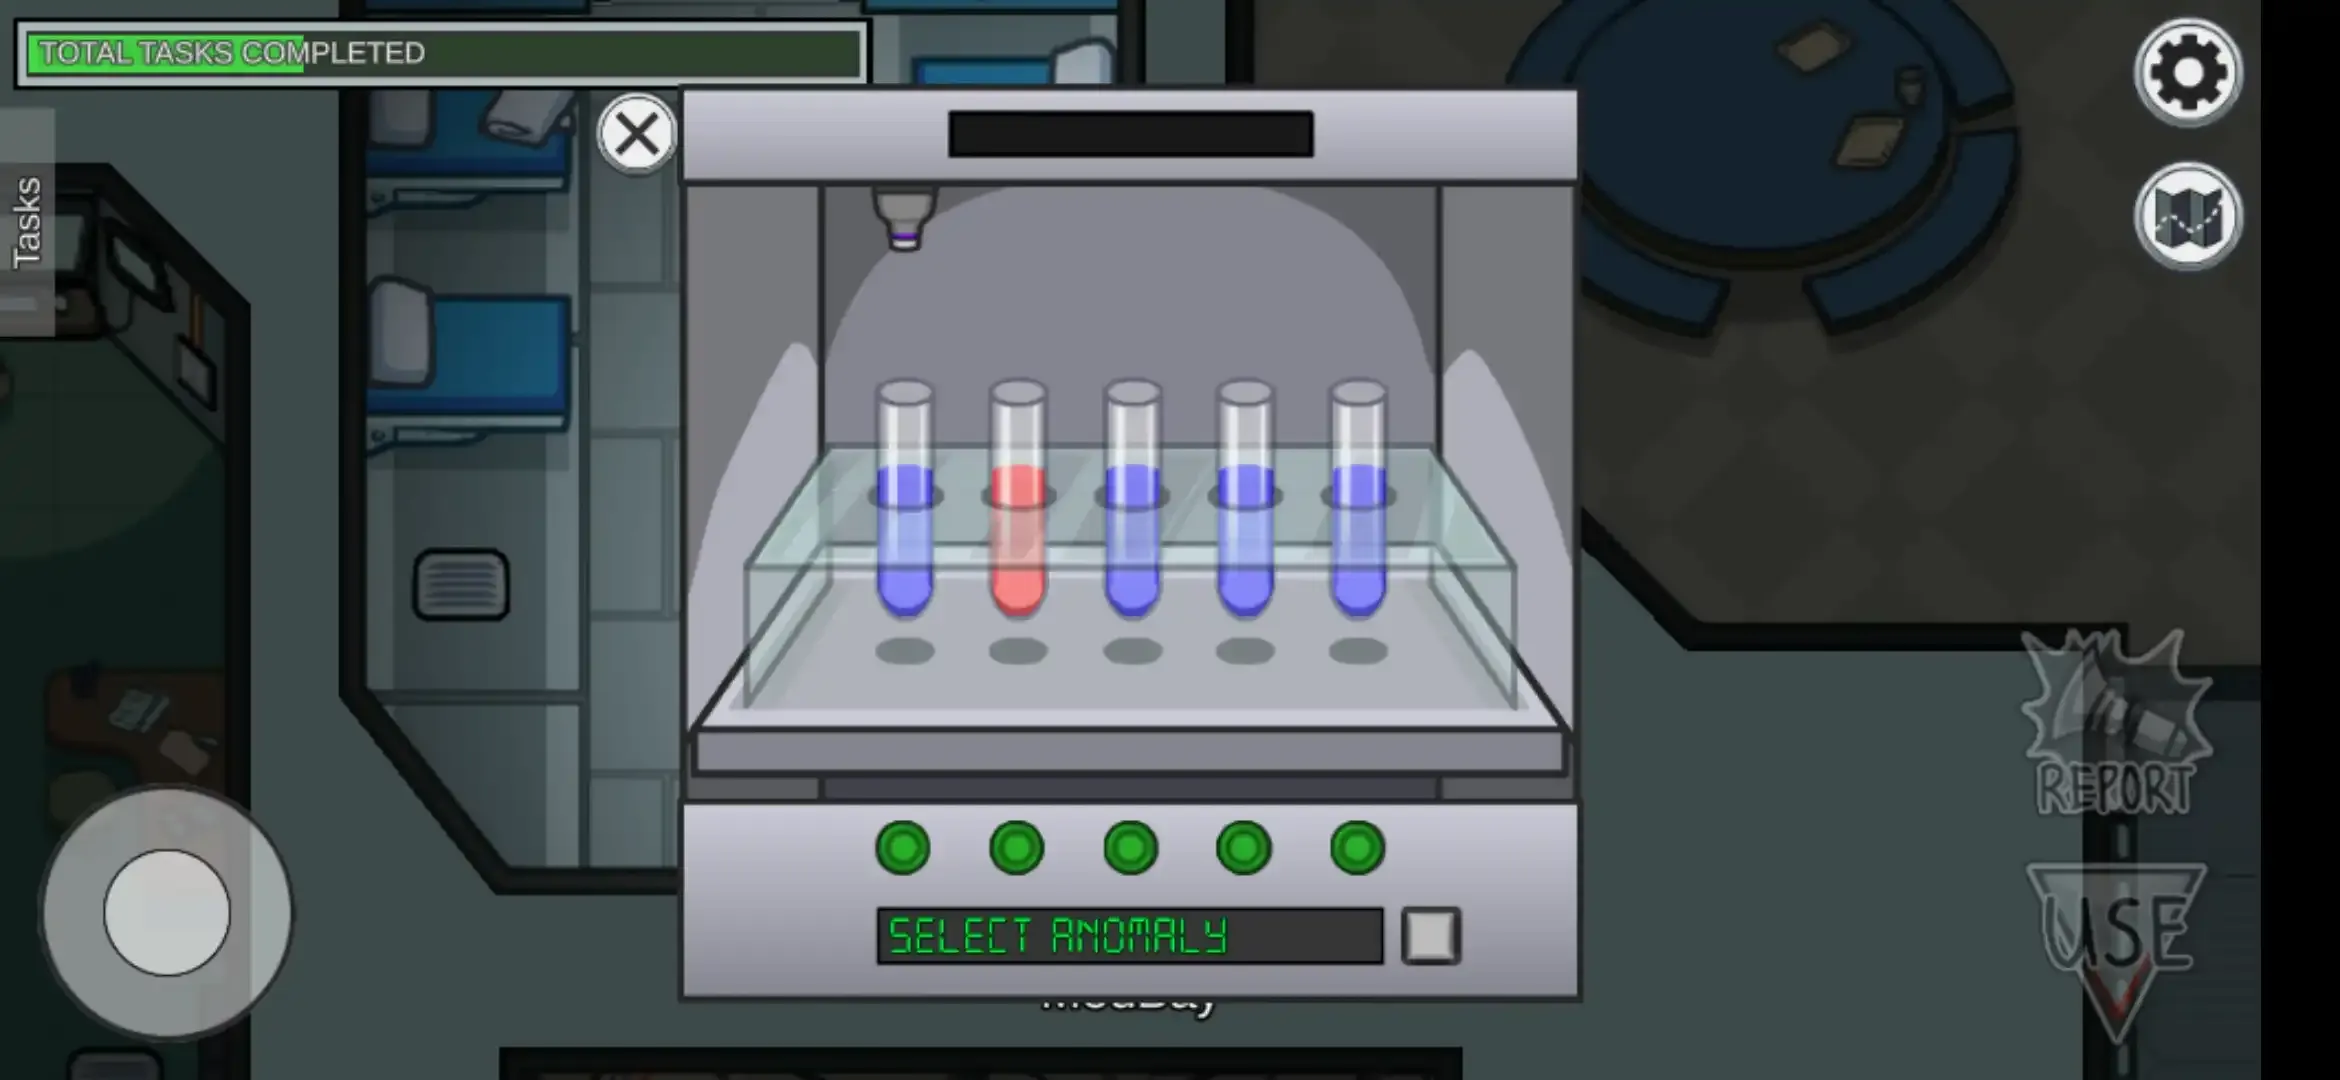
② Inspect sample –
➤ It is a long task.
Go to Medbay near the bottom-right side there is a screen and tap or click use.
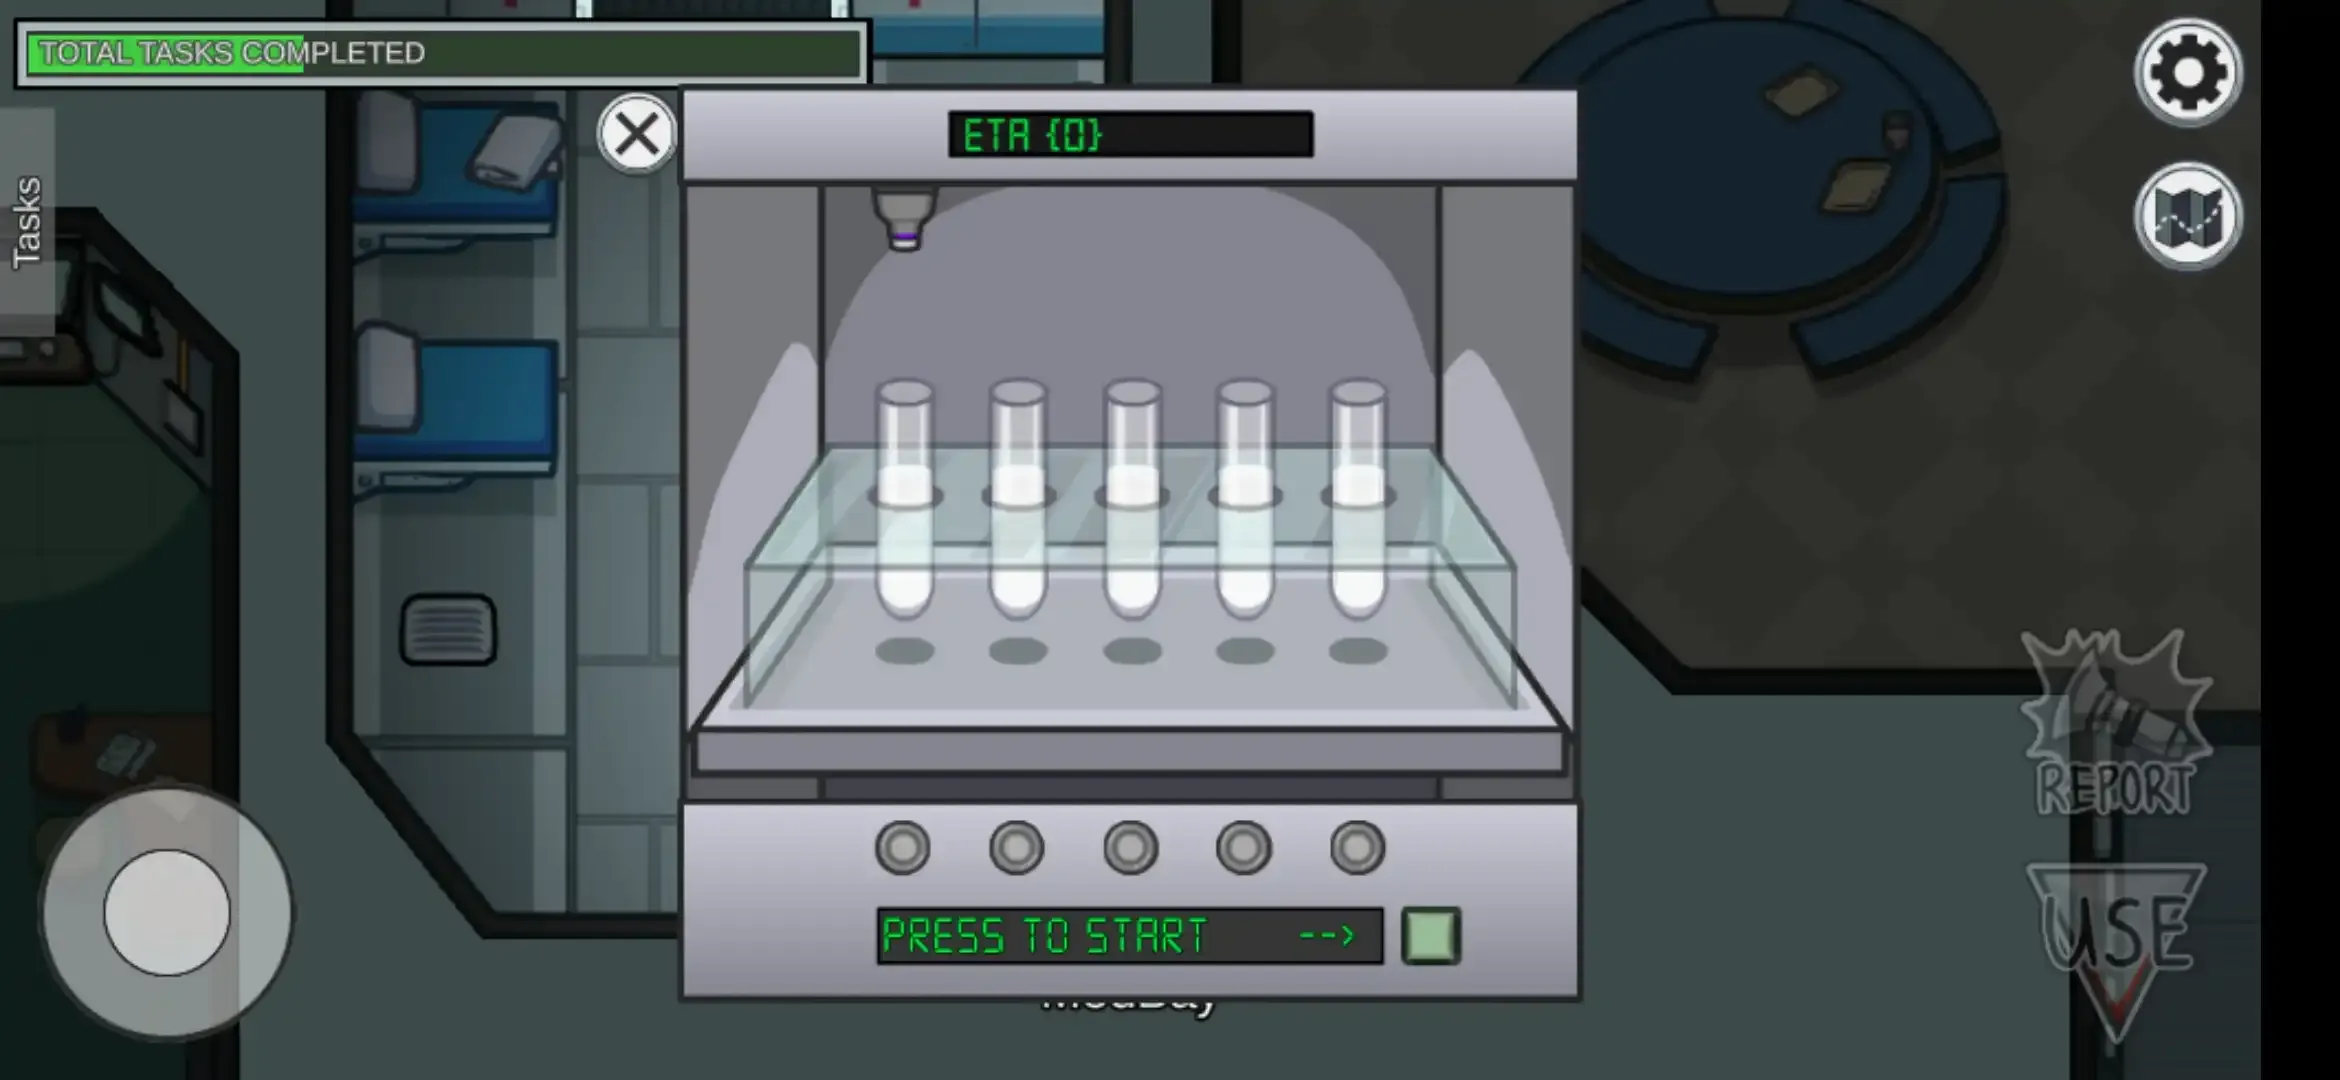
It will open a screen having test tubes and a button, Now tap the button present at the bottom of the screen which is shown by the –> symbol.
Now it will measure ETA 59 and after 60 seconds of pressing the green button one or more of the test tubes will come with red color liquid in it, tap the green button below red color tubes to complete this task.
[Ⅷ] Navigation:
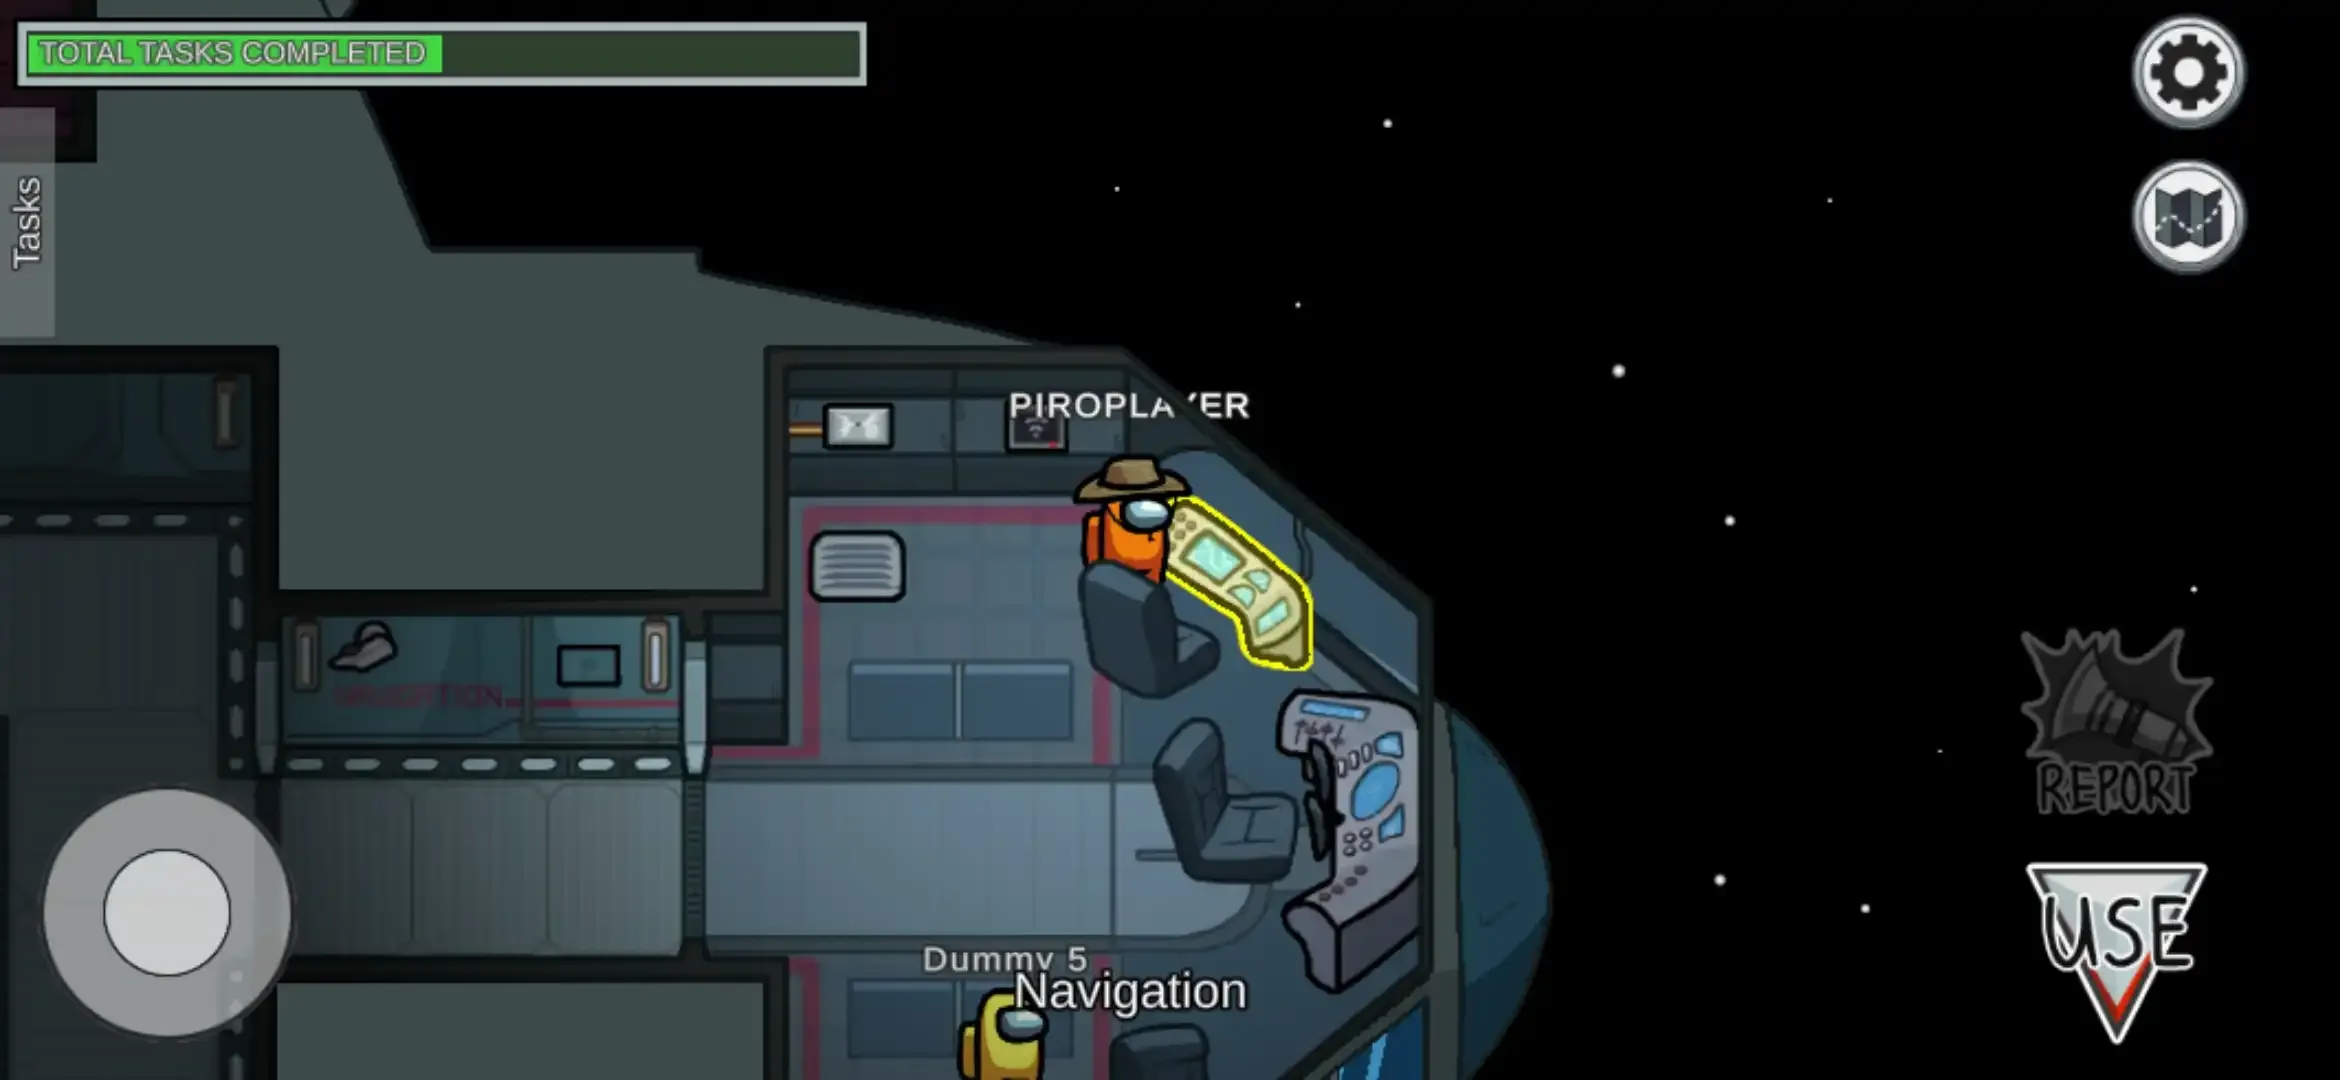
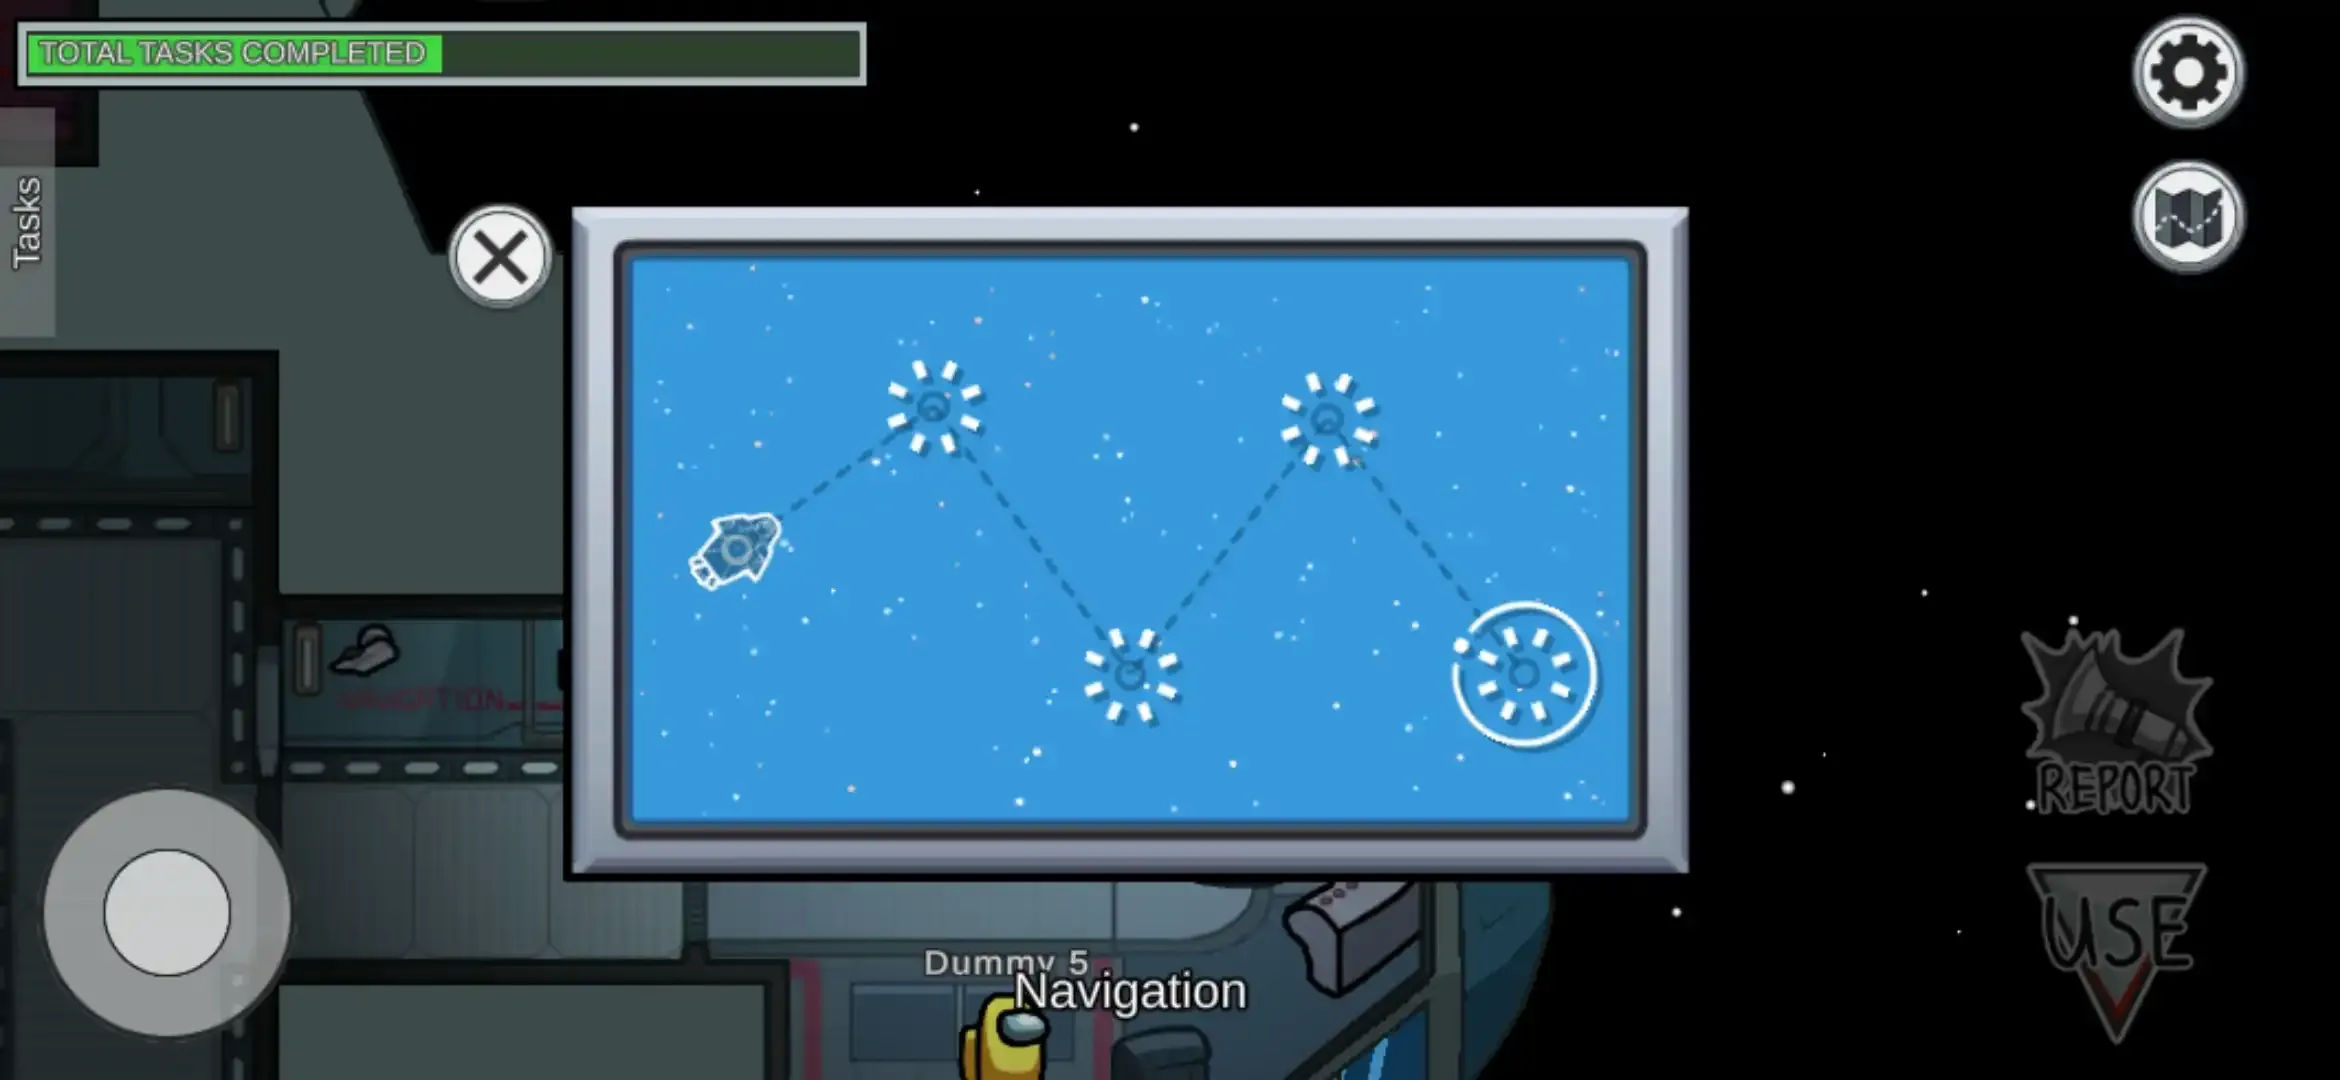
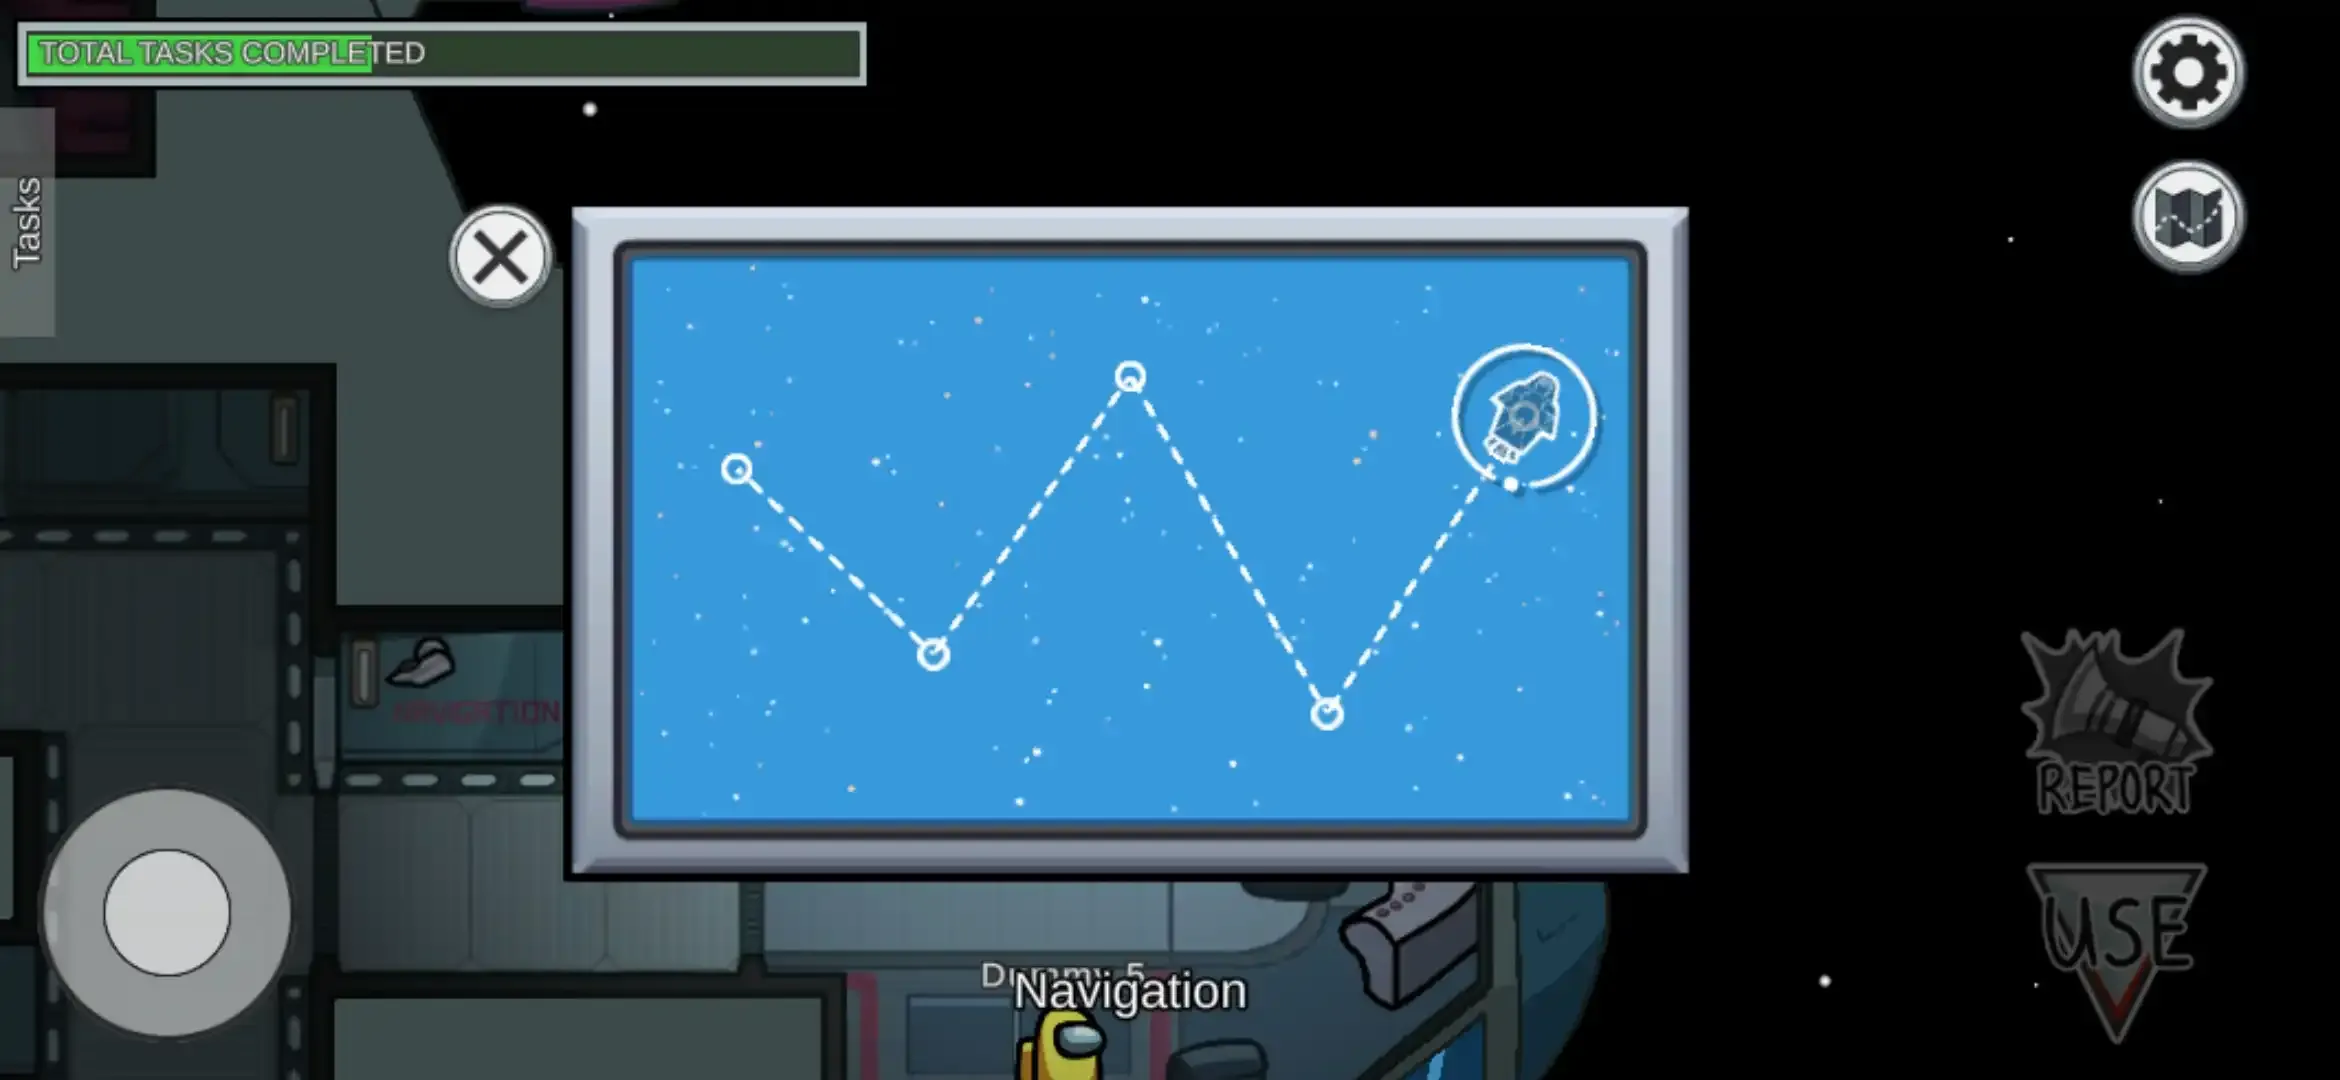
① Chart course –
➤ It is a short task.
In the Navigation location and go near the control table which is close to the WI-FI panel and tap use.
It will open the map root of Skeld spaceship.
Now just drag the spaceship from one point to the second point and similarly to the next points.
There are four points to connect after reaching the spaceship to the endpoint task will be completed.
② Upload data-
➤ Upload data is a short task. It is divided into two parts.
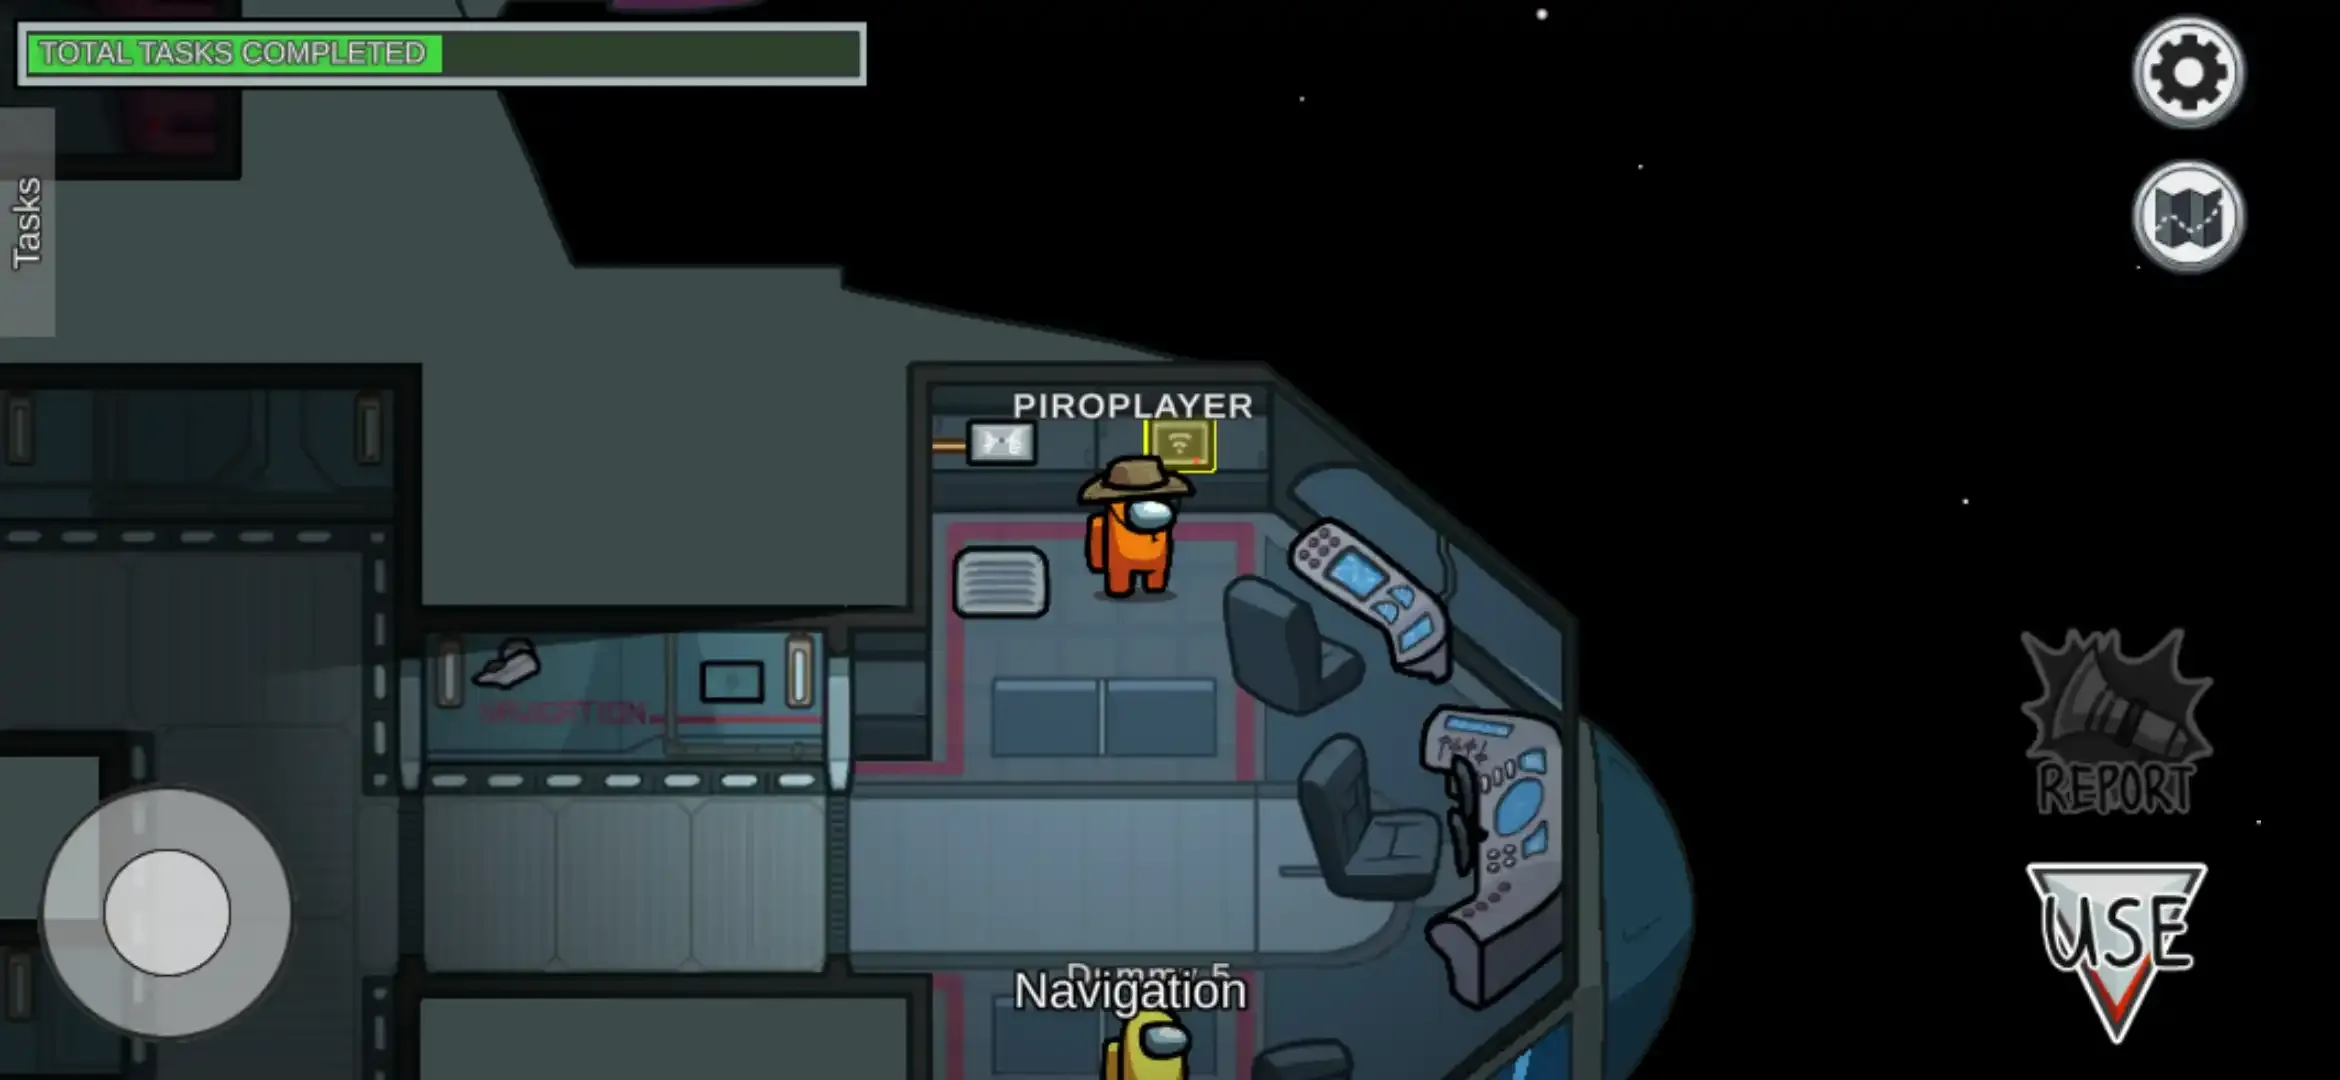
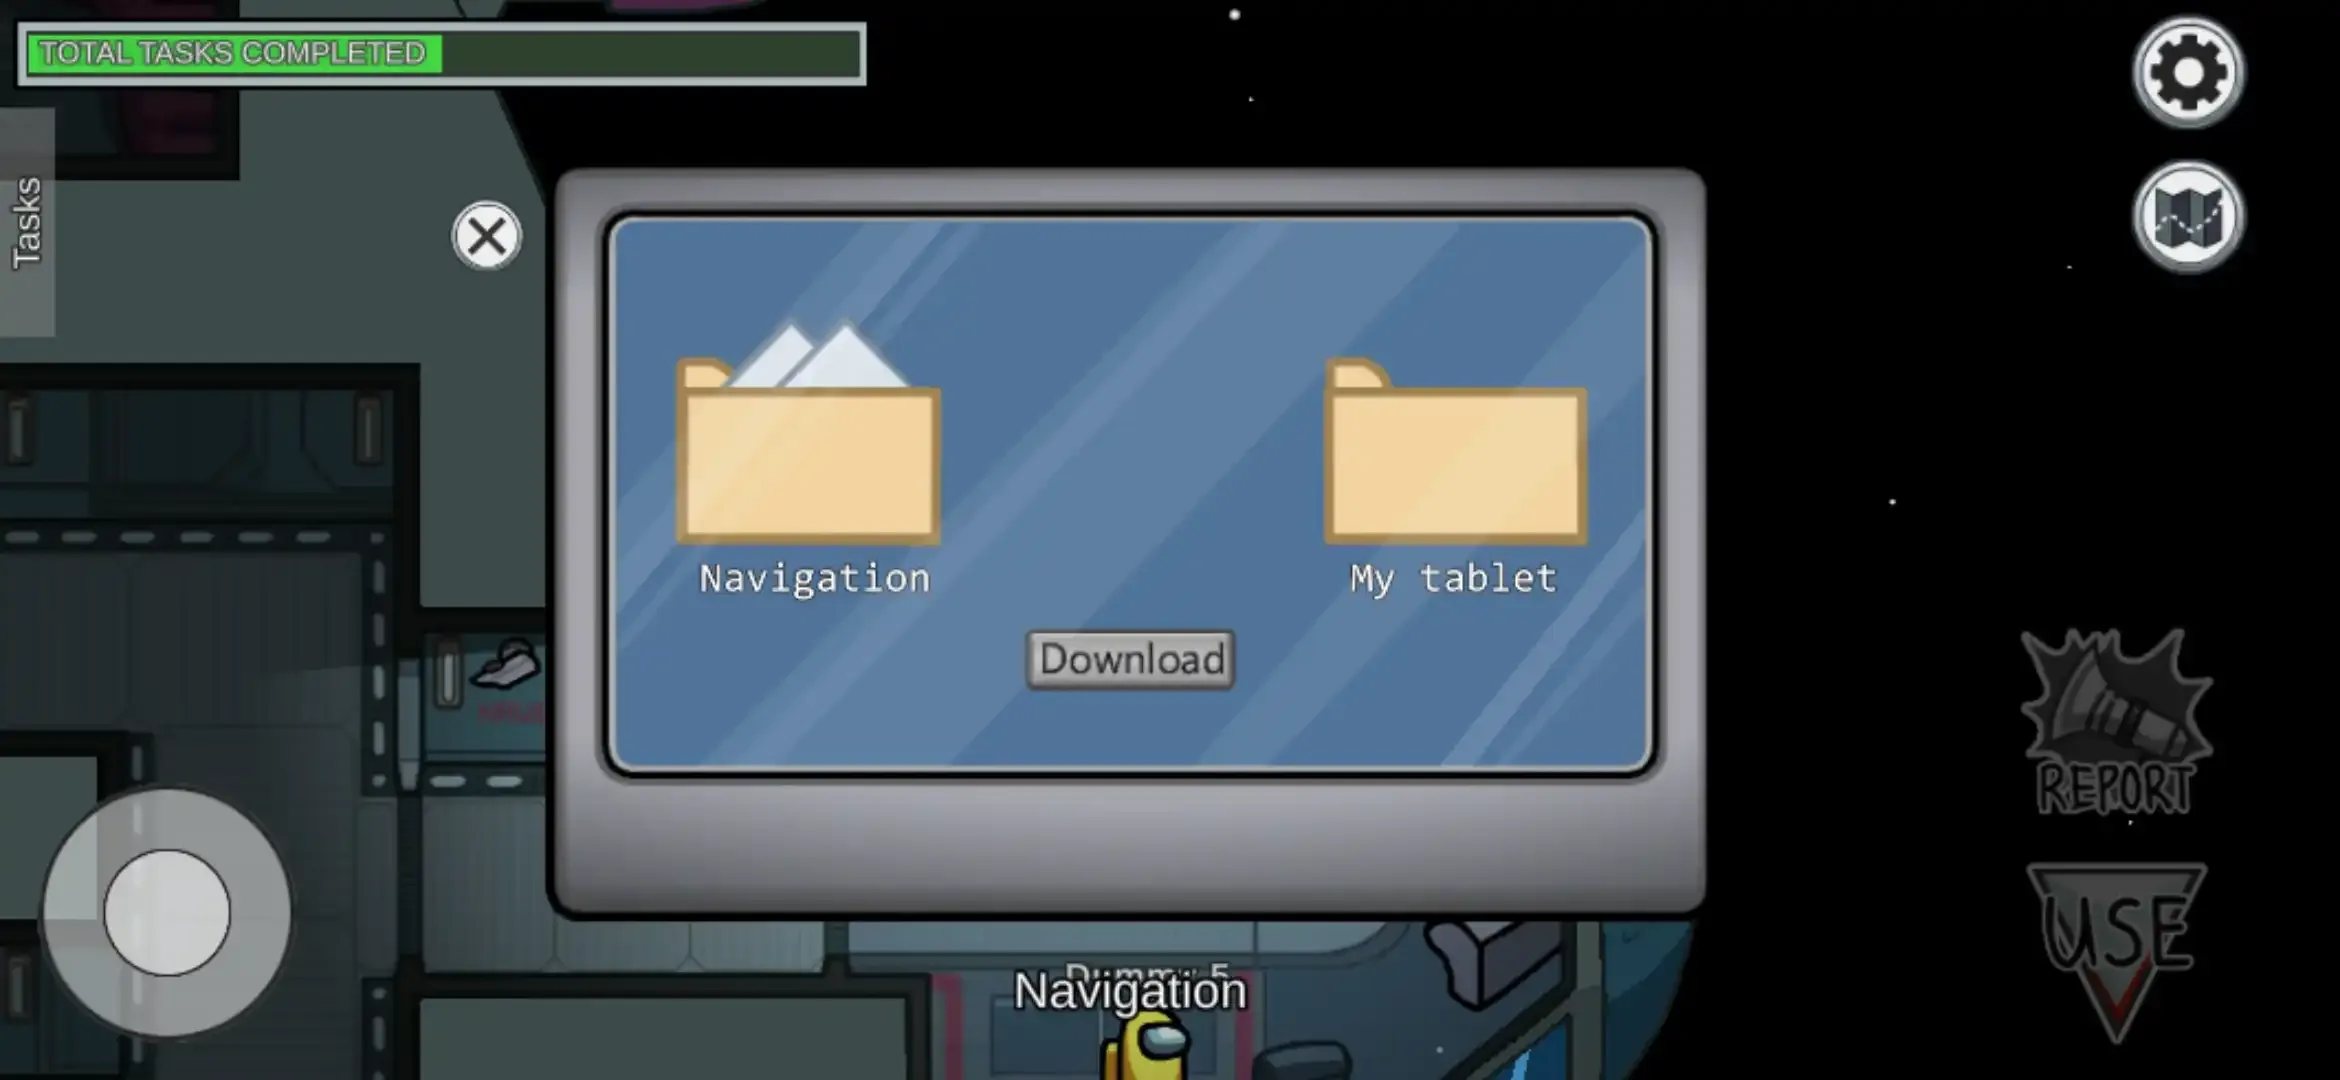
Step 1. in the Navigation location go near to the upper wall side, near the WI-FI panel, and tap use.
Then one popup will come tap or click download.
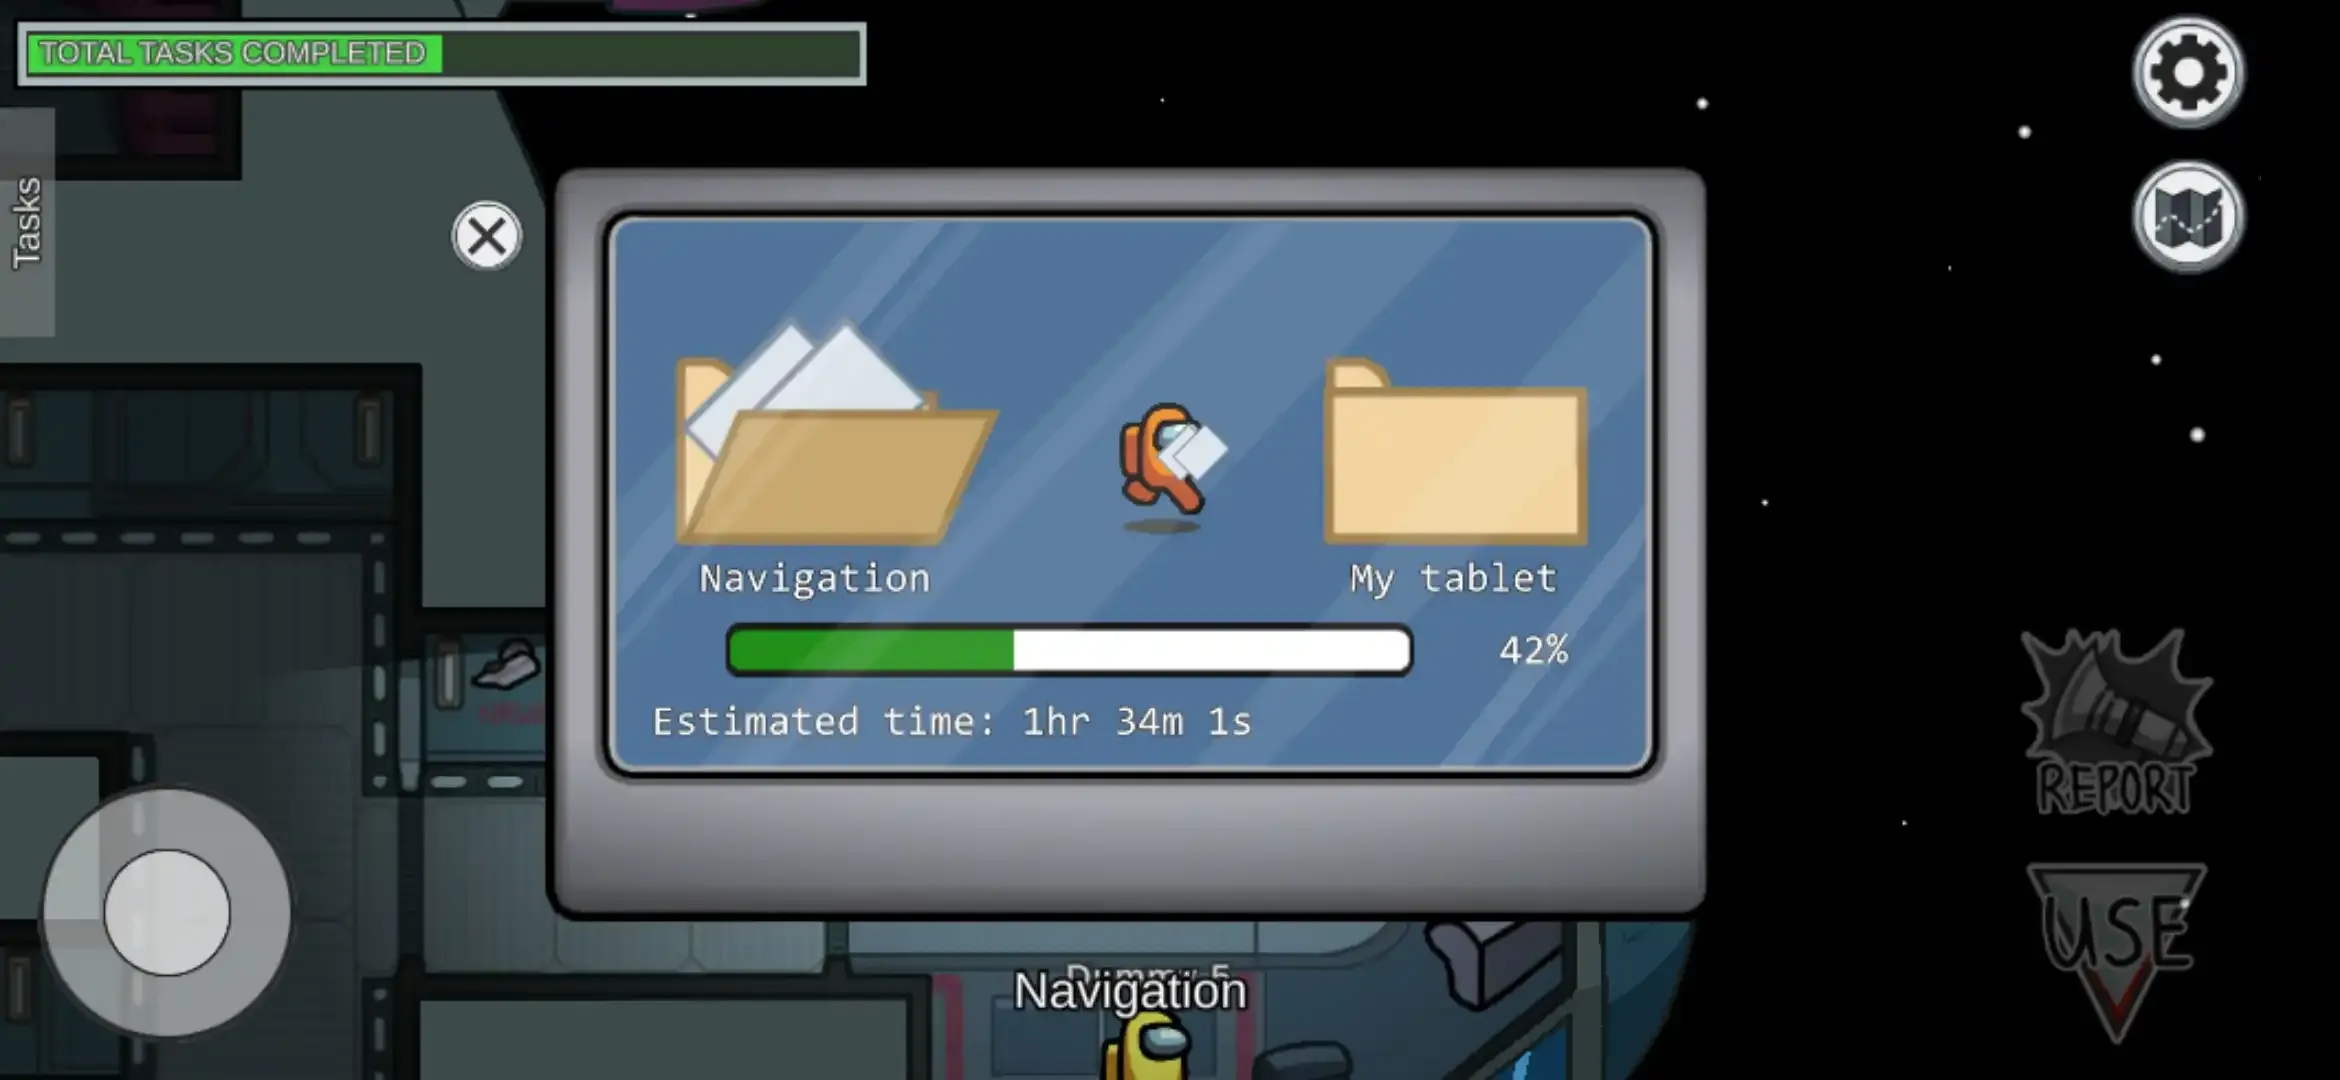
It will start downloading files from the ‘Navigation’ folder to My Tablet.
Generally, it takes 8.7 seconds. While downloading a file if it closes by mistake then one has to download it again from the beginning.
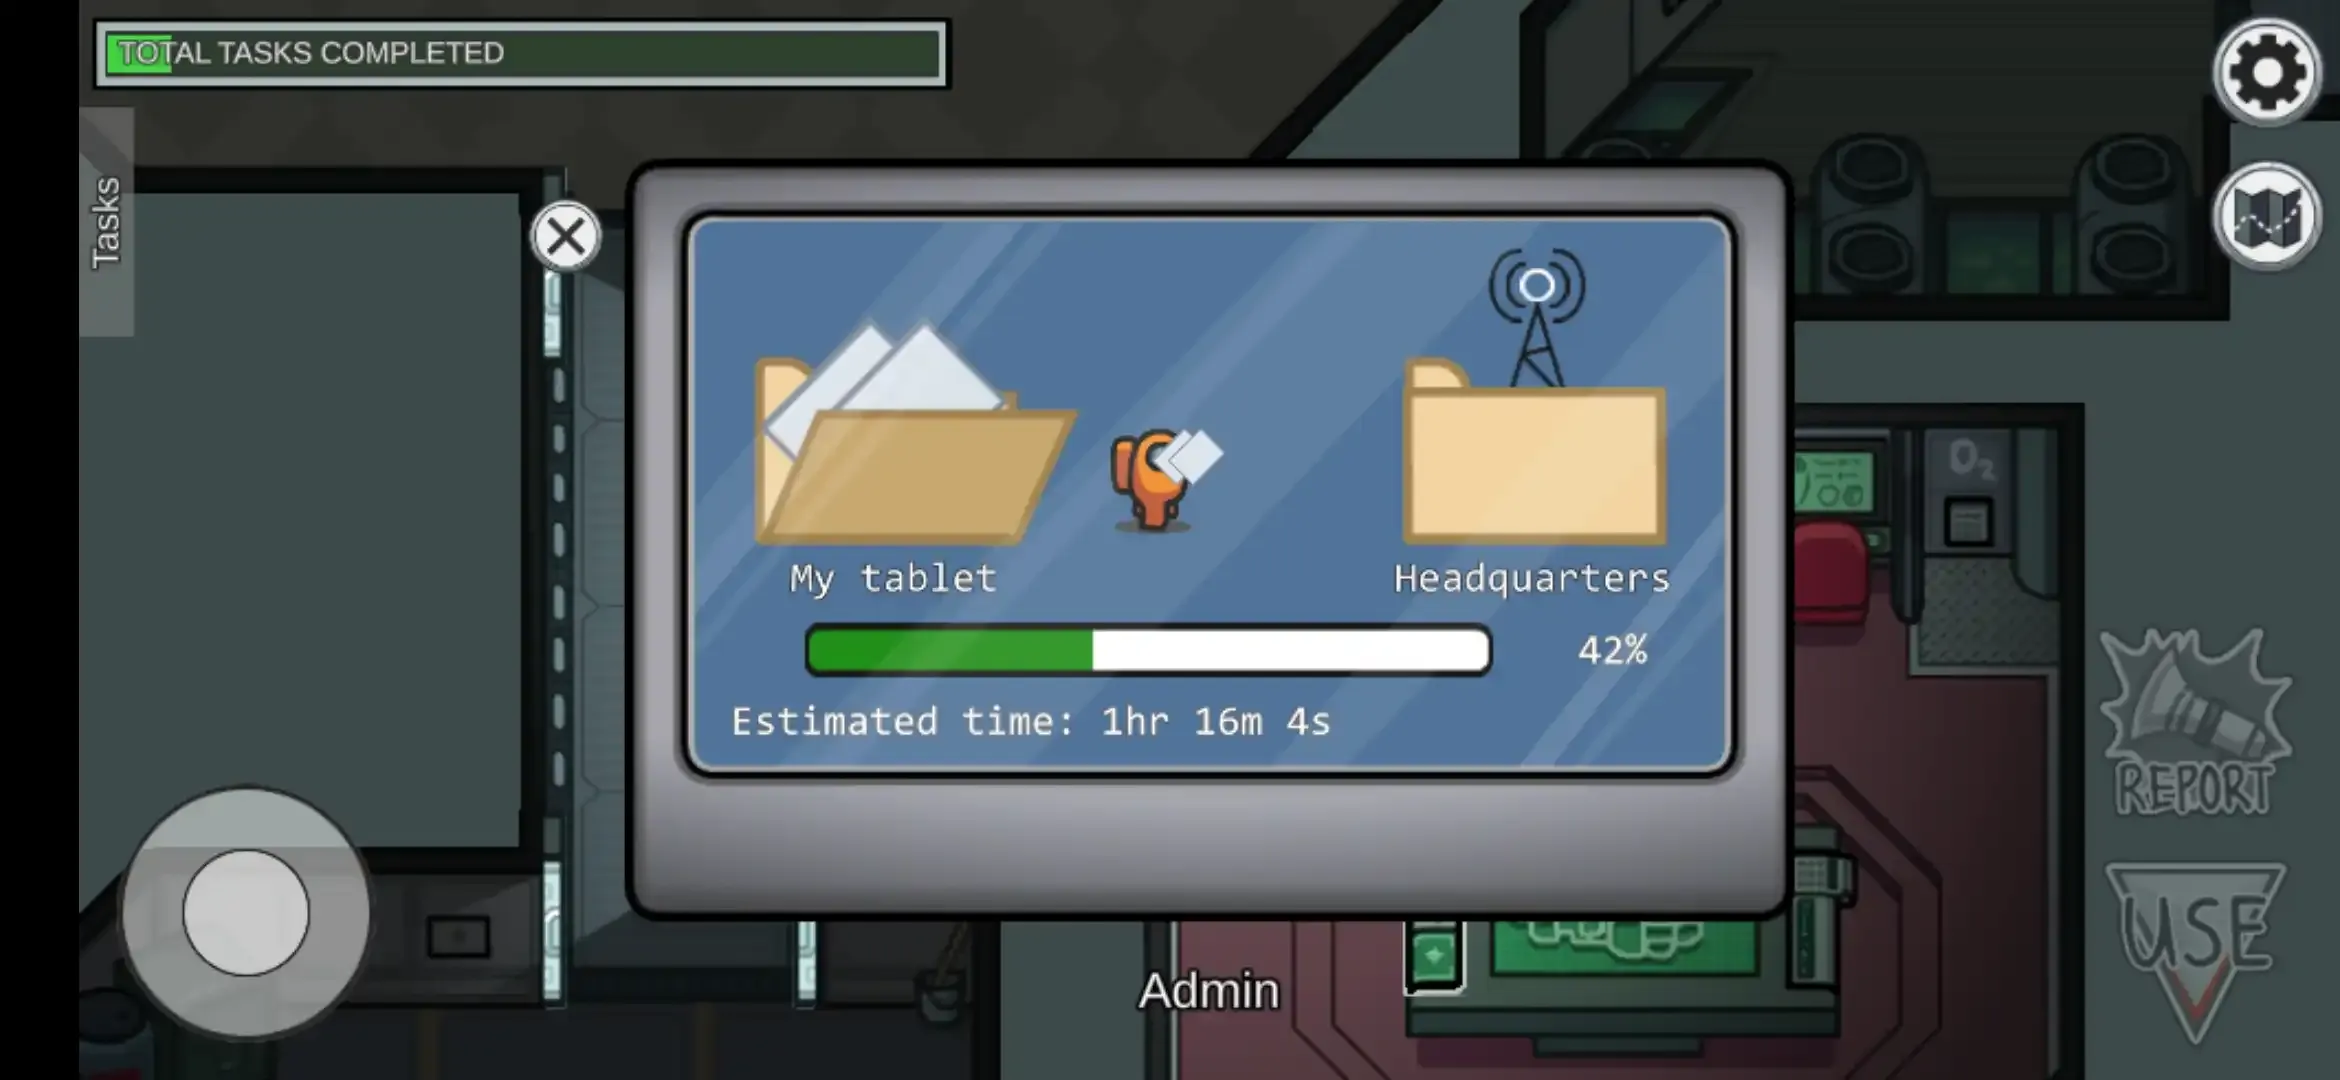
Step 2. After downloading the files to My Tablet follow the➤ symbol which will carry you to the admin room’s WI-FI panel now tap use.
Then in the window one tap or click Upload.
It will start uploading the files from My Tablet to Headquarters and you will complete this task.
It also takes 8.7 seconds. While uploading a file if it closes by mistake then one has to upload it again from the beginning.
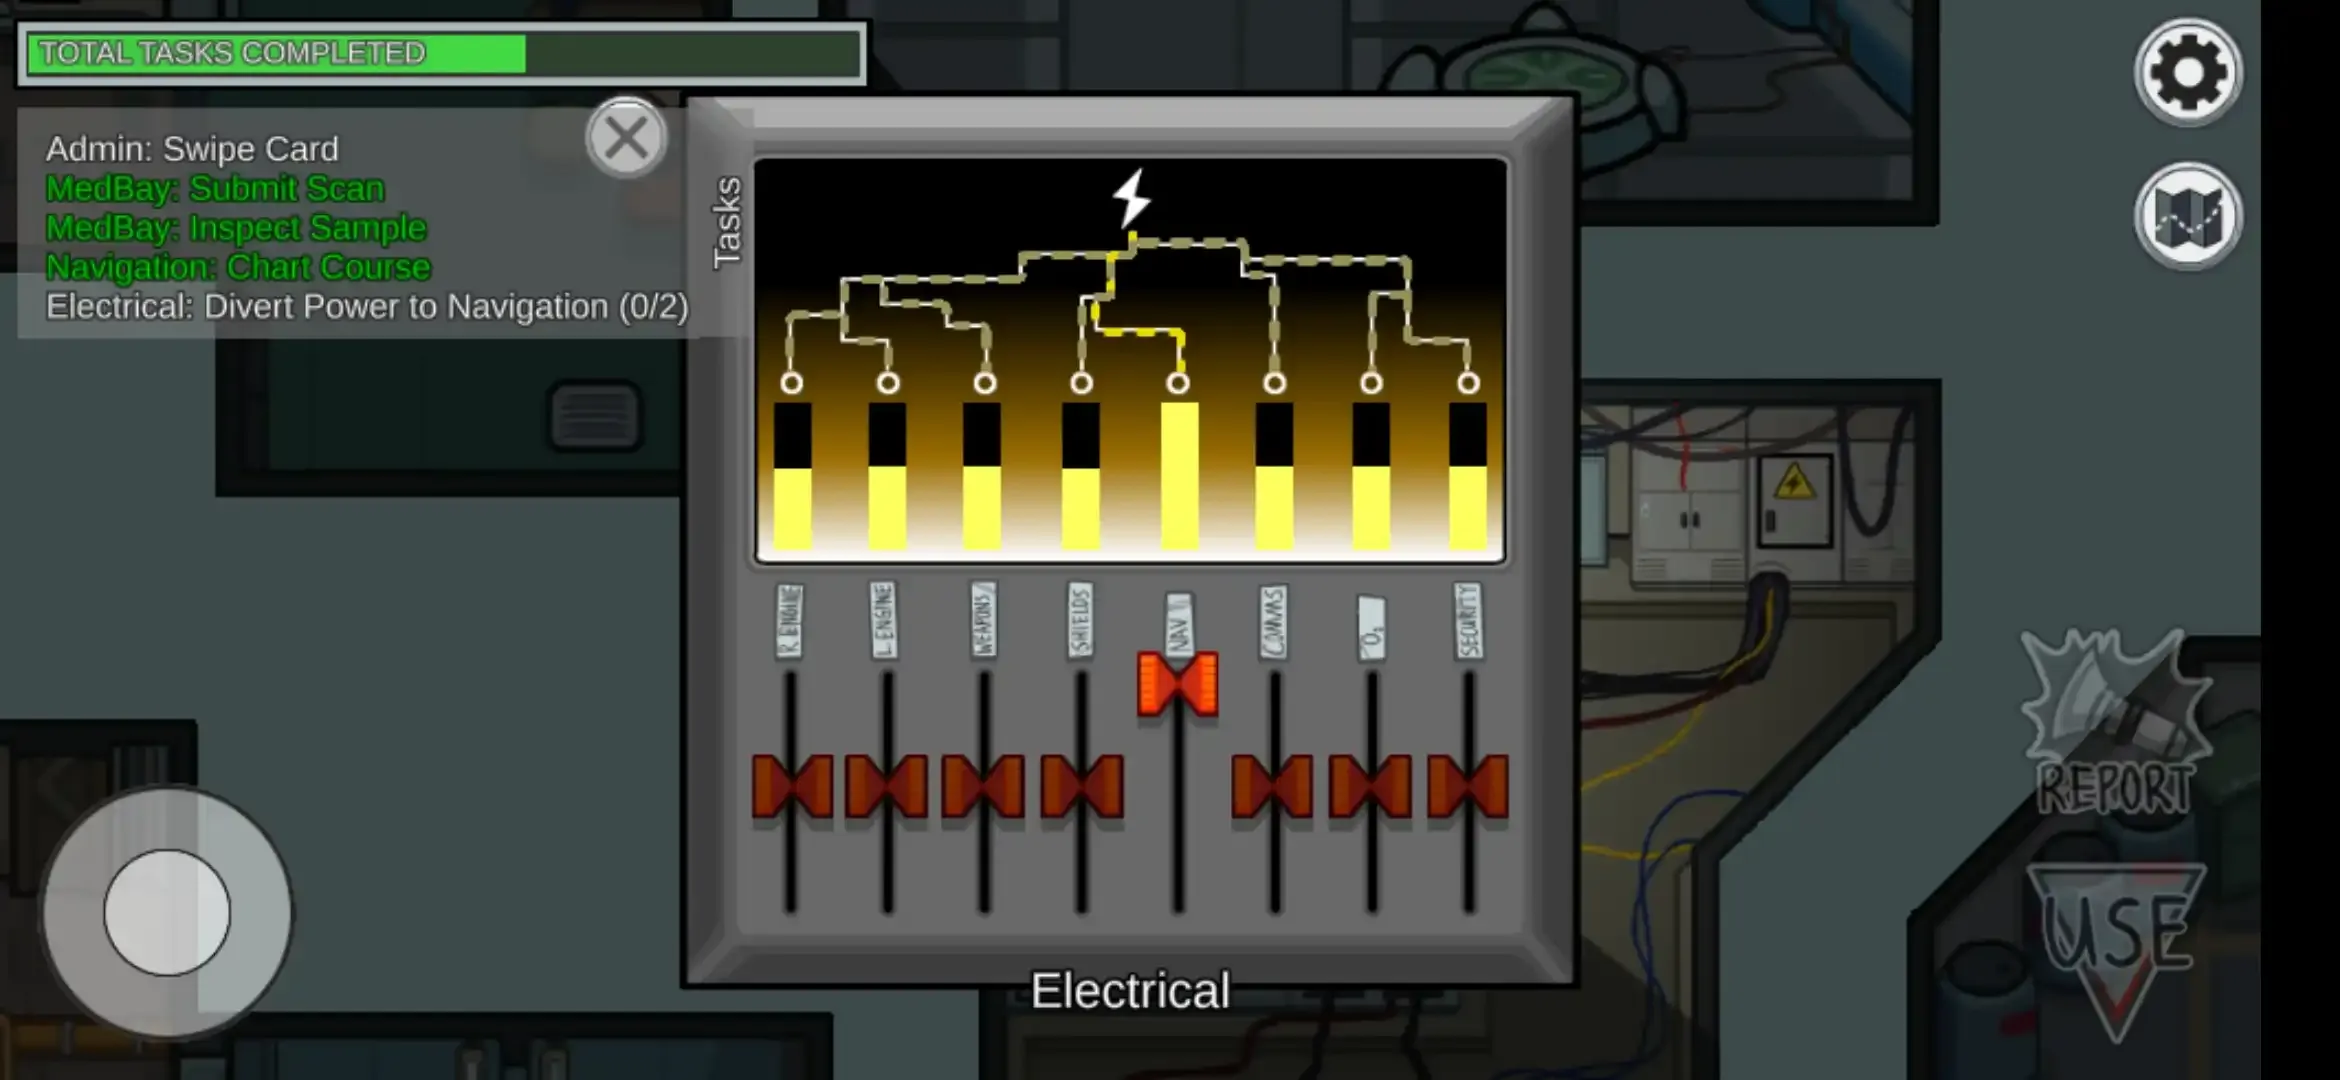
③ Divert power to Navigation –
➤ It is also a long task. It is divided into two stages.
Step 1. Go to the Electric location near the right side of the WI-FI panel and tap use.
which will open an electric supply board. Now find the highlighted red switch with the ‘Nav’ tag. As the task is about to divert power to the Navigationroom, slide the switch to the upper side.
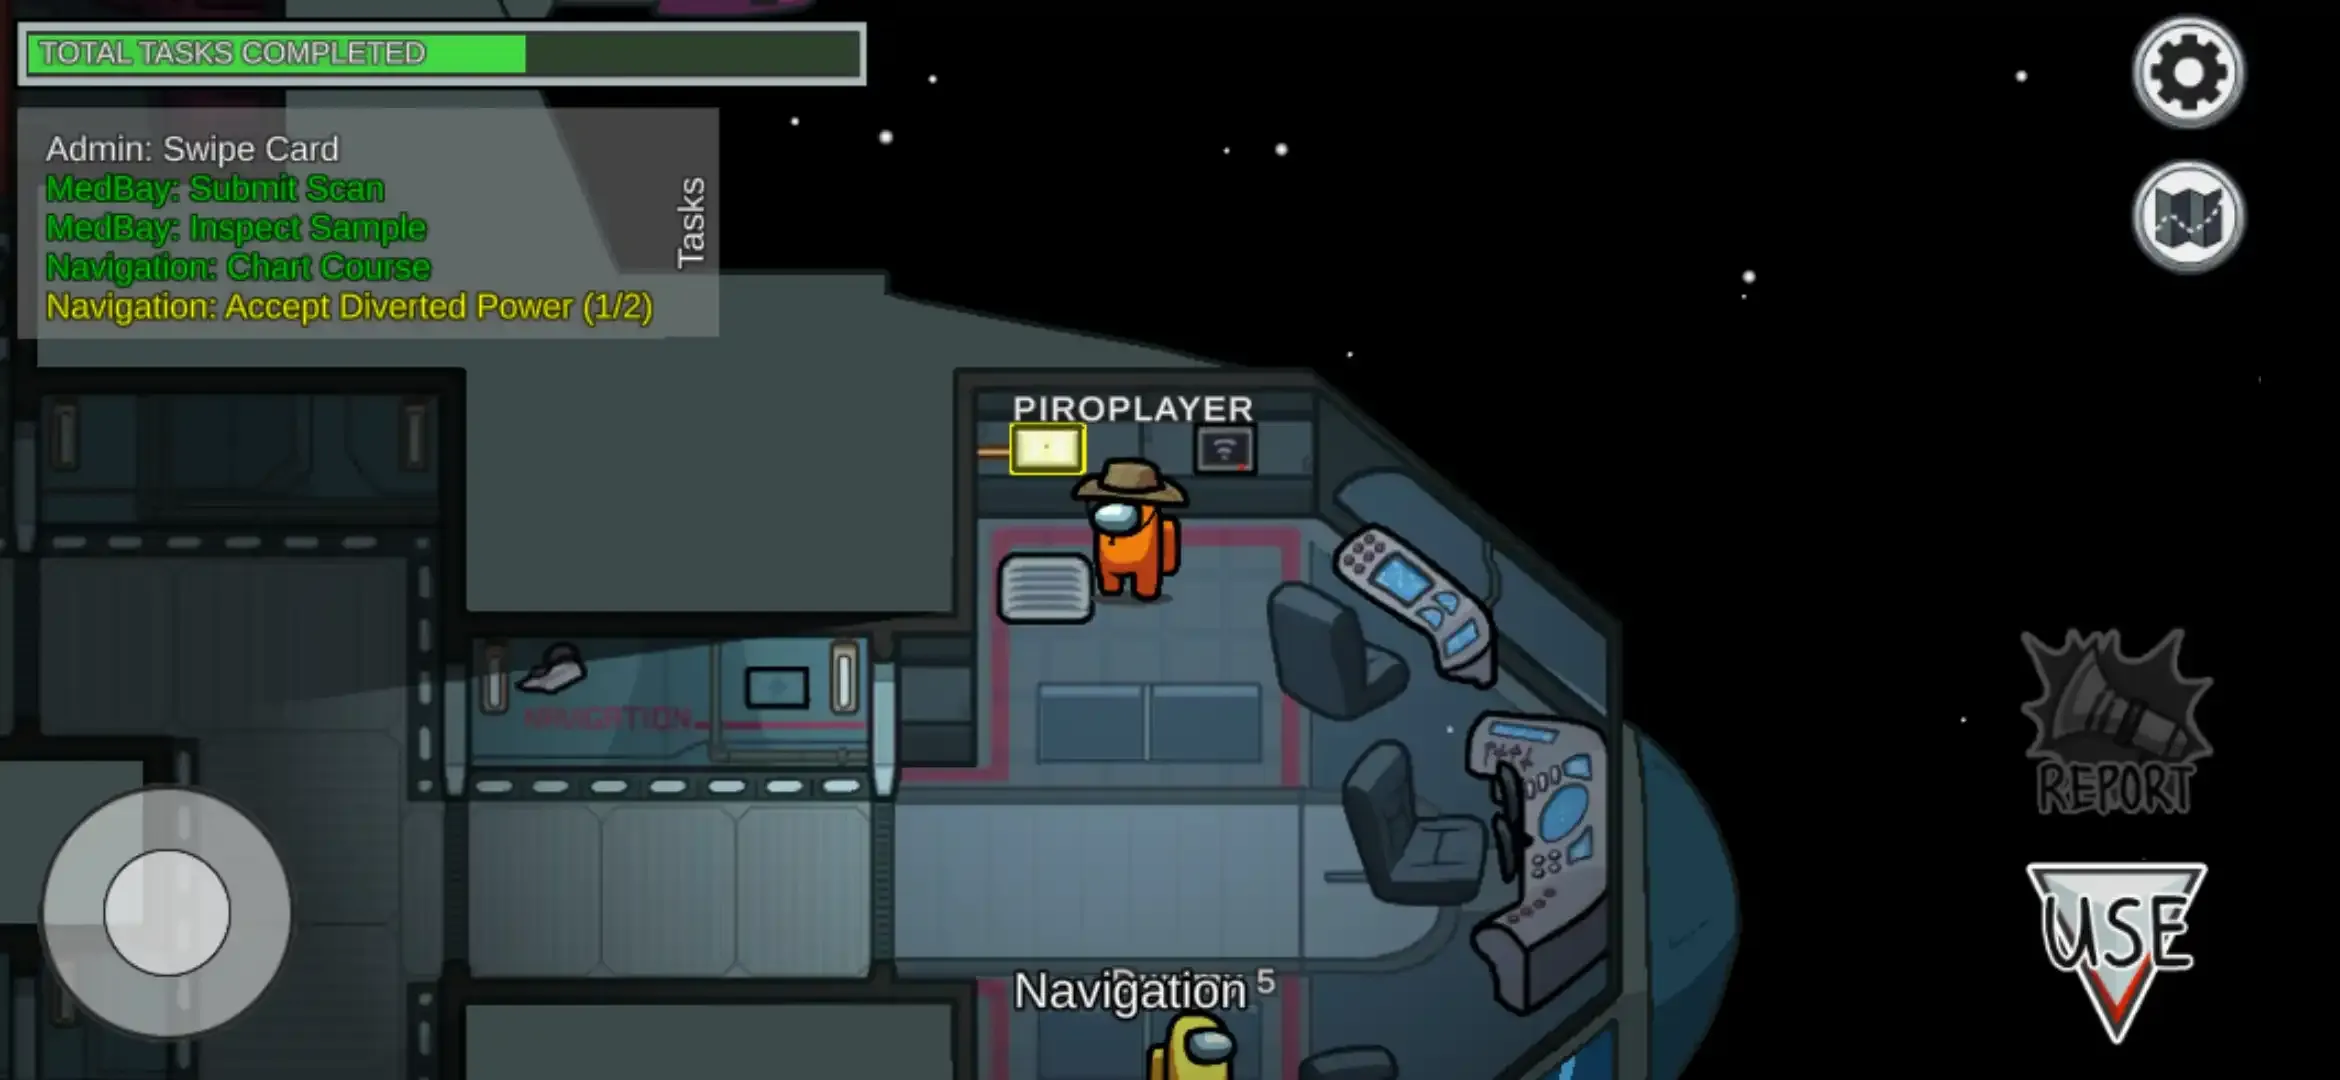
Step 2. Now follow the➤ symbol which will carry you to the power control
panel located in the Navigation room and tap use.
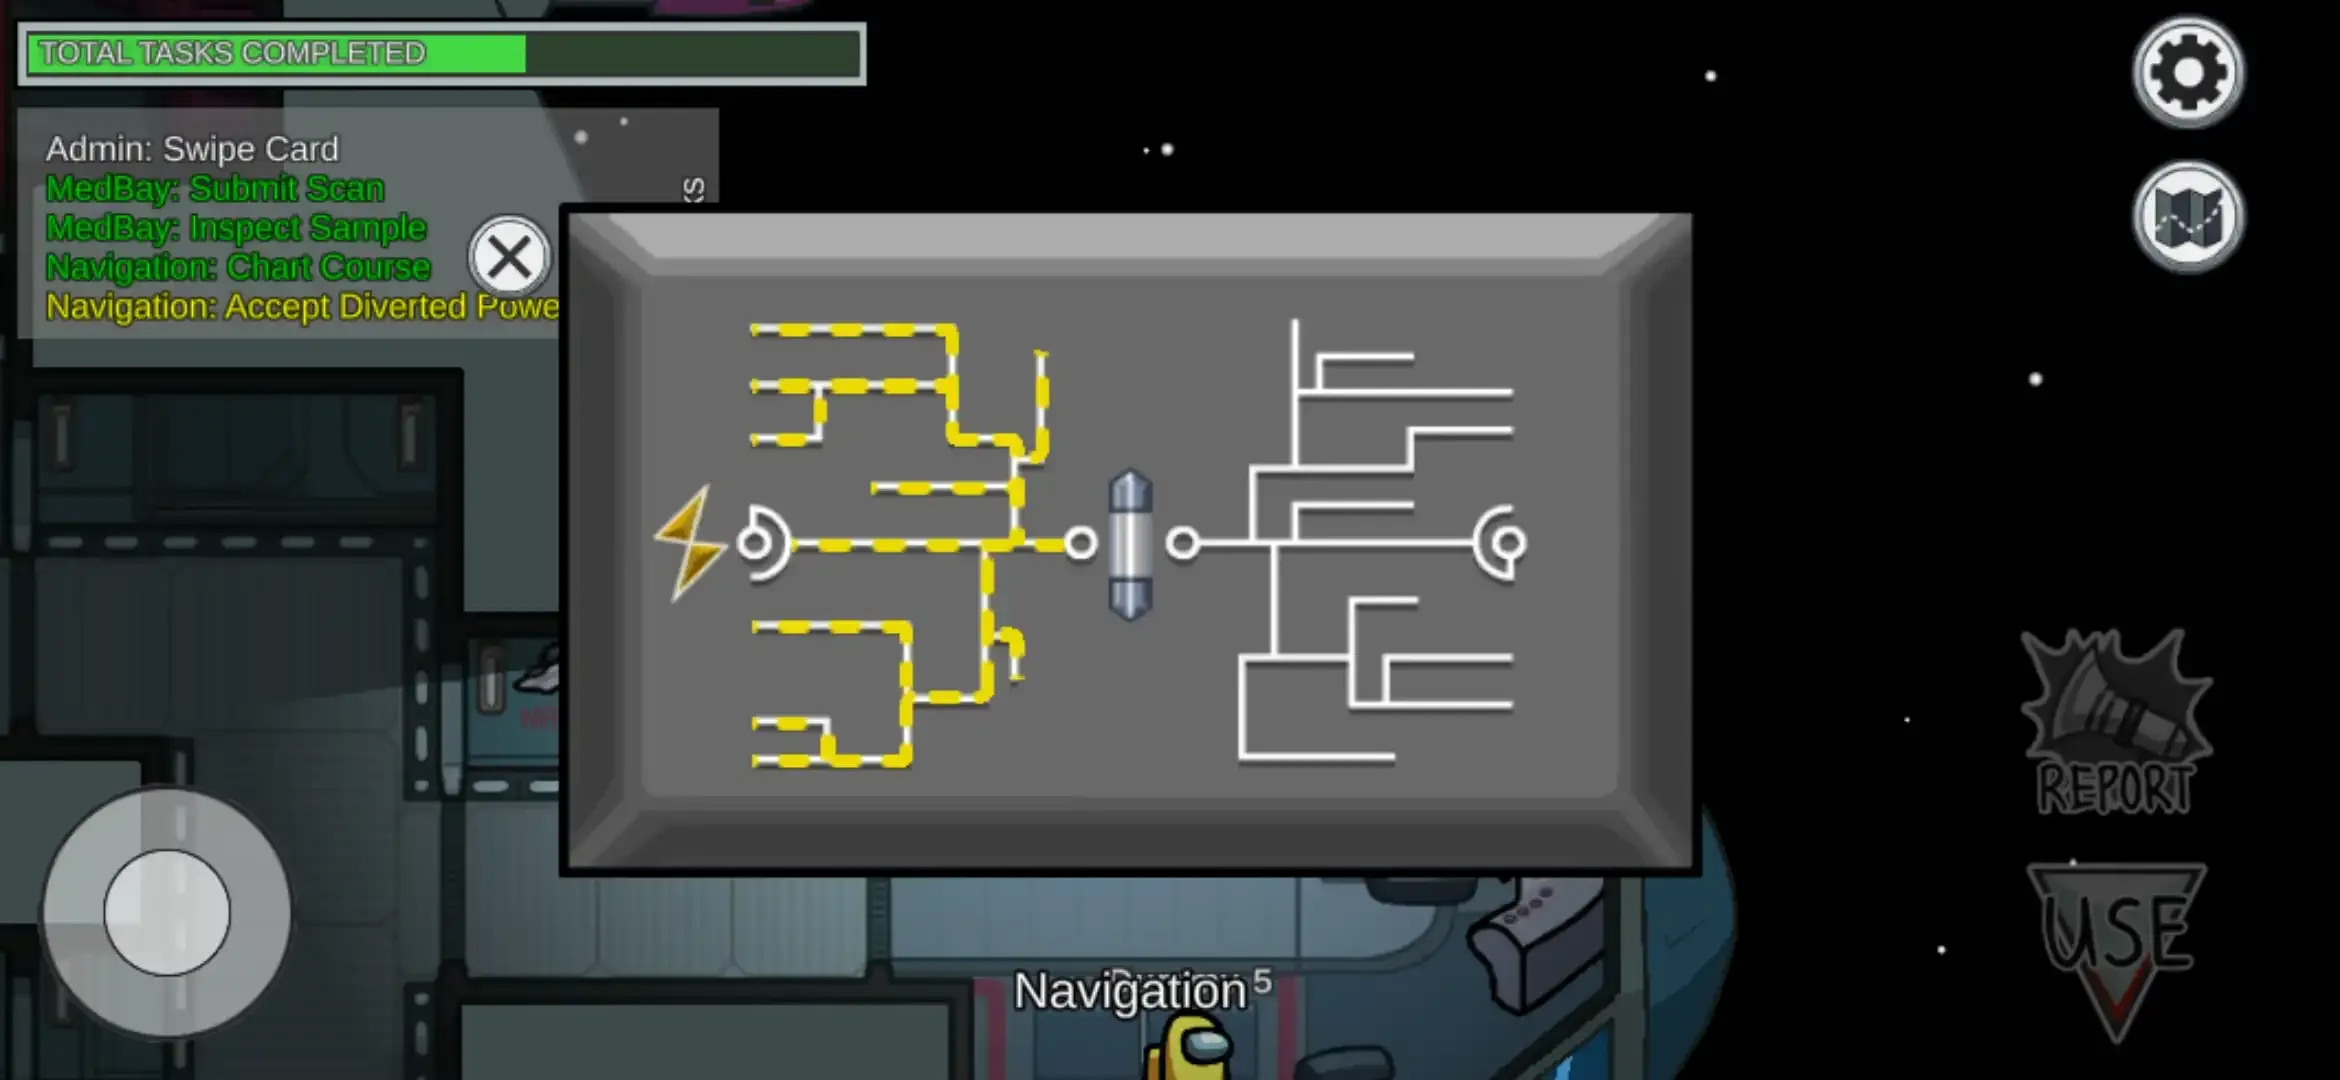
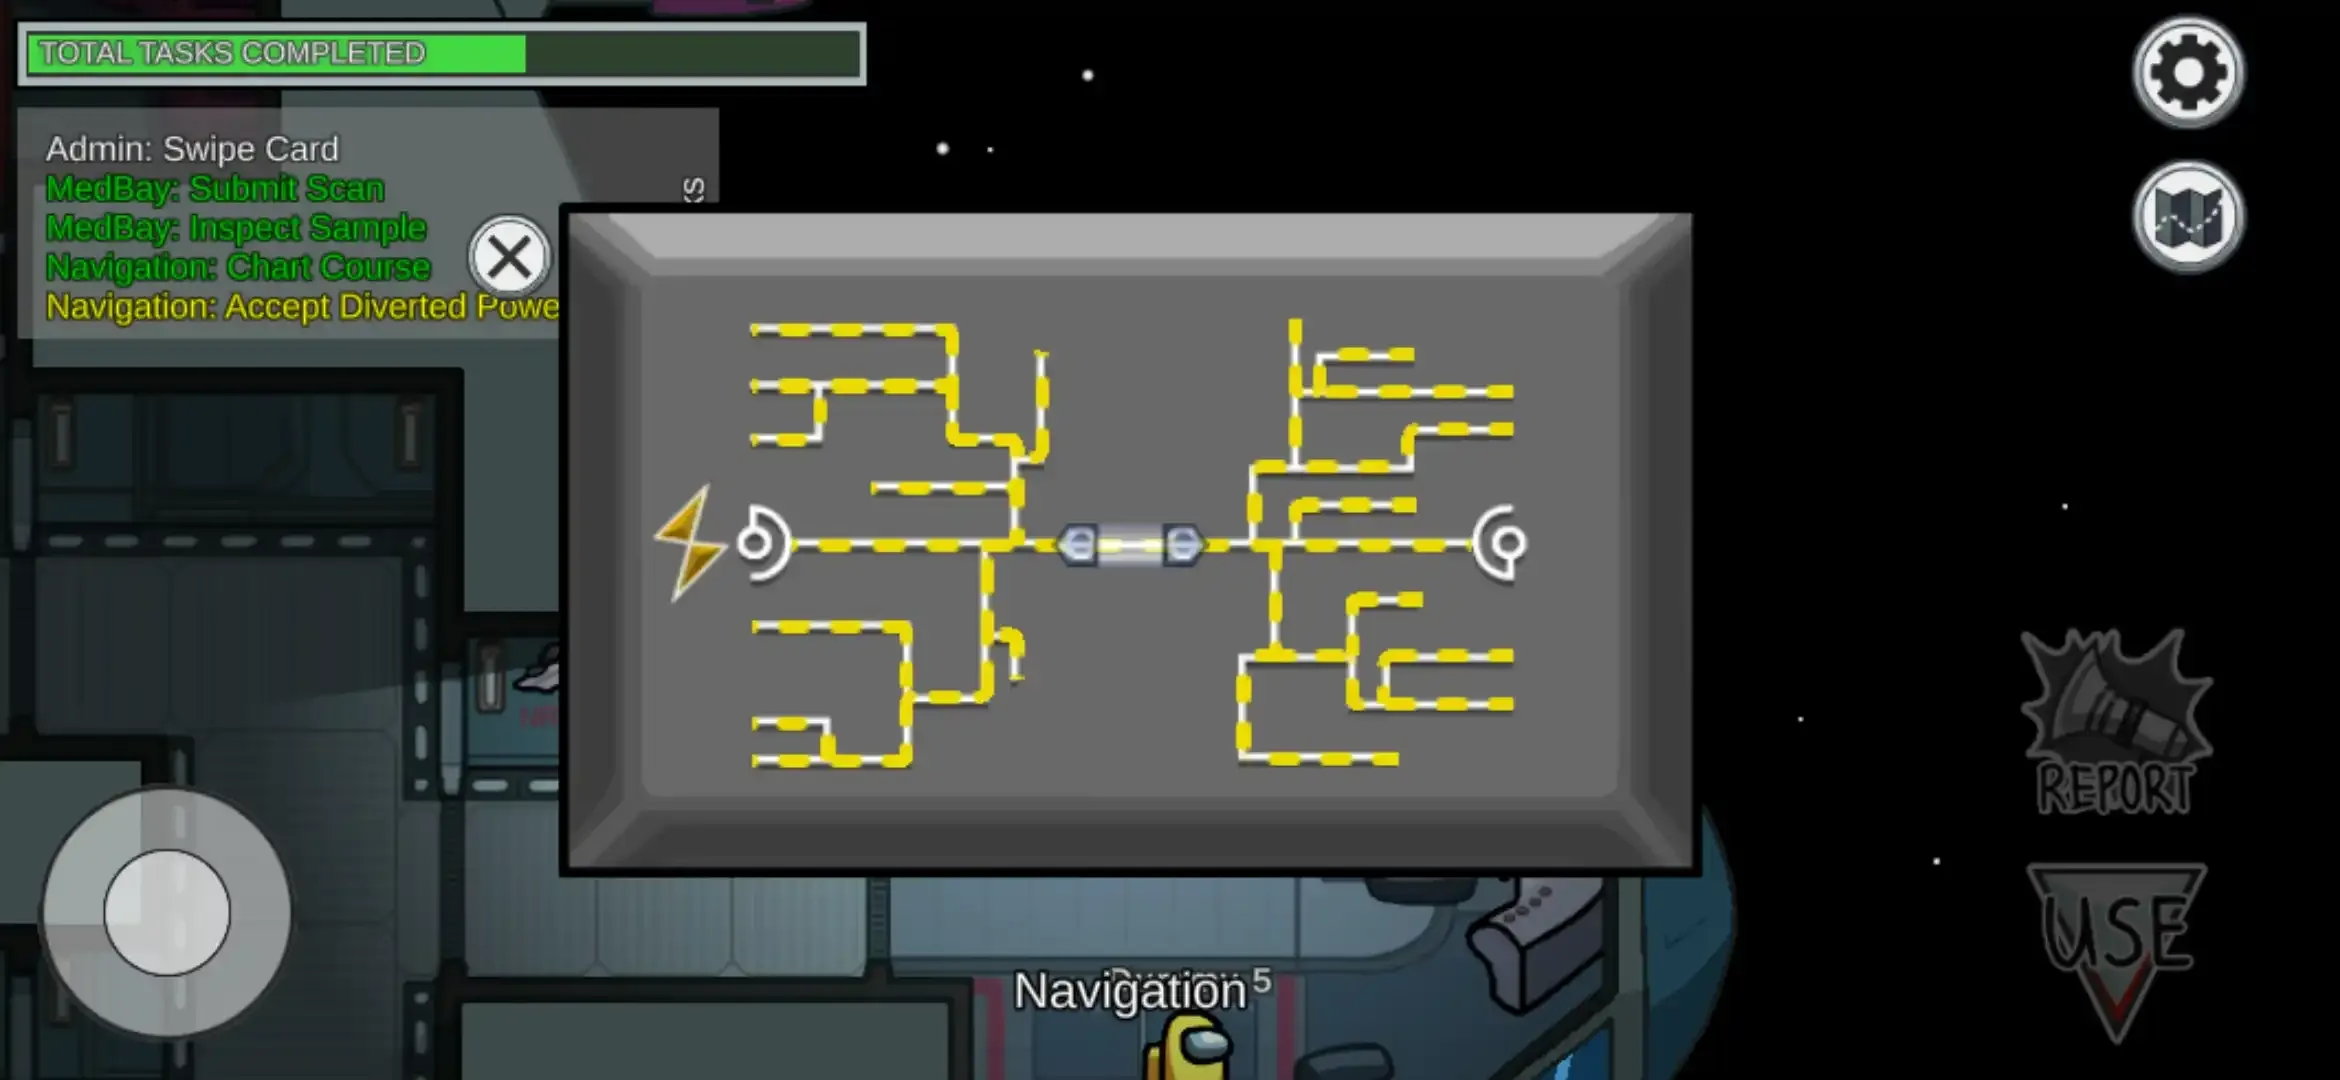
It will open the power supply control box as shown in below screenshot.
Now tap the switch located in the center which will turn on the electric supply to the Navigation room and the task will be completed.
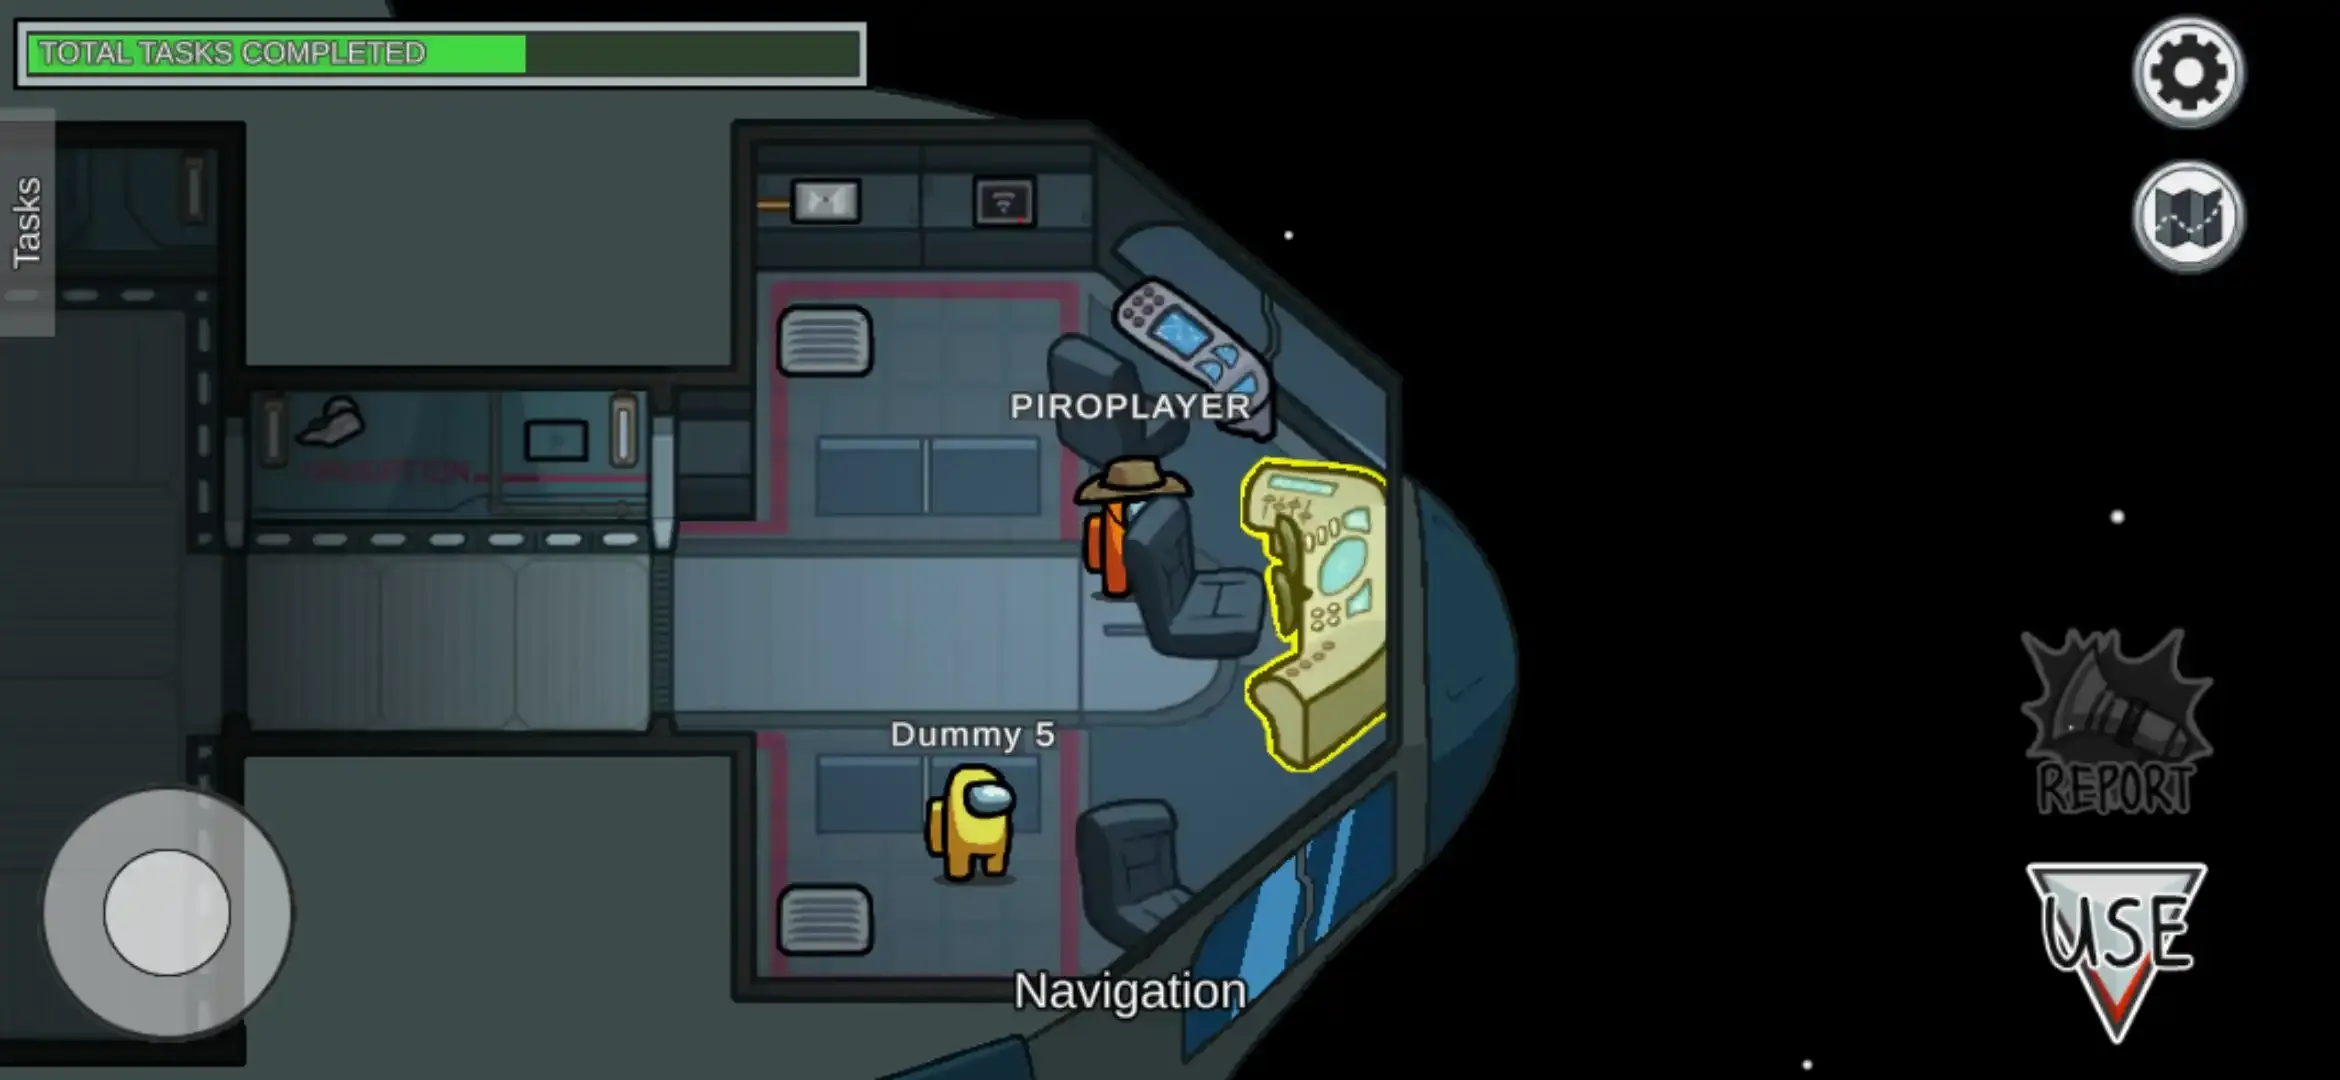
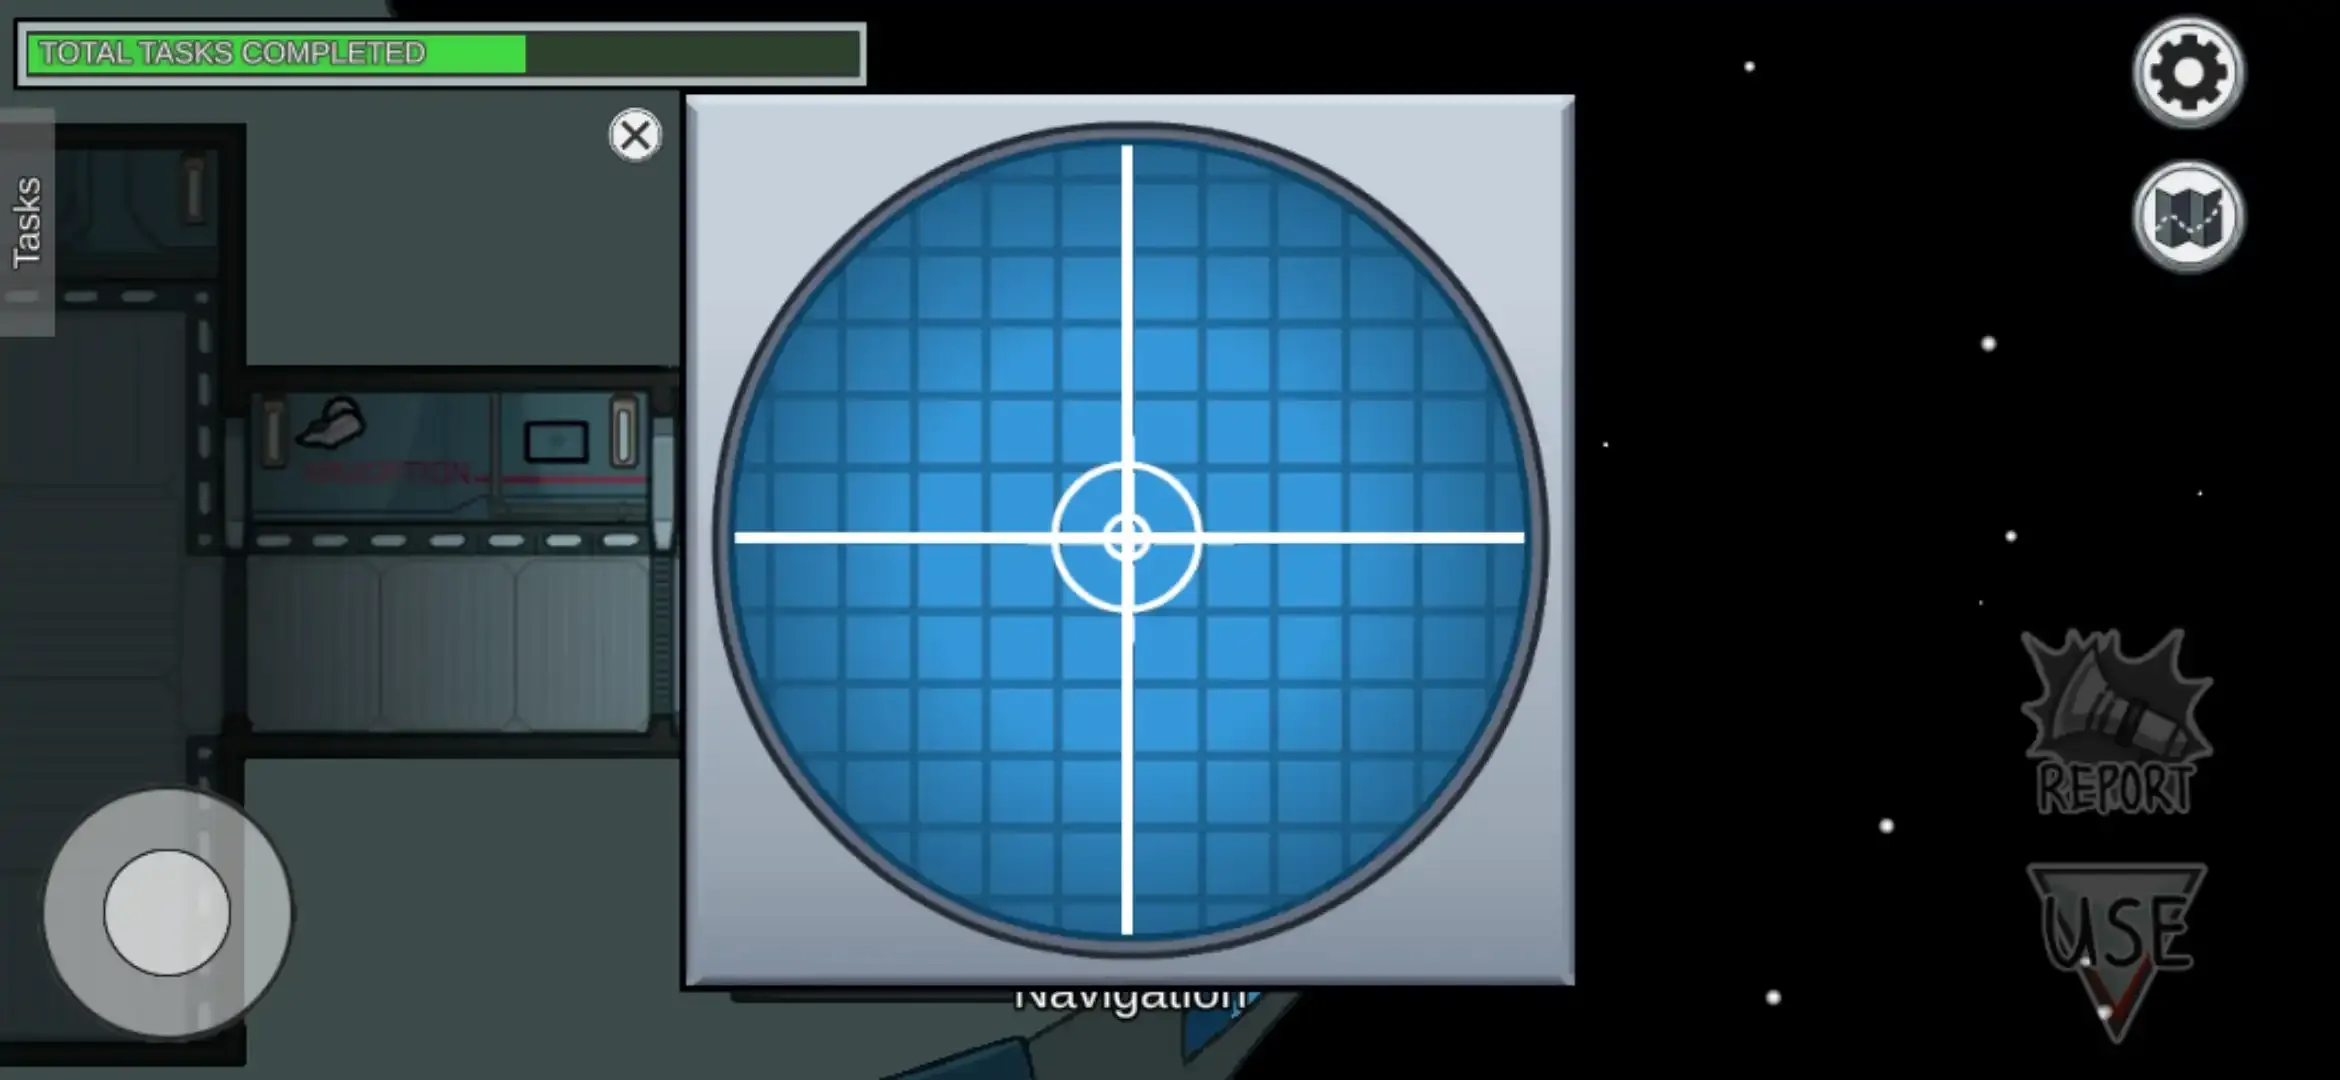
④ Stabilize steering –
➤ It is a short task.
In the Navigation location, go near the right-most table and tap the use button.
which will open a circular blue grid screen like a radar with a center shown with a cross mark and crosshair which is movable. Then you only have to tap or click on the center cross mark after which the movable crosshair will turn into green color and the task will be completed.
[Ⅸ] O2:
① Empty chute –
➤ Empty chute is a Long and Visual type of task. It is divided into two stages.
Step 1.To complete step 1 you must go to a left wall in the O2 location go near the lever and tap ‘use’.
Then one popup will be shown with a lever and garbage.
Now pull down the lever and hold it for about 3-4 seconds, it will throw all garbage outside from the skeld spaceship.
Step 2. After completing the 1st step follow the ➤ symbol which will let you to a storage area in the bottom area and tap the ‘use’.
Then, similarly to the 1st step pull the lever down and hold for about 3-4 seconds, it will throw all garbage outside from the skeld spaceship.
②Divert power to O2 –
➤ It is also a long task. It is divided into two stages.
Step 1. Go to the Electrical location near the right side of the WI-FI panel and tap use.
which will open an electric supply board. Now find the highlighted red switch with the ‘O2‘ tag. As the task is about to divert power to the O2room, slide the switch to the upper side.
Step 2. Now follow the➤ symbol which will carry you to the power control panel located in the O2 room and tap use.
which will open the power supply control box. Now tap the switch located in the center which will turn on the electric supply to the O2 room and the task will be completed.
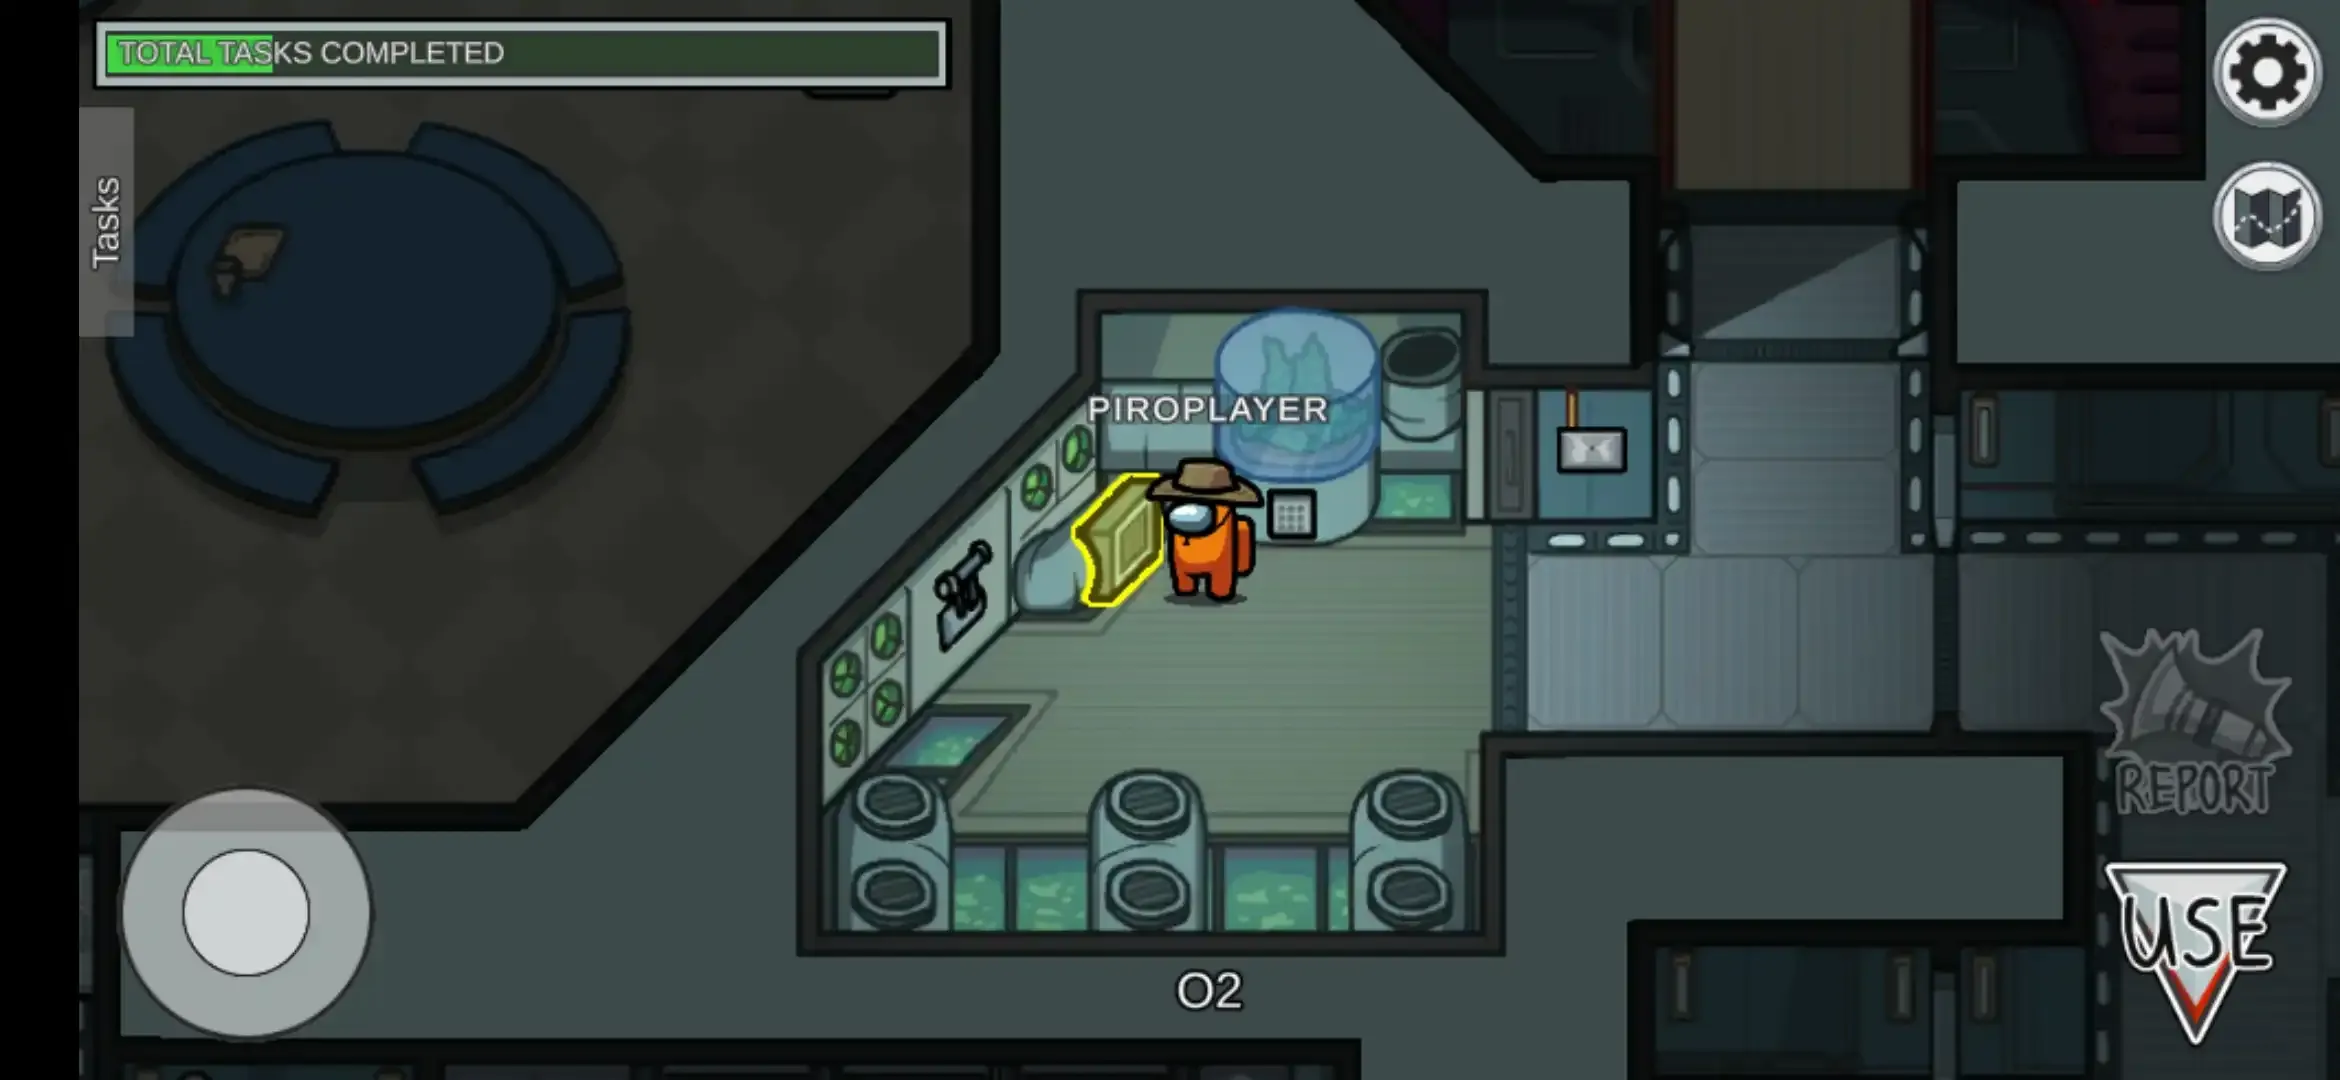
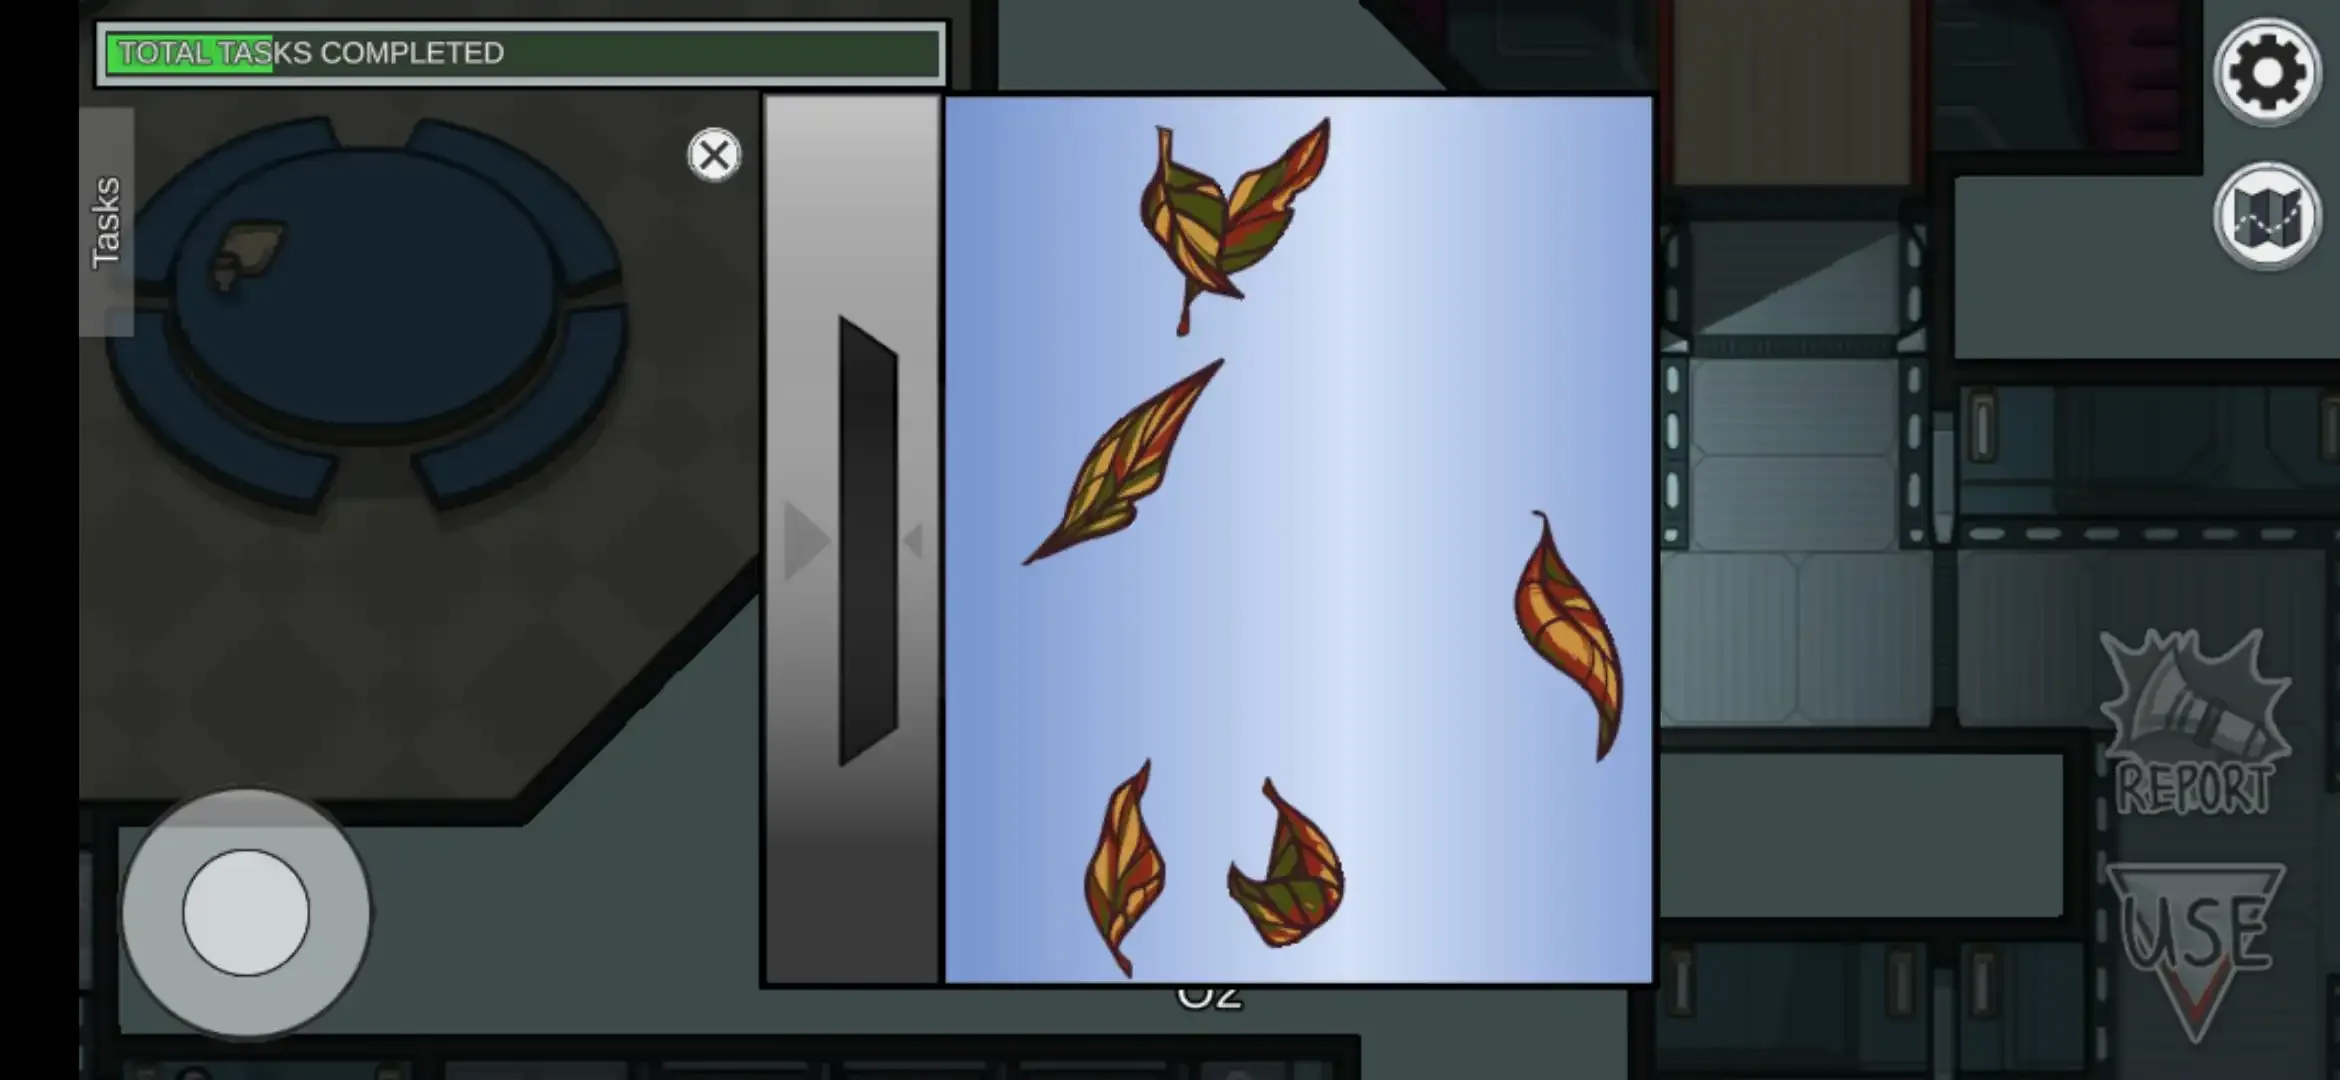
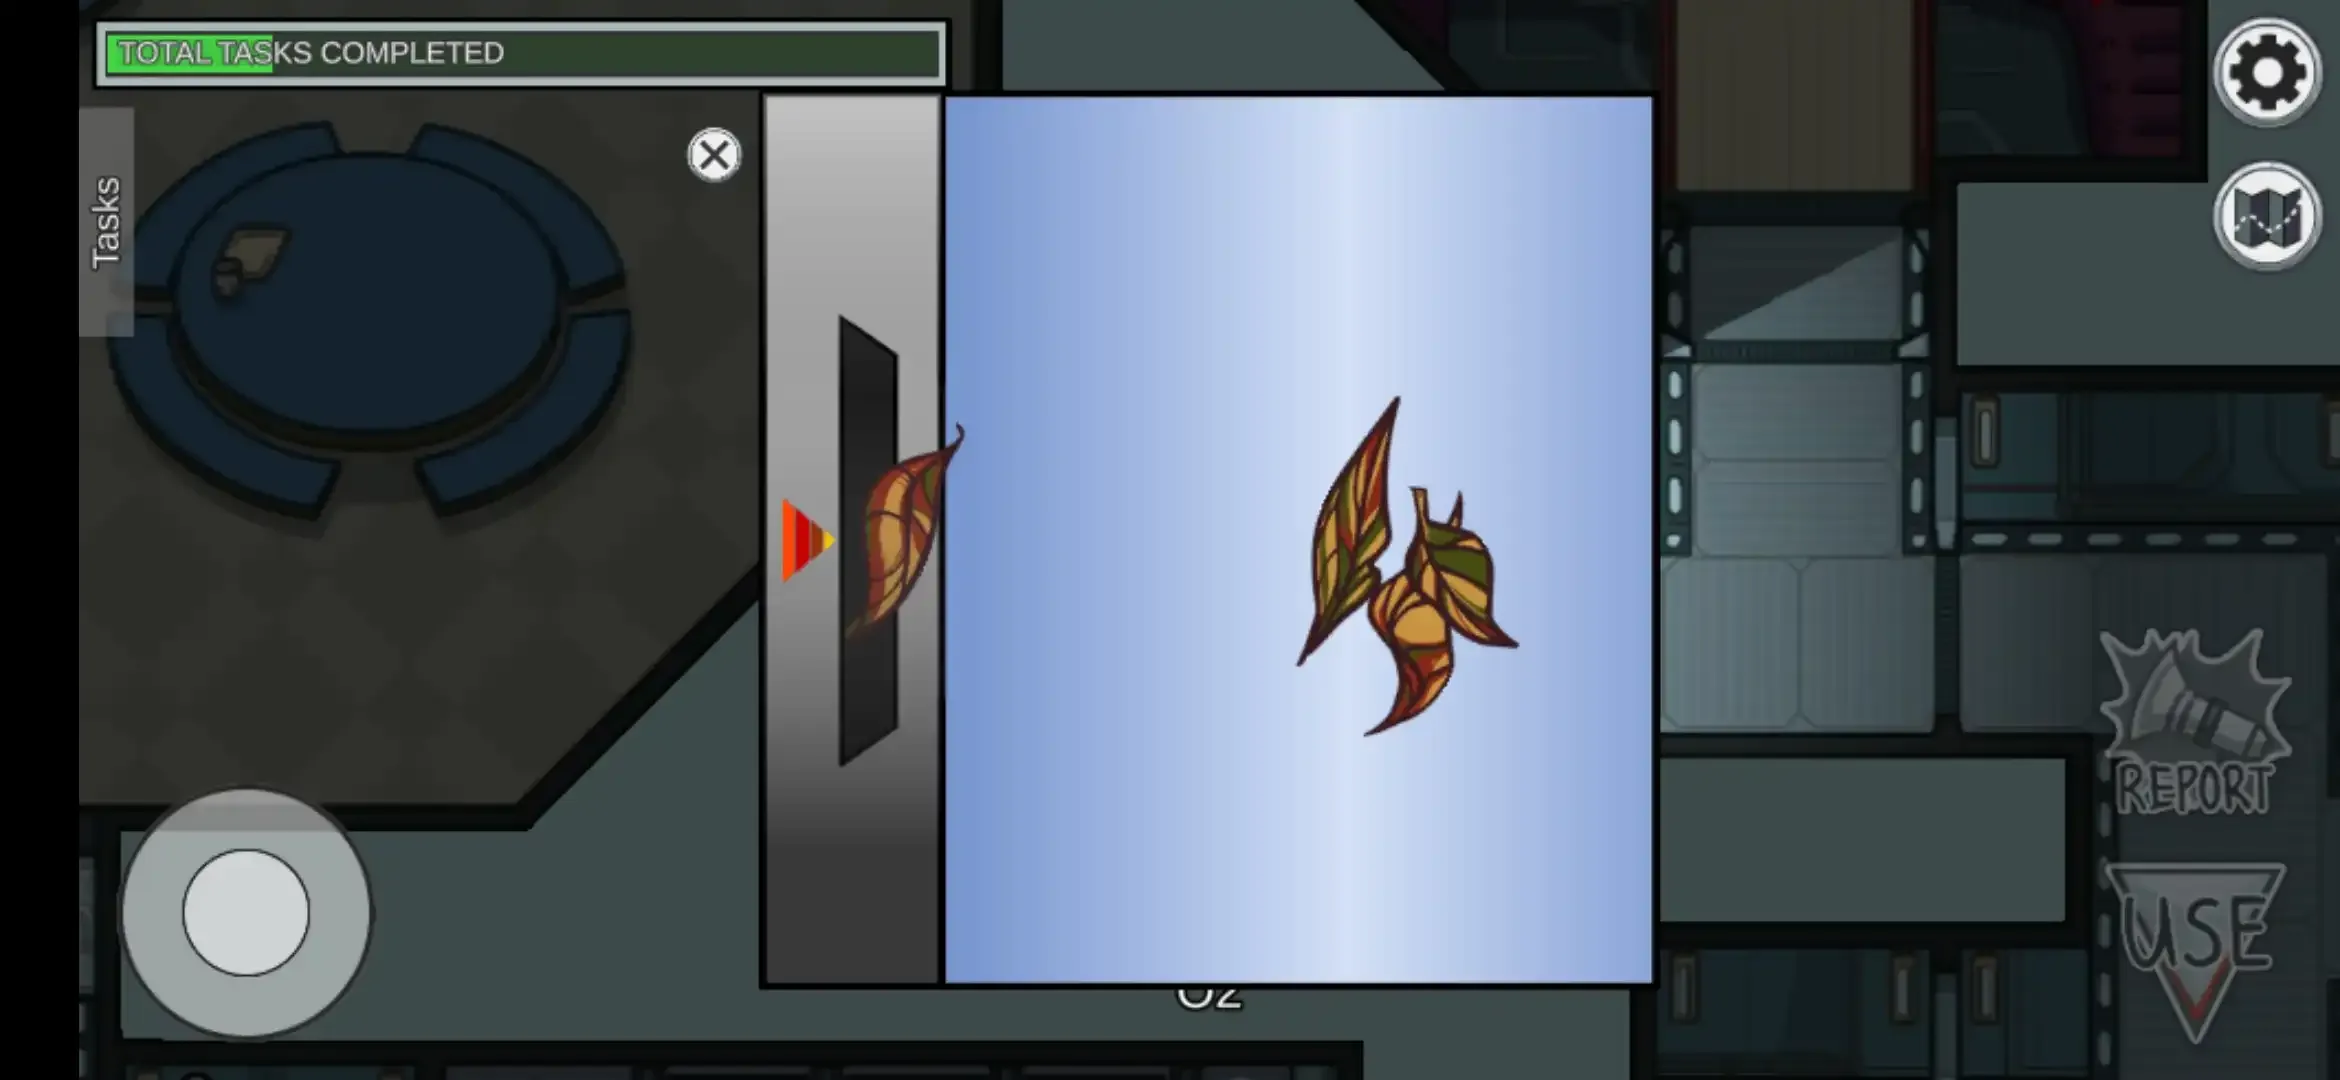
③ Clean O2 filter –
➤ It is a short task.
In the O2 location go near the filter which looks squarish and tap or click use.
then one window will open having some waste, as shown in the screenshot below.
To complete this task long tap or click each waste one by one and slide them to the left side space, to complete the task.
[Ⅹ] Reactor:
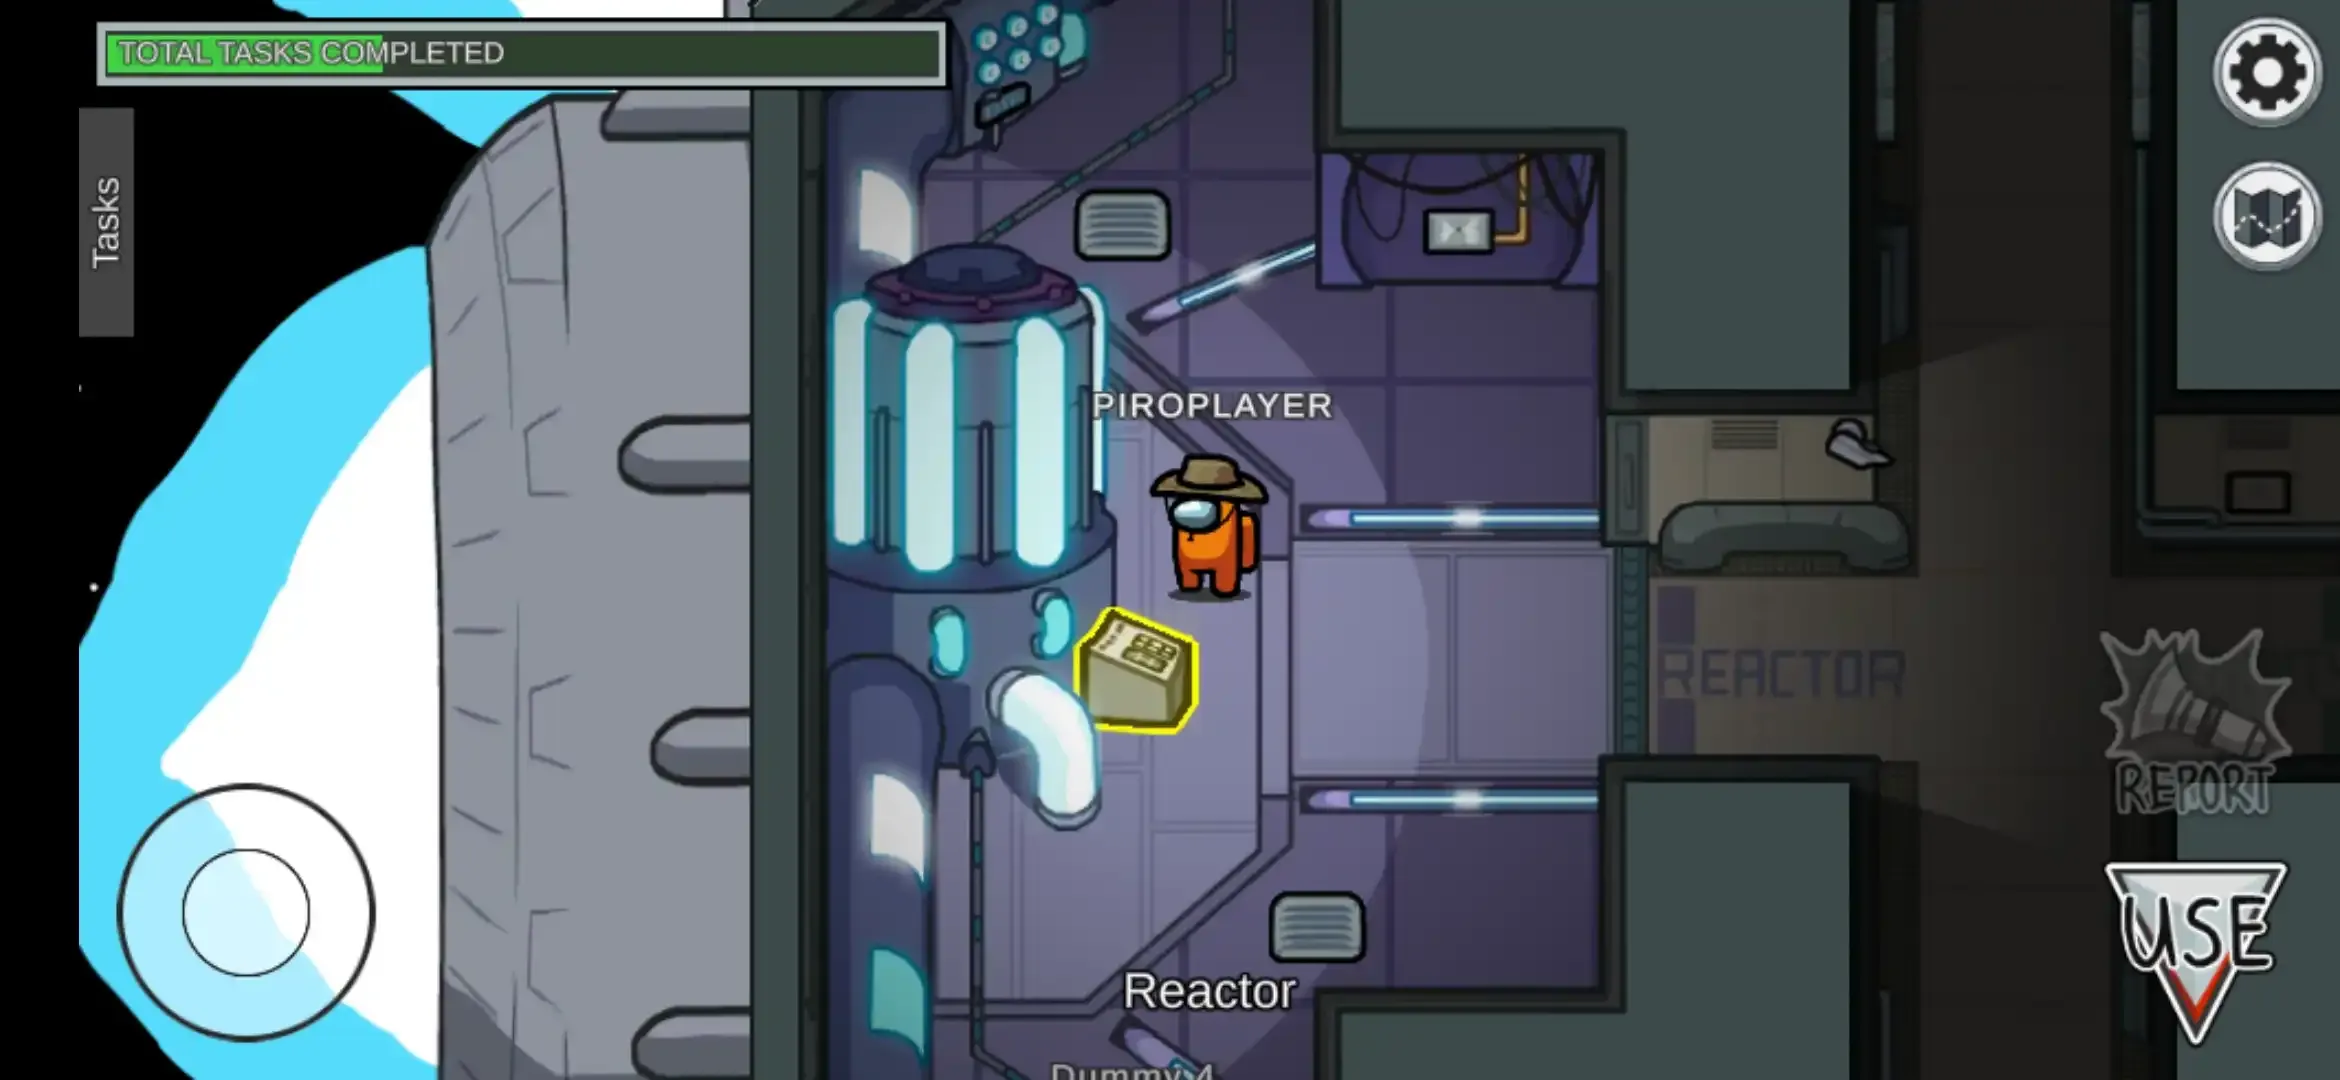
① Start Reactor –
➤ It is a long task, and it is one of the hard task to complete in Skeld map.
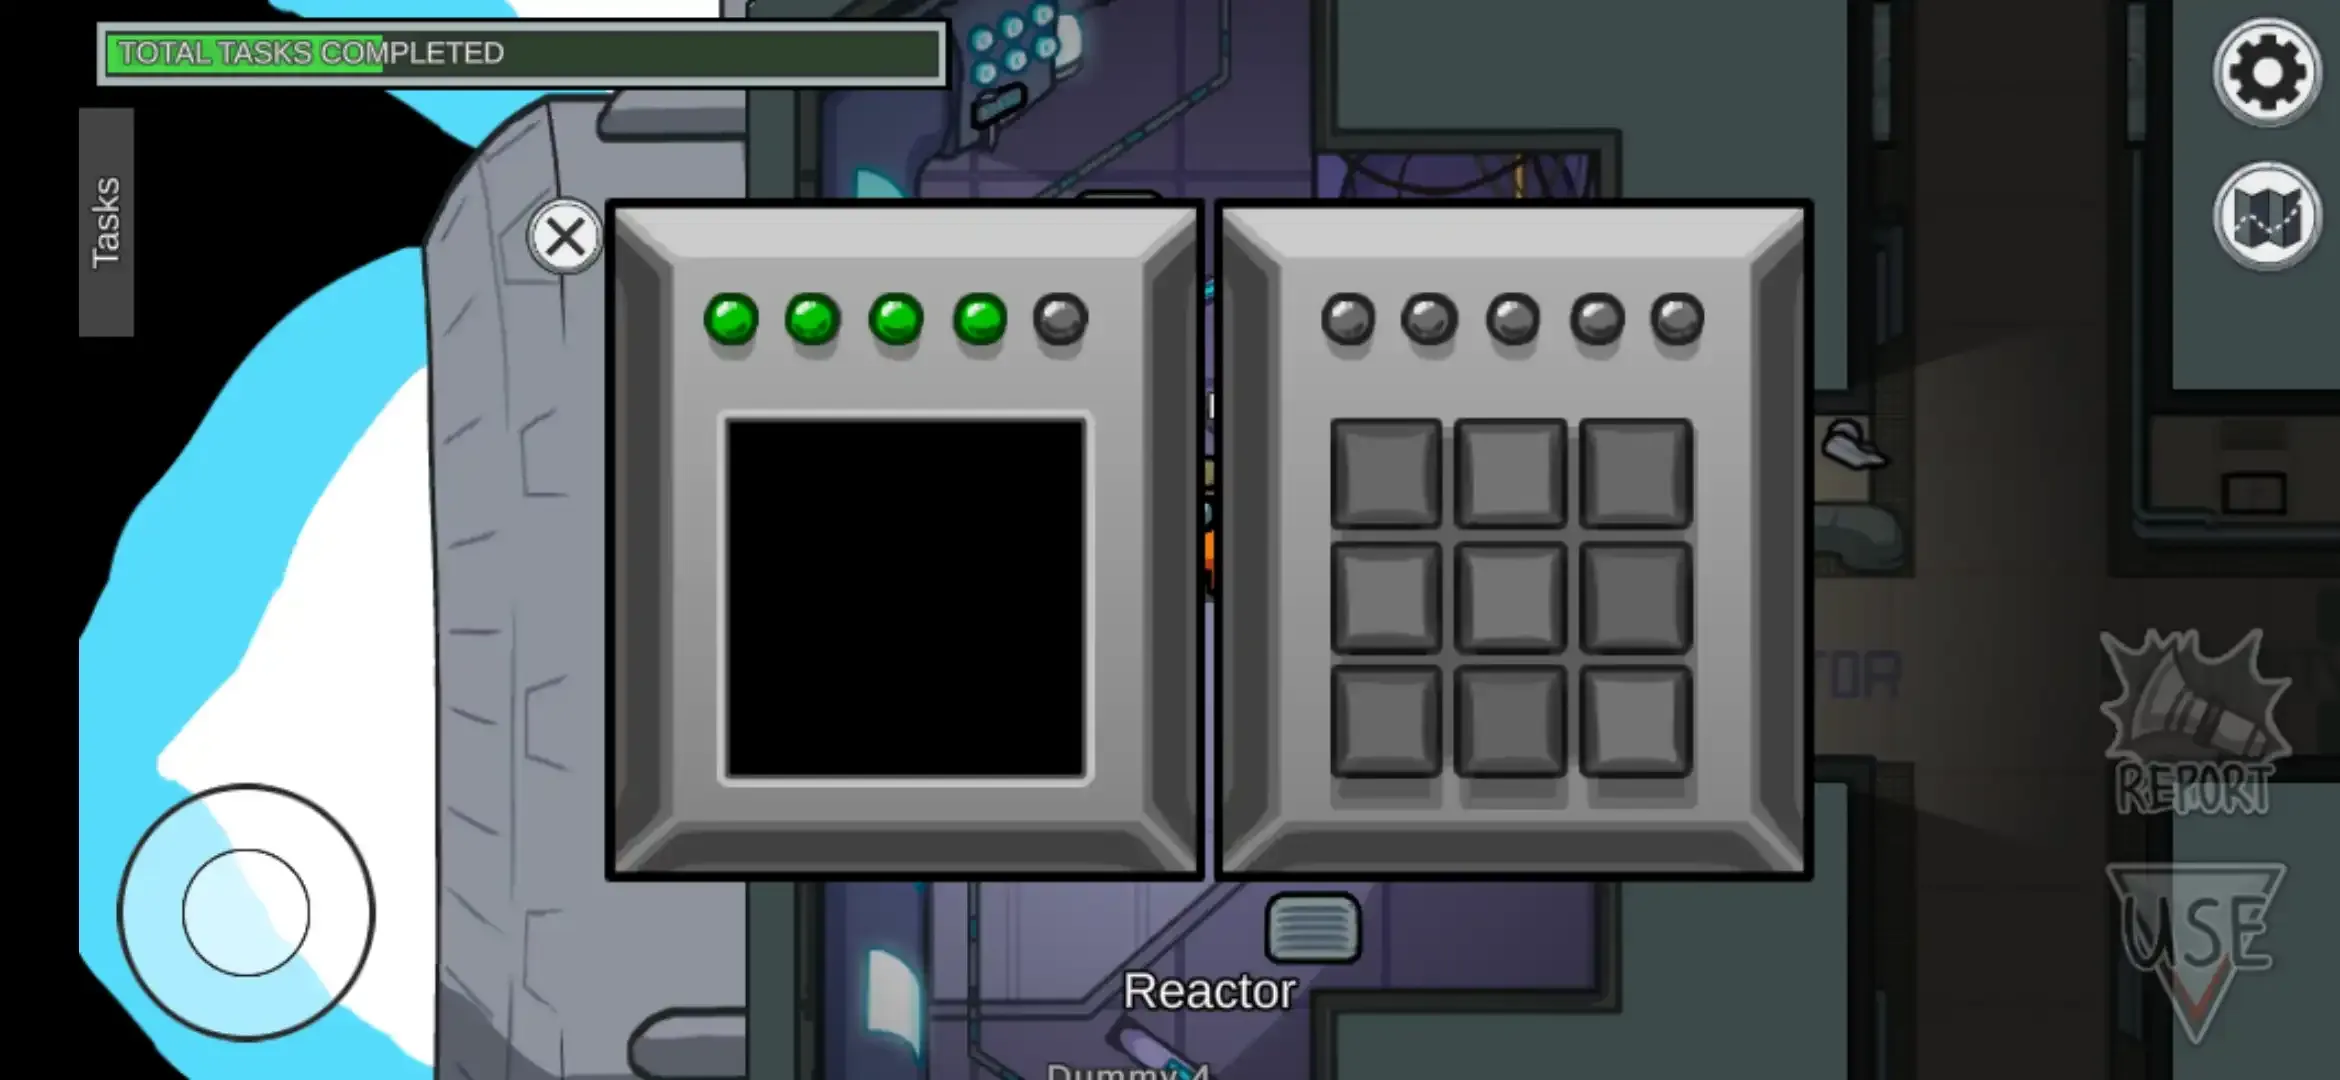
In the Reactor location, go near the control panel which is right there attached to Reactor, now tap or click the use button.
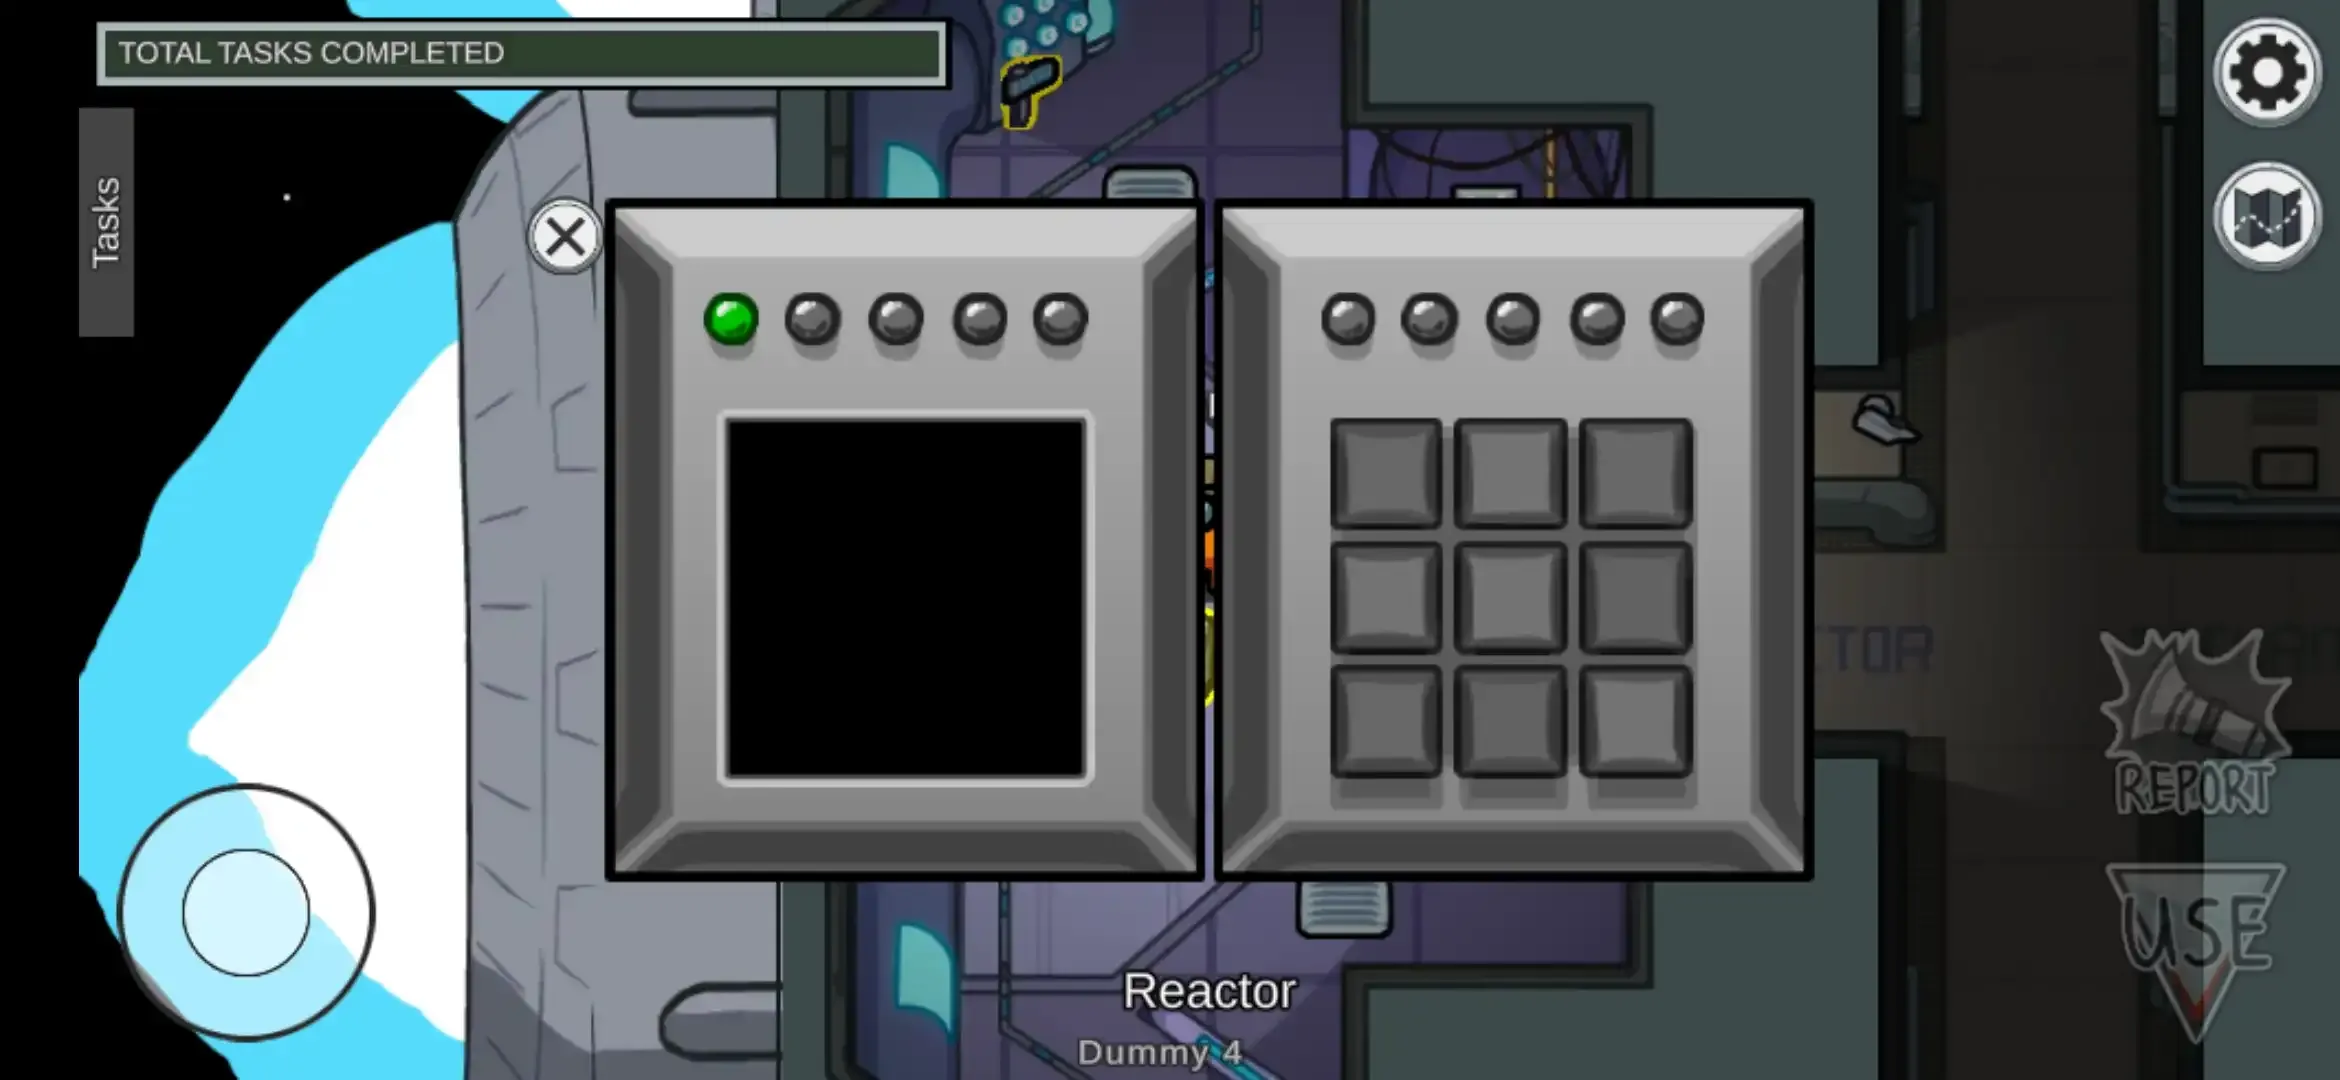
On one screen, 9 buttons and 10 indicators will be visible as shown in the screenshot below.
To complete this task memorize five blue square pattern one by one which is shown to the left side and replicate using a keypad on the right side one by one.
A
s you replicate one pattern next pattern will be nearly the same as the previous pattern just one blue square is added. If you replicate the pattern in a wrong way you have to enter the pattern from start again.
② Unlock Manifolds –
➤ It is a short task.
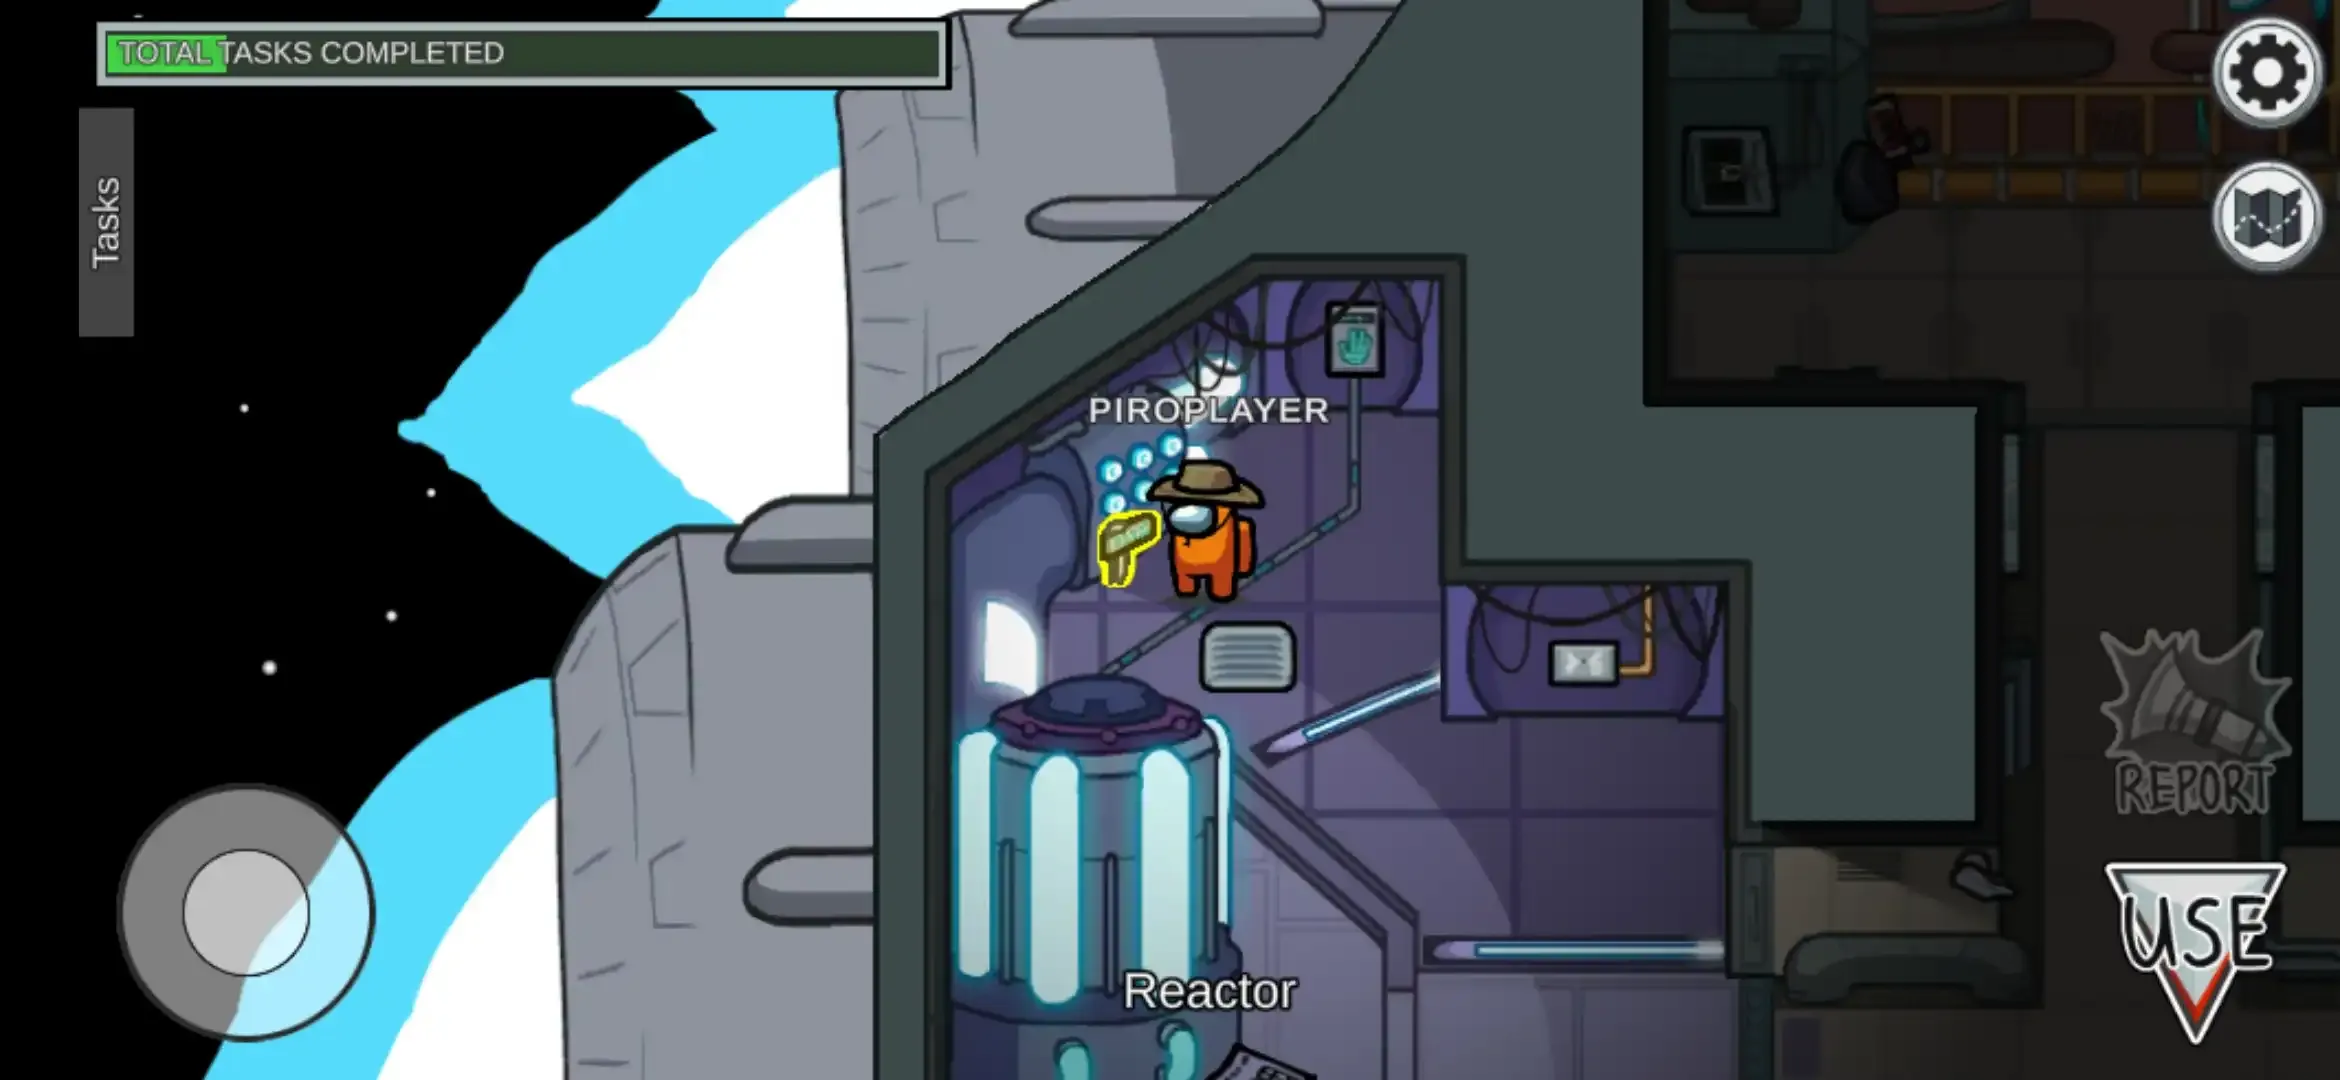
In the Reactor location, go near the panel which is located to the upper-left side near the vent. Tap or click the ‘use’ button.
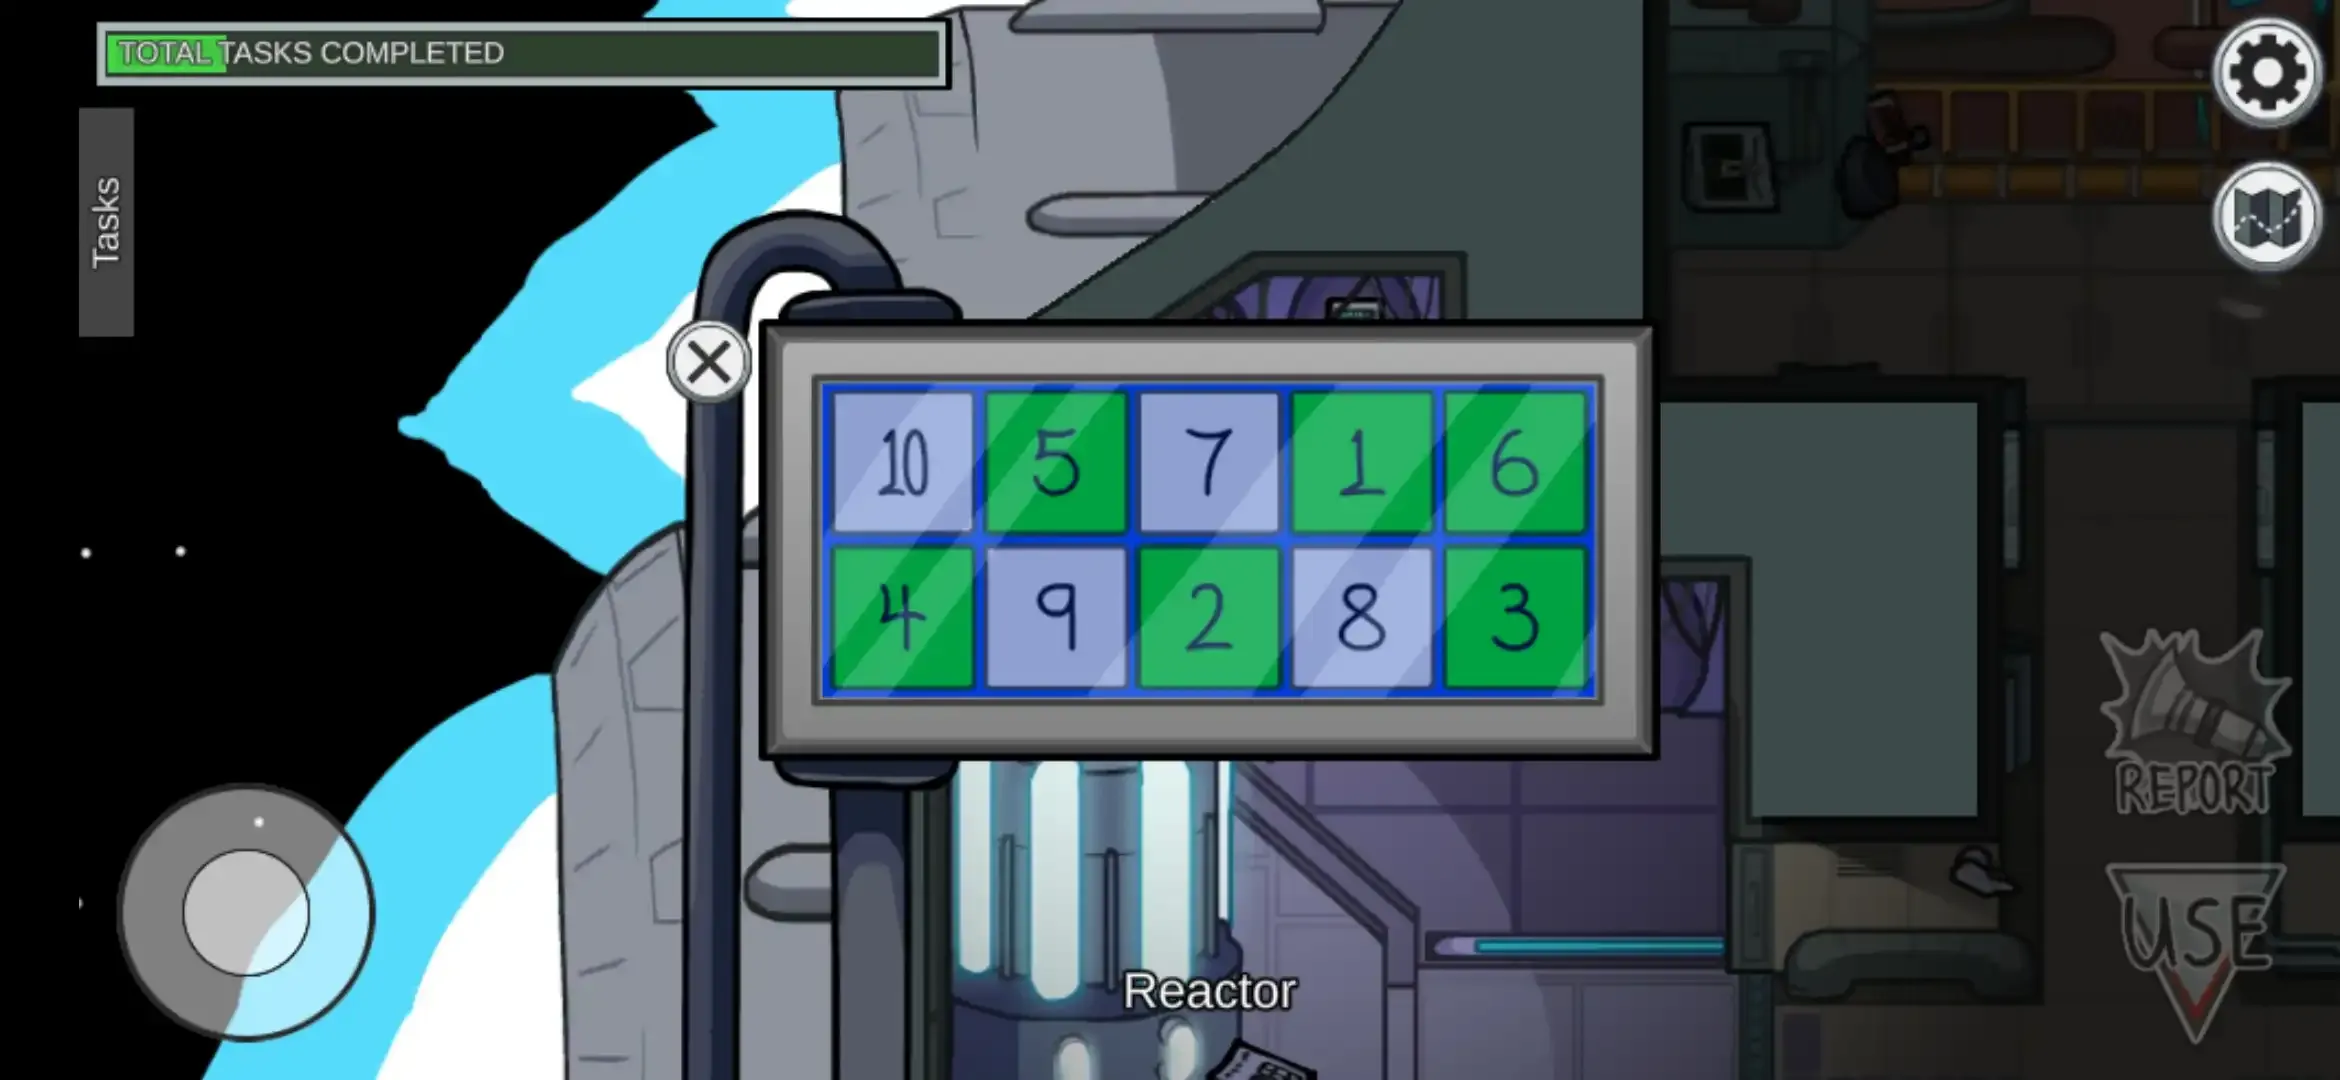
1 to 10 numbers will be shown to you, now to complete this task as shown in screenshot below.
Now you just have to tap or click numbers in ascending order i.e 1, 2, 3, 4, 5, 6, 7, 8, 9, 10.
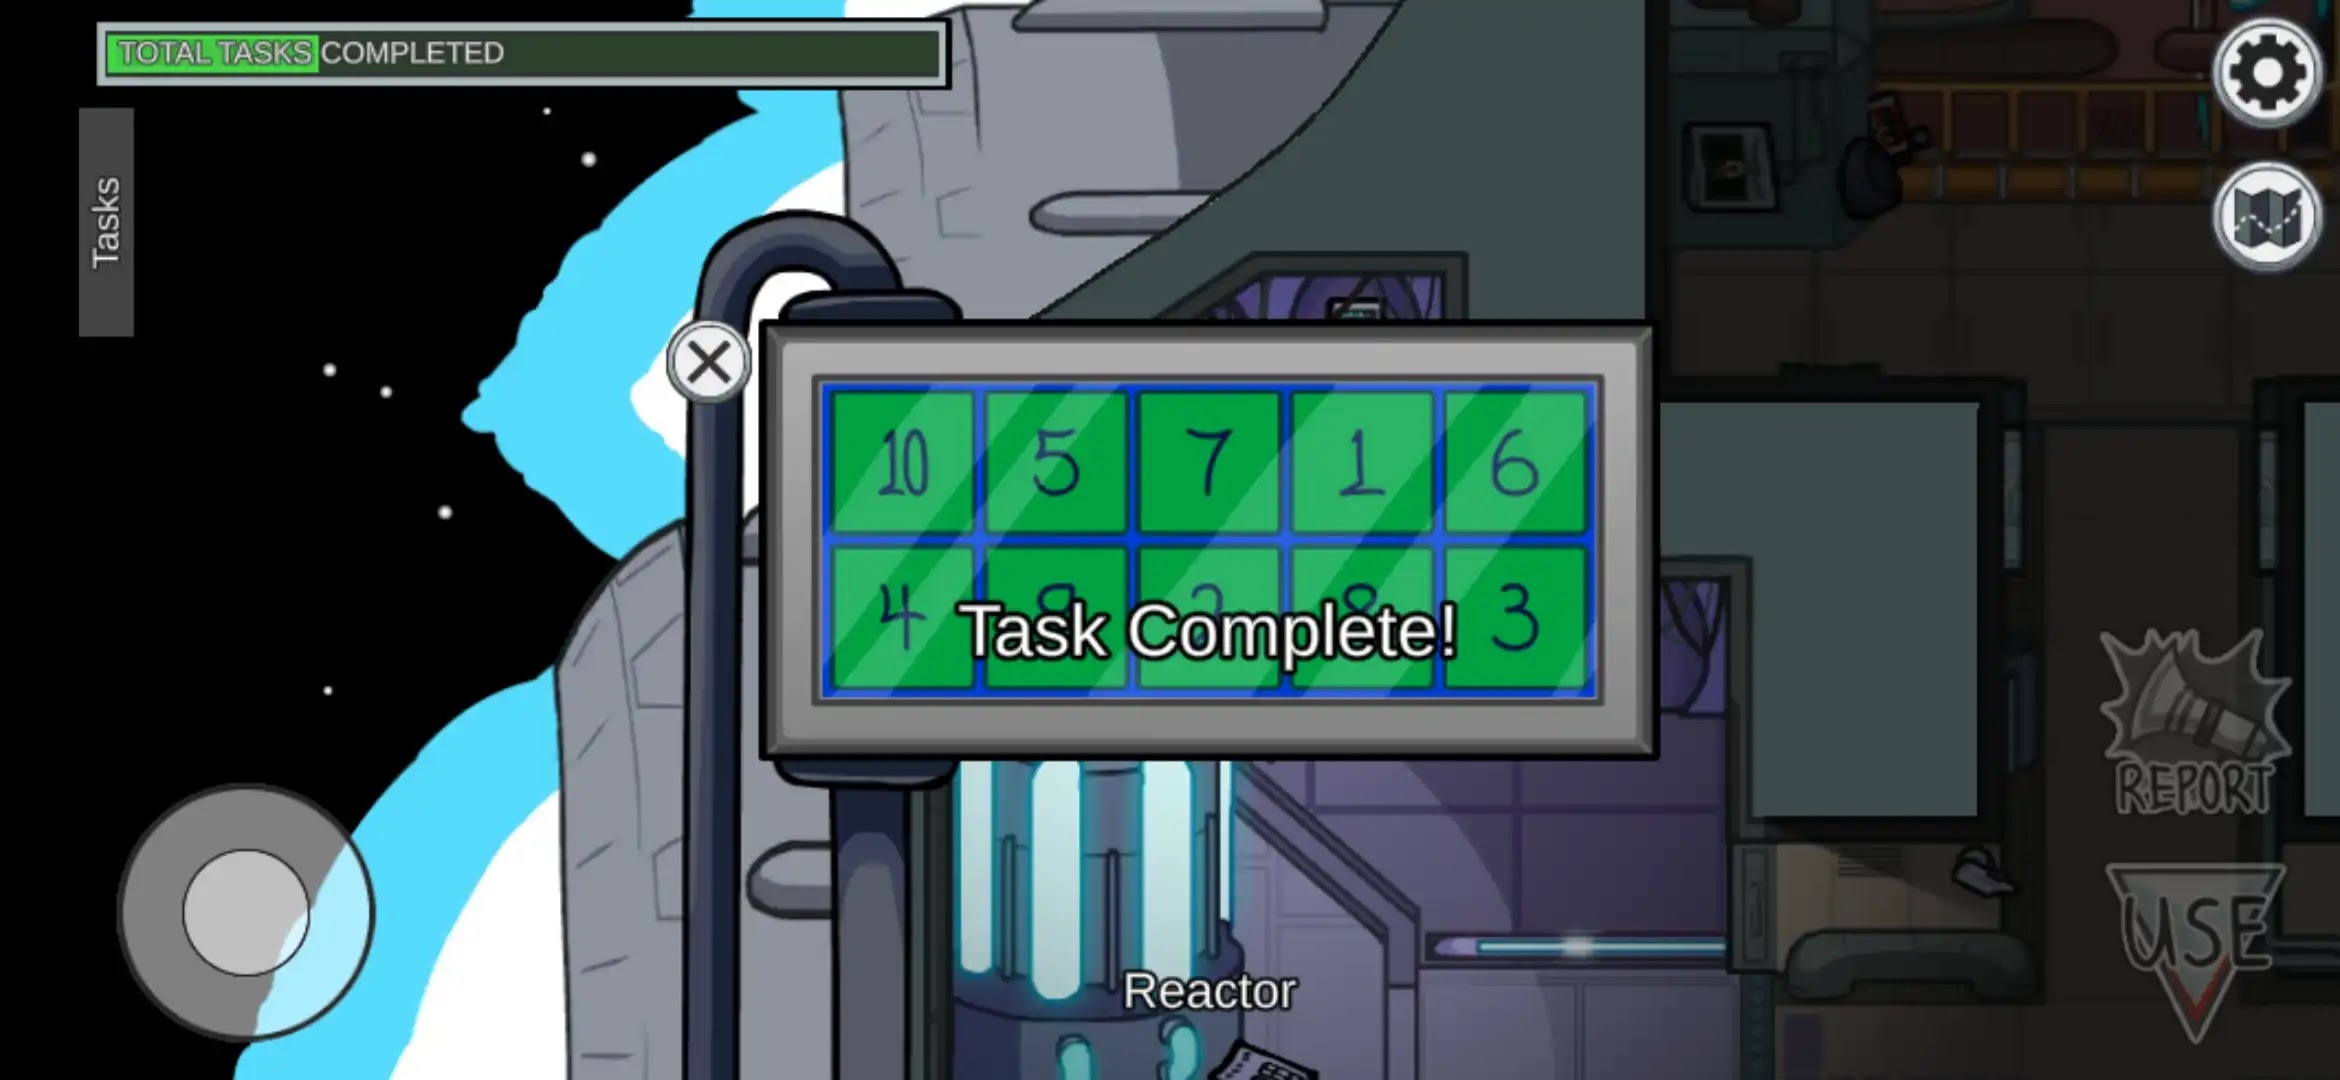
When you select the numbers in the right sequence then it will change their background to green color and if you select numbers in the wrong way then you have to start the task again from the beginning.
[Ⅺ] Security:
① Divert Power to security –
➤ It is also a long task. It is divided into two stages.
Step 1. Go to the Electric location near the right side of the WI-FI panel and tap use.
which will open an electric supply board. Now find the highlighted red switch with the ‘Security’ tag. As the task is about to divert power to the Security
room, slide the switch to the upper side.
Step 2. Now follow the➤ symbol which will carry you to the power control panel located in the Security room and tap use.
which will open the power supply control box. Now tap the switch located in the center which will turn on the electric supply to the Security room and the task will be completed.
[Ⅻ] Shields:
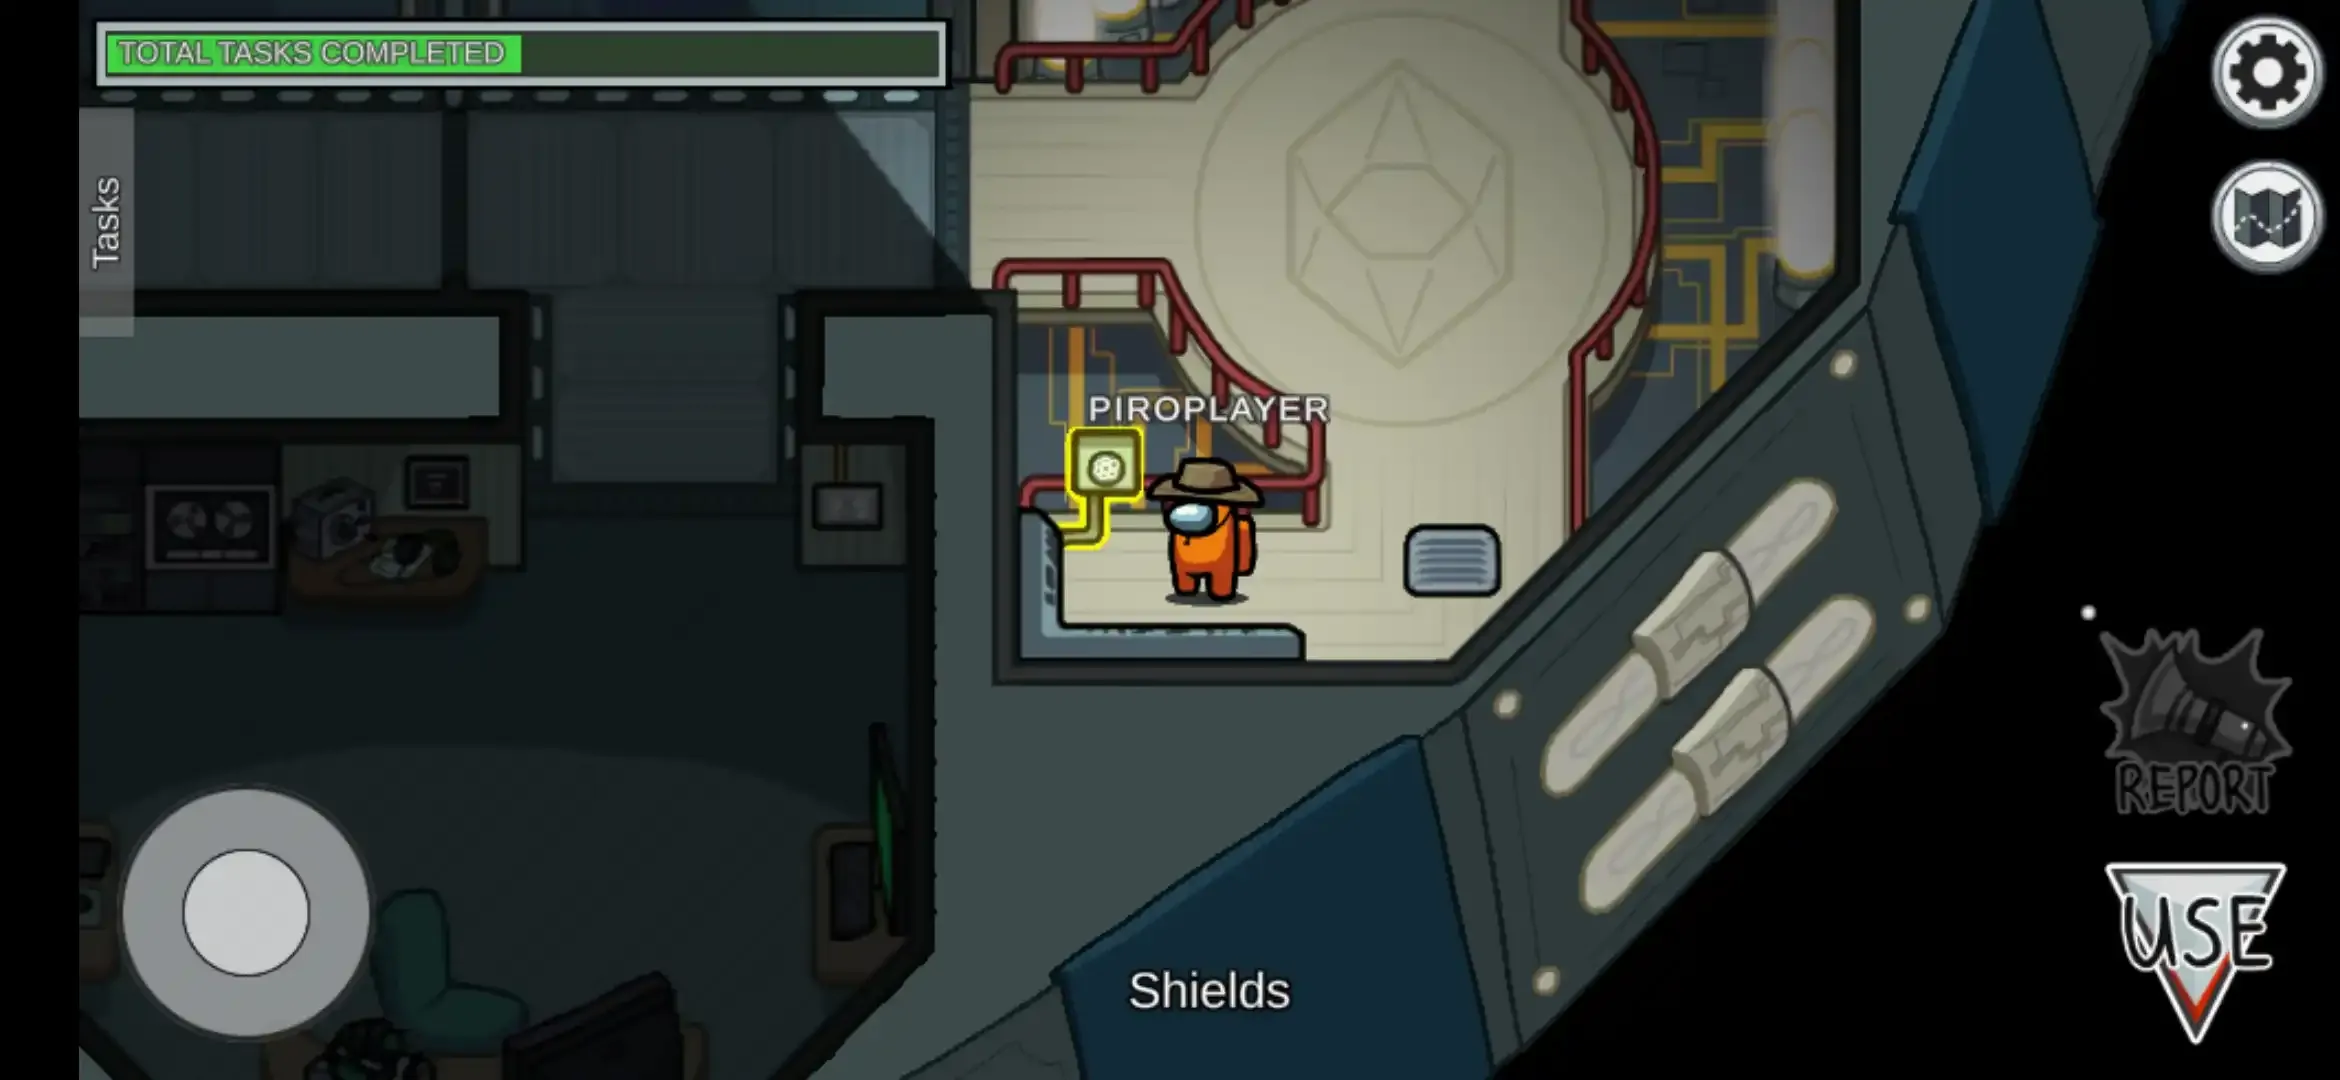
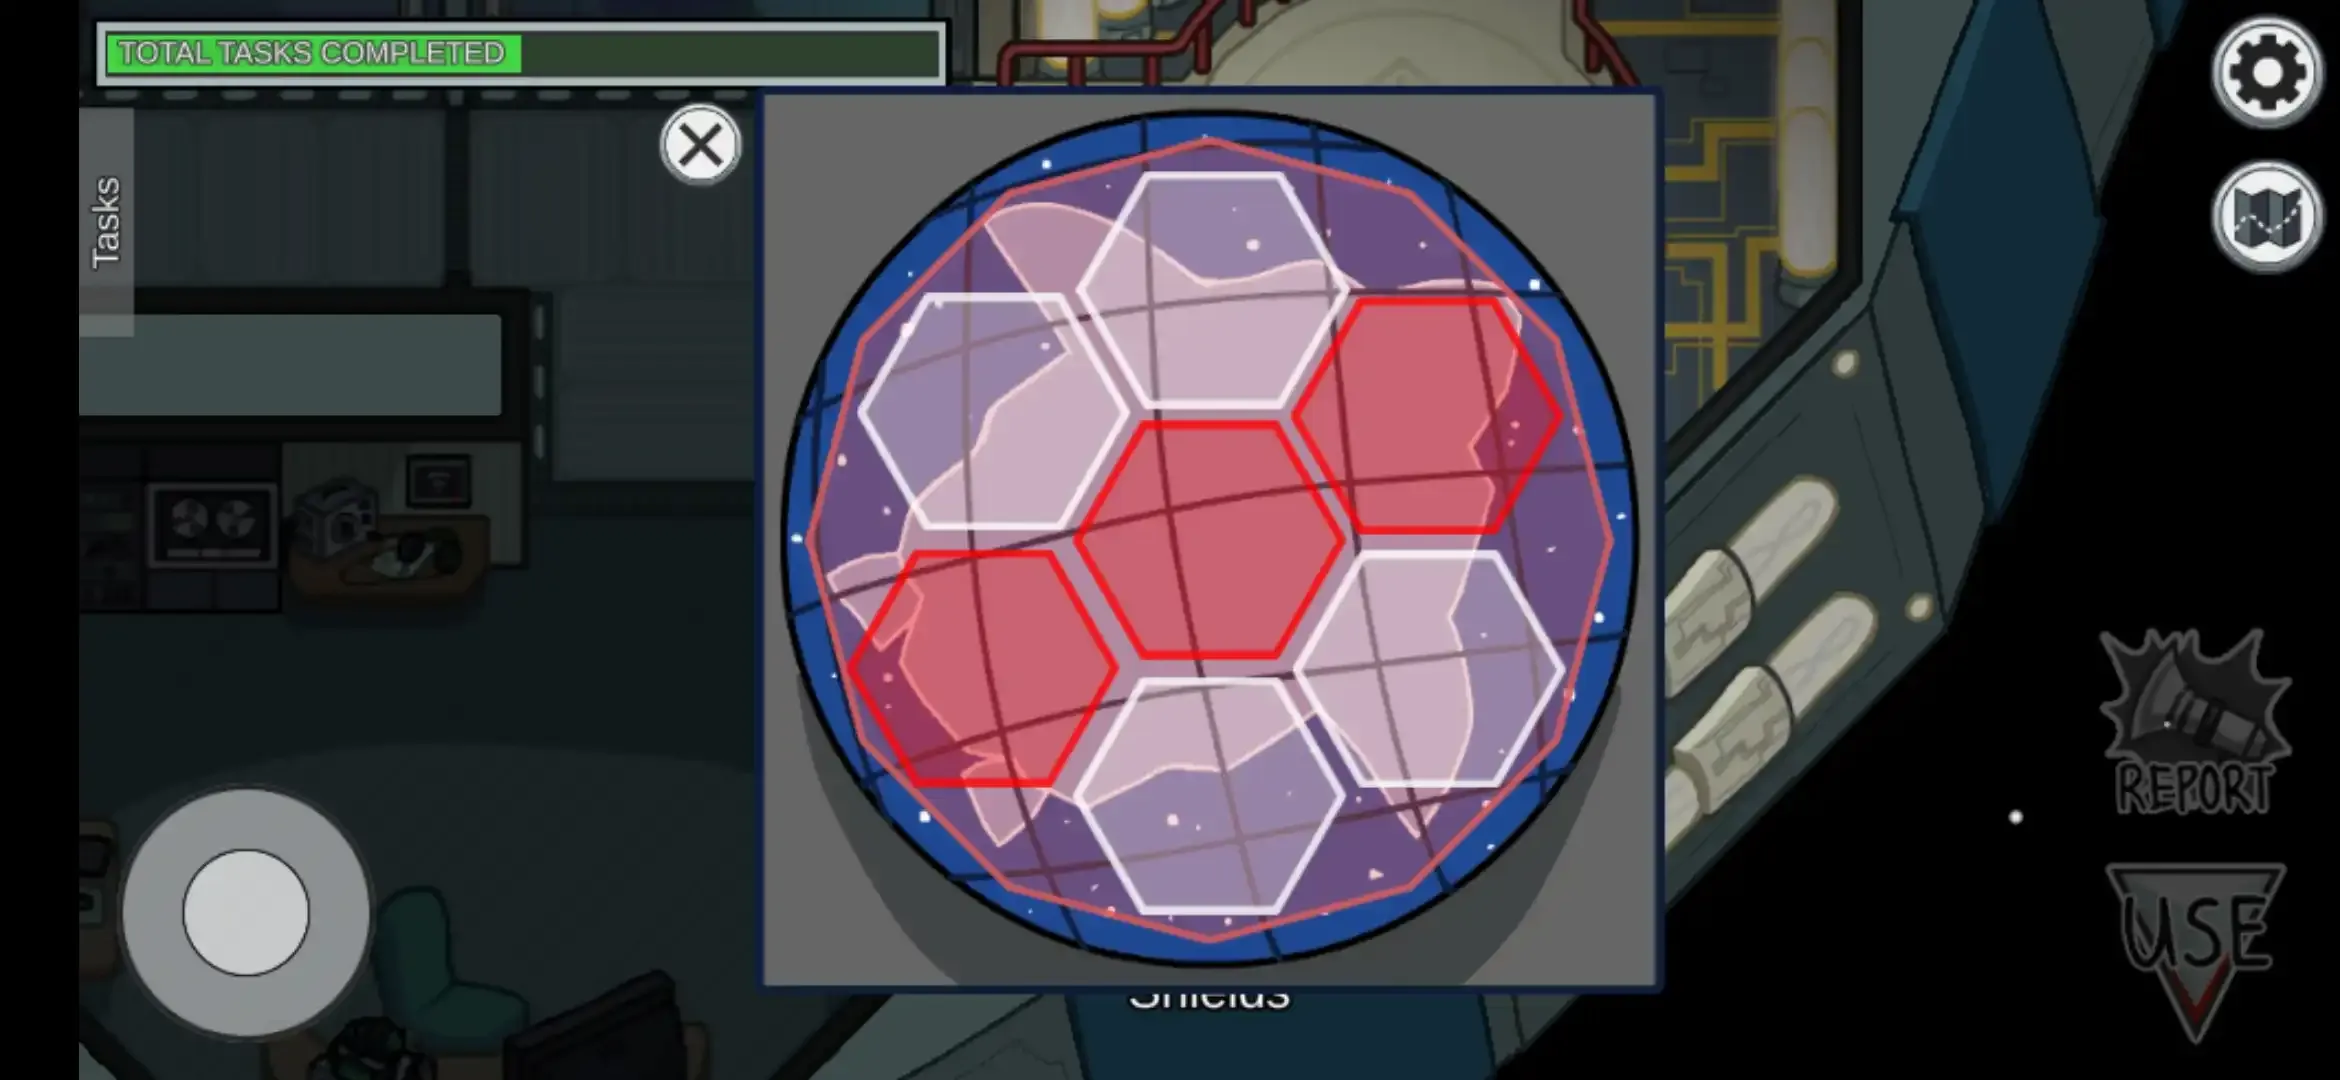
① Prime Shields –
➤ It is a short and visual task.
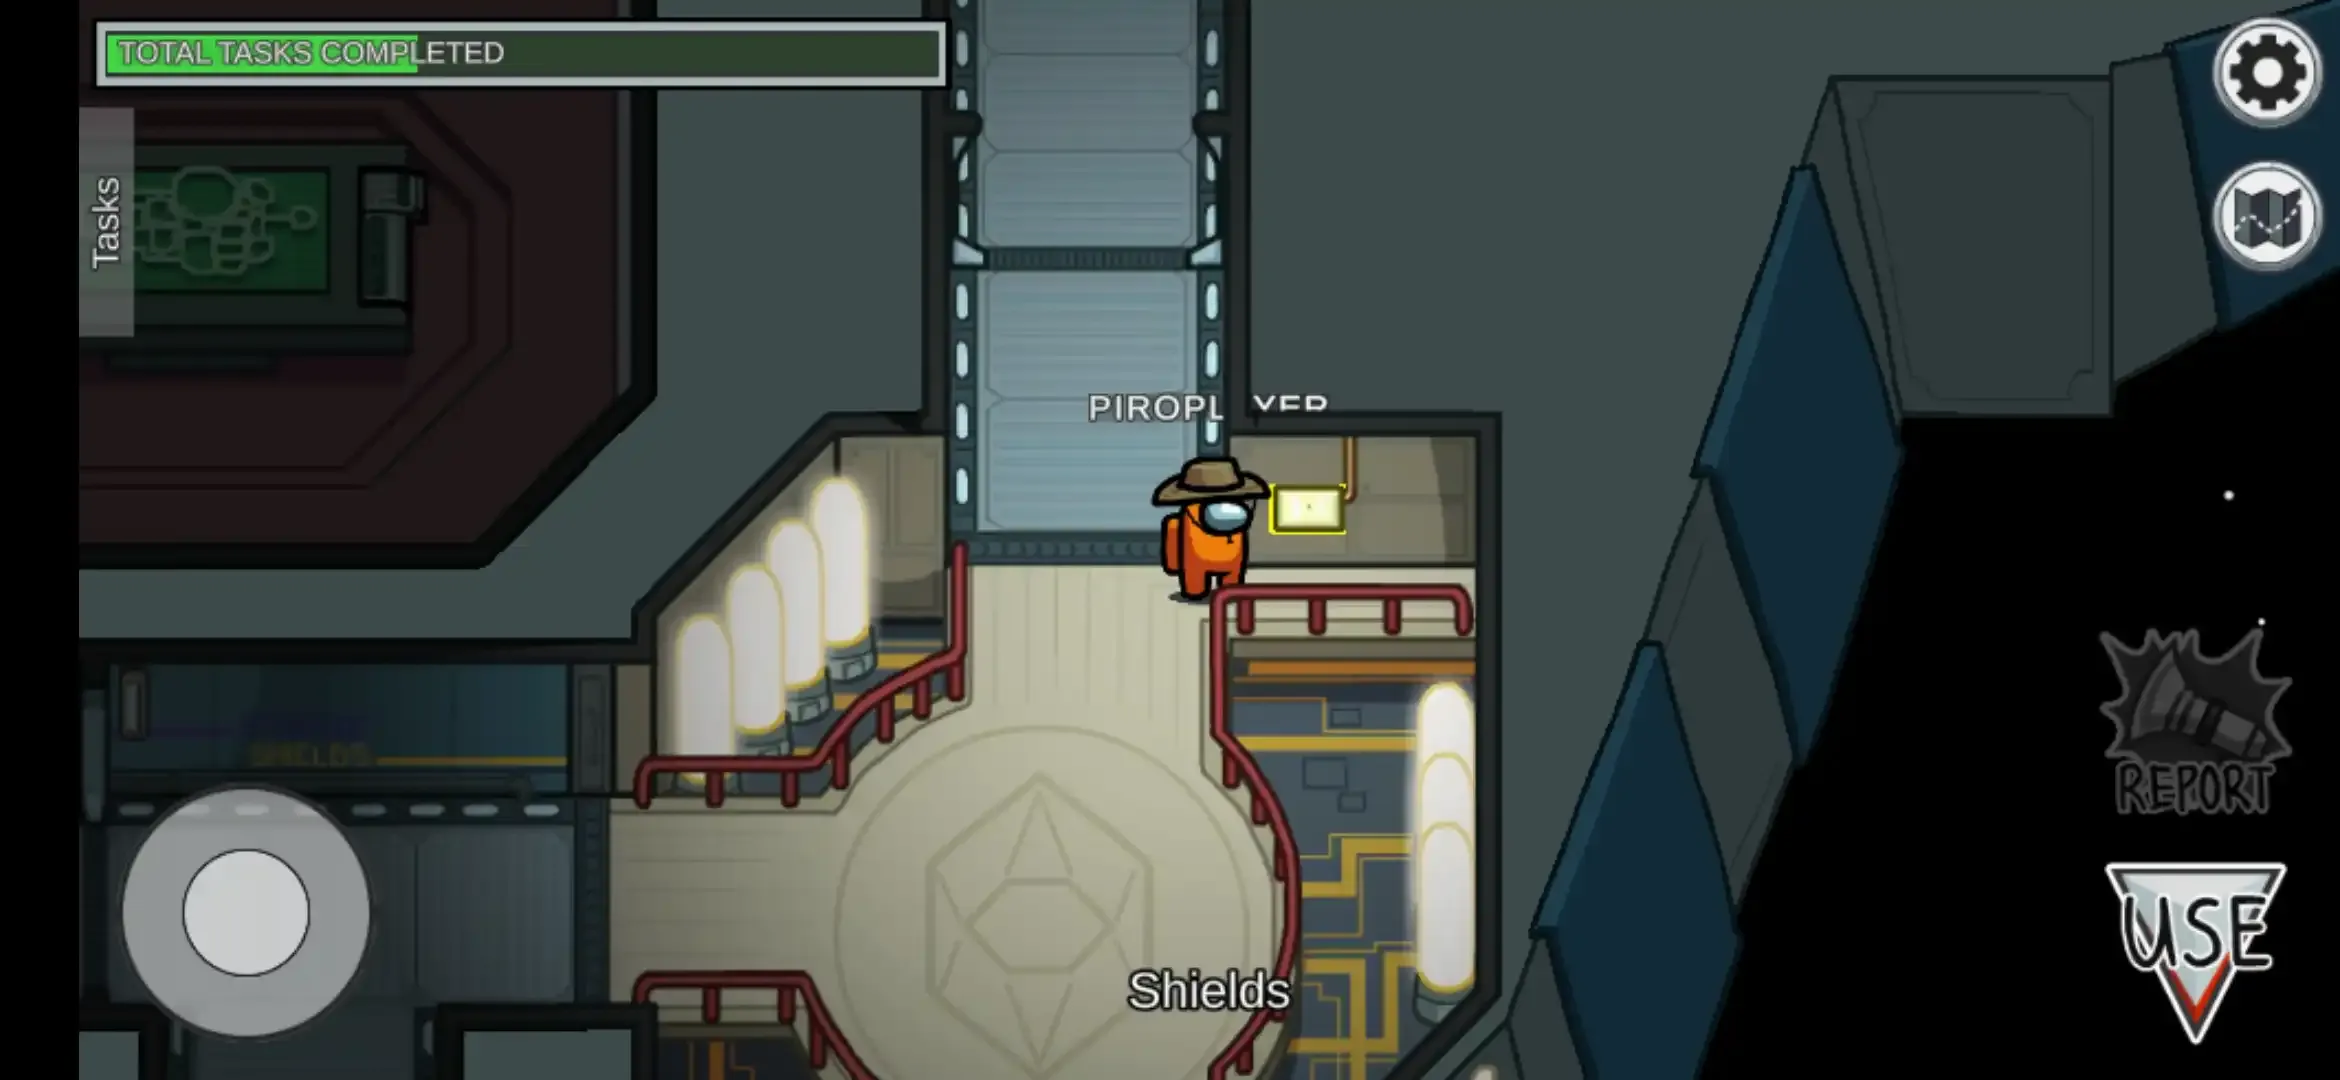
In Shields location go near bottom-left wall and tap use.
which will open the globe having 7 hexagons in which some of which have red color in the background.
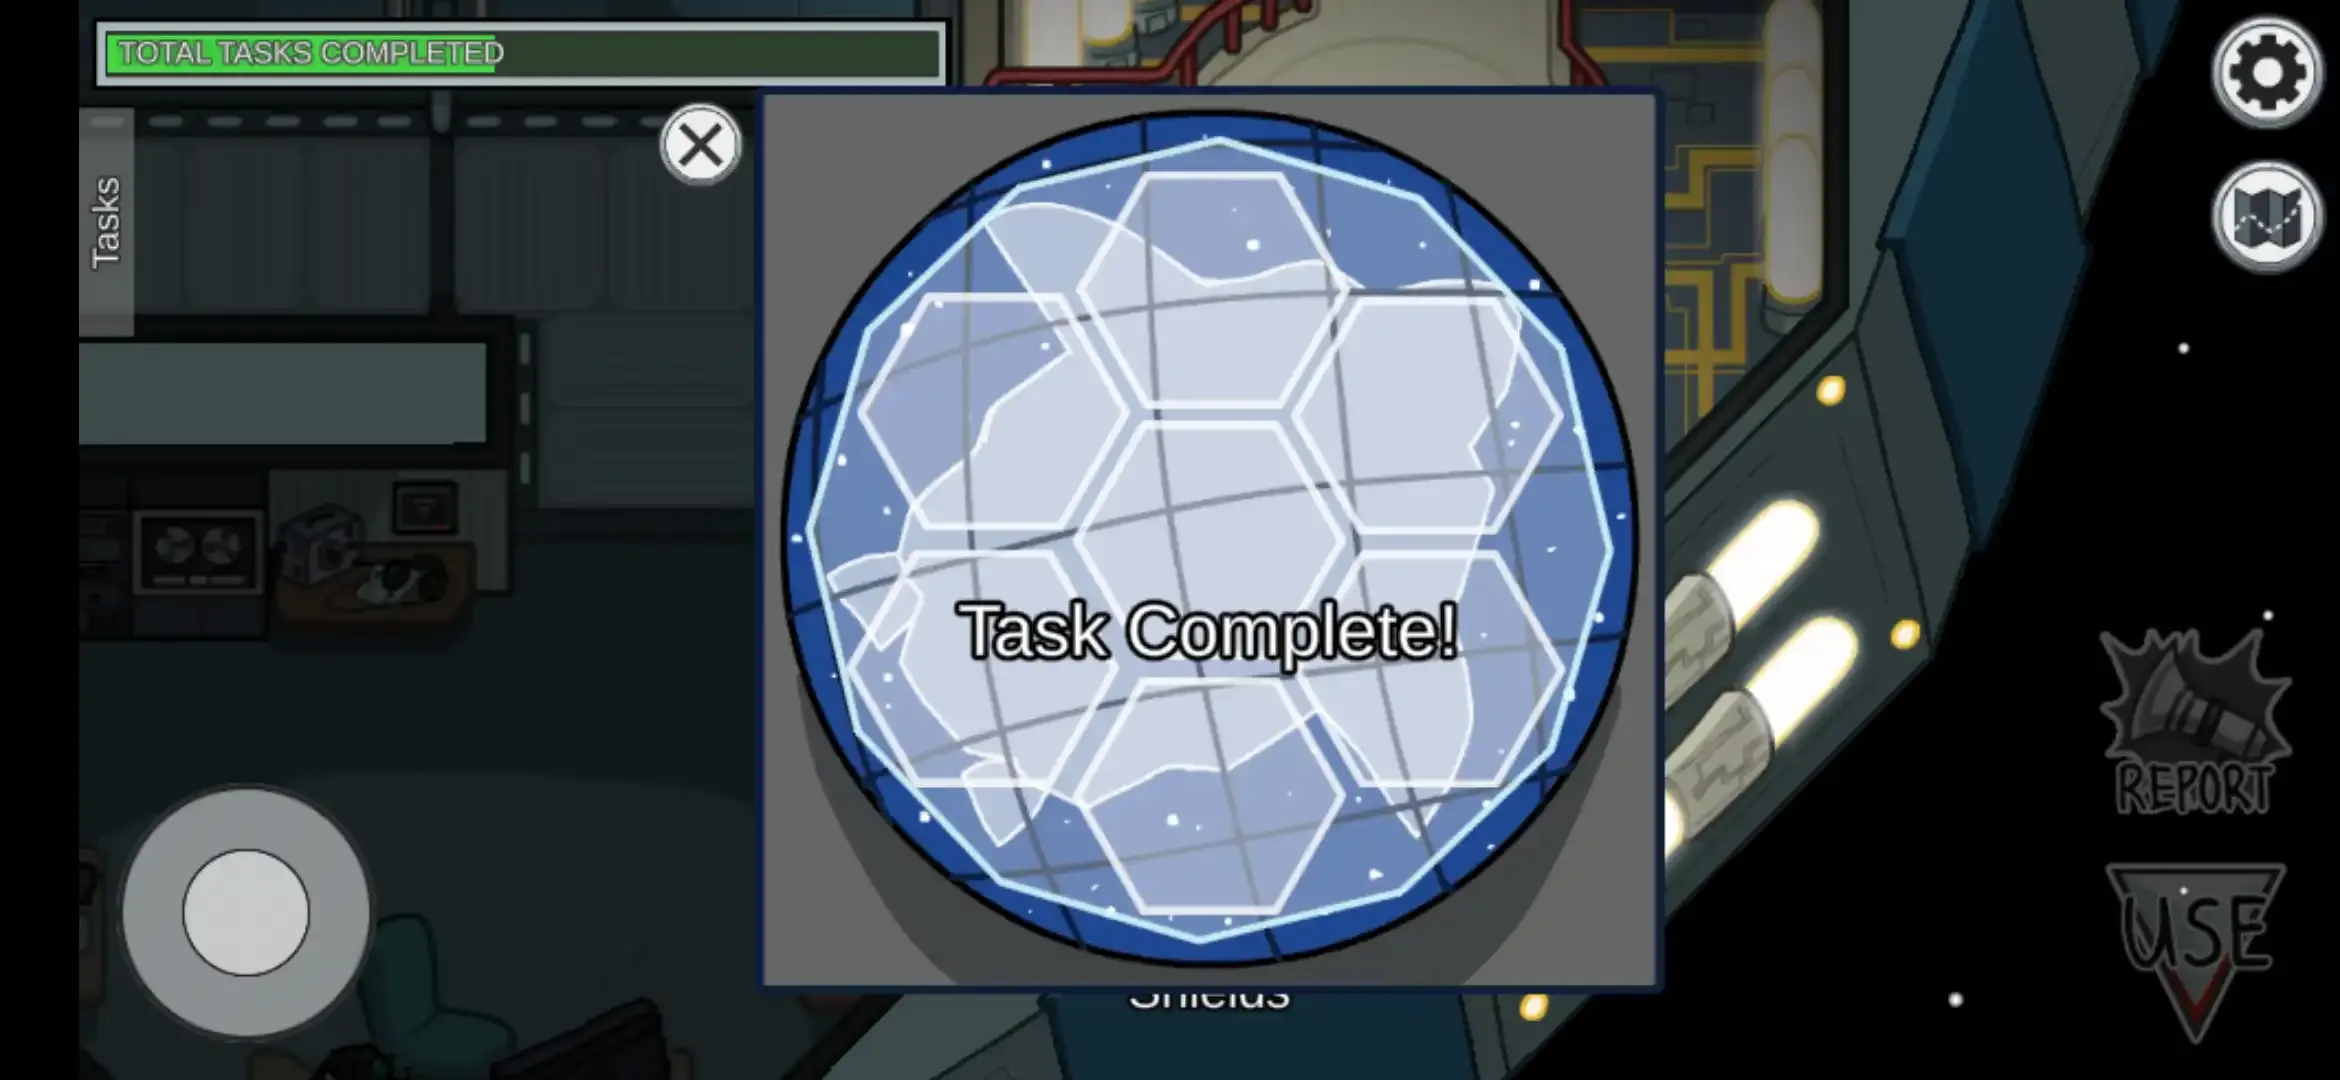
Tap or click all red hexagons and turn them to white background to complete this task.
After completing the task shield which is present outside the spaceship will light up which is visible to other crewmates, thus the player can prove his innocence by running this task.
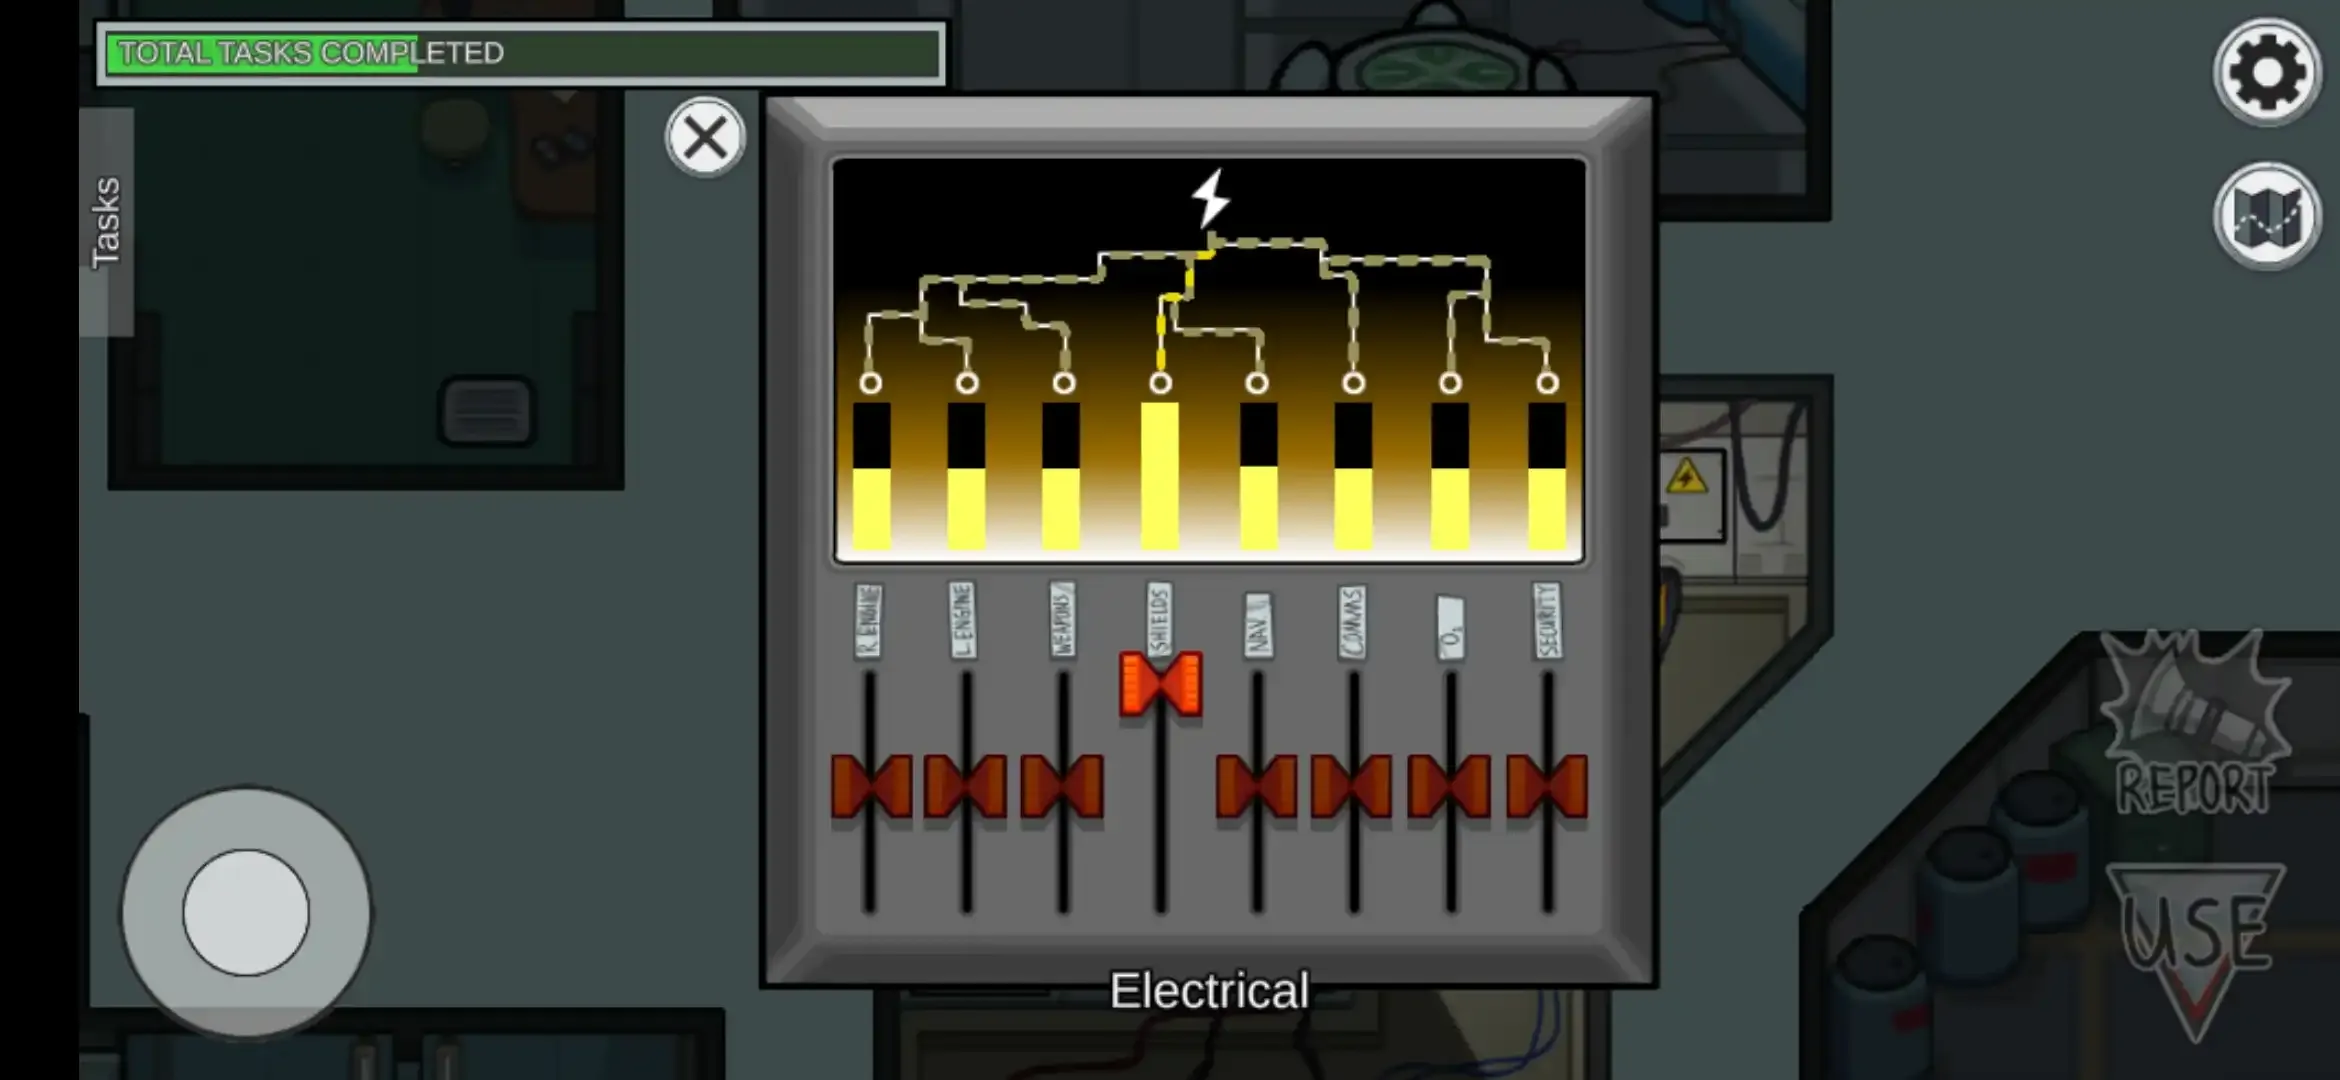
②Divert power to shields –
➤ It is also a long task. It is divided into two stages.
Step 1. Go to the Electric location near the right side of the WI-FI panel and tap use.
which will open an electric supply board. Now find the highlighted red switch with the ‘Shields’ tag. As the task is about to divert power to the Shieldsroom, slide the switch to the upper side.
Step 2. Now follow the➤ symbol which will carry you to the power control panel located in the Shields room and tap use.
which will open the power supply control box. Now tap the switch located in the center which will turn on the electric supply to the Shields room and the task will be completed.
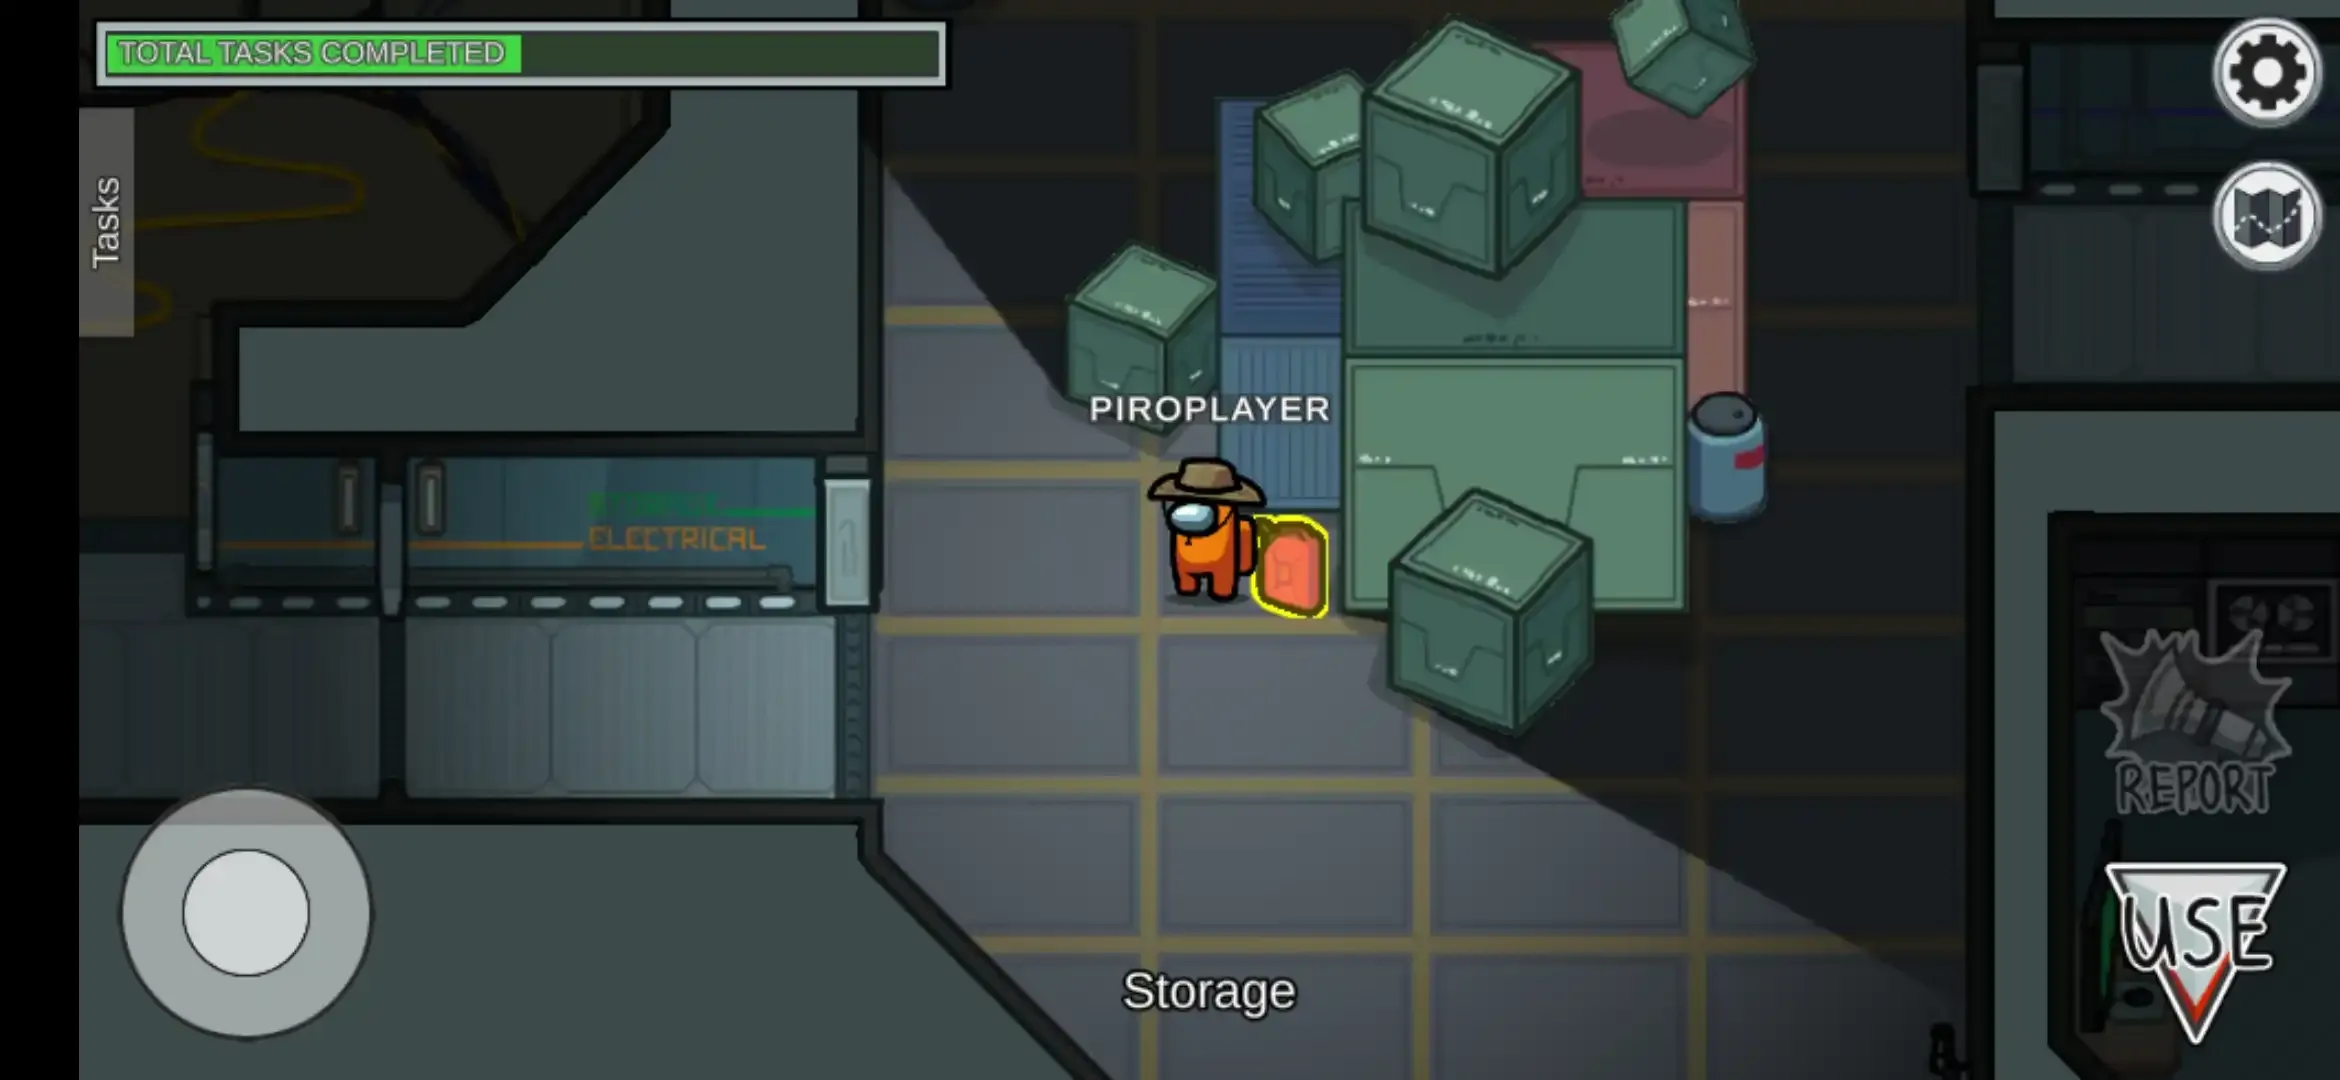
[XIII] Storage:
① Fuel engines –
➤ It is a long task. It has two stages.
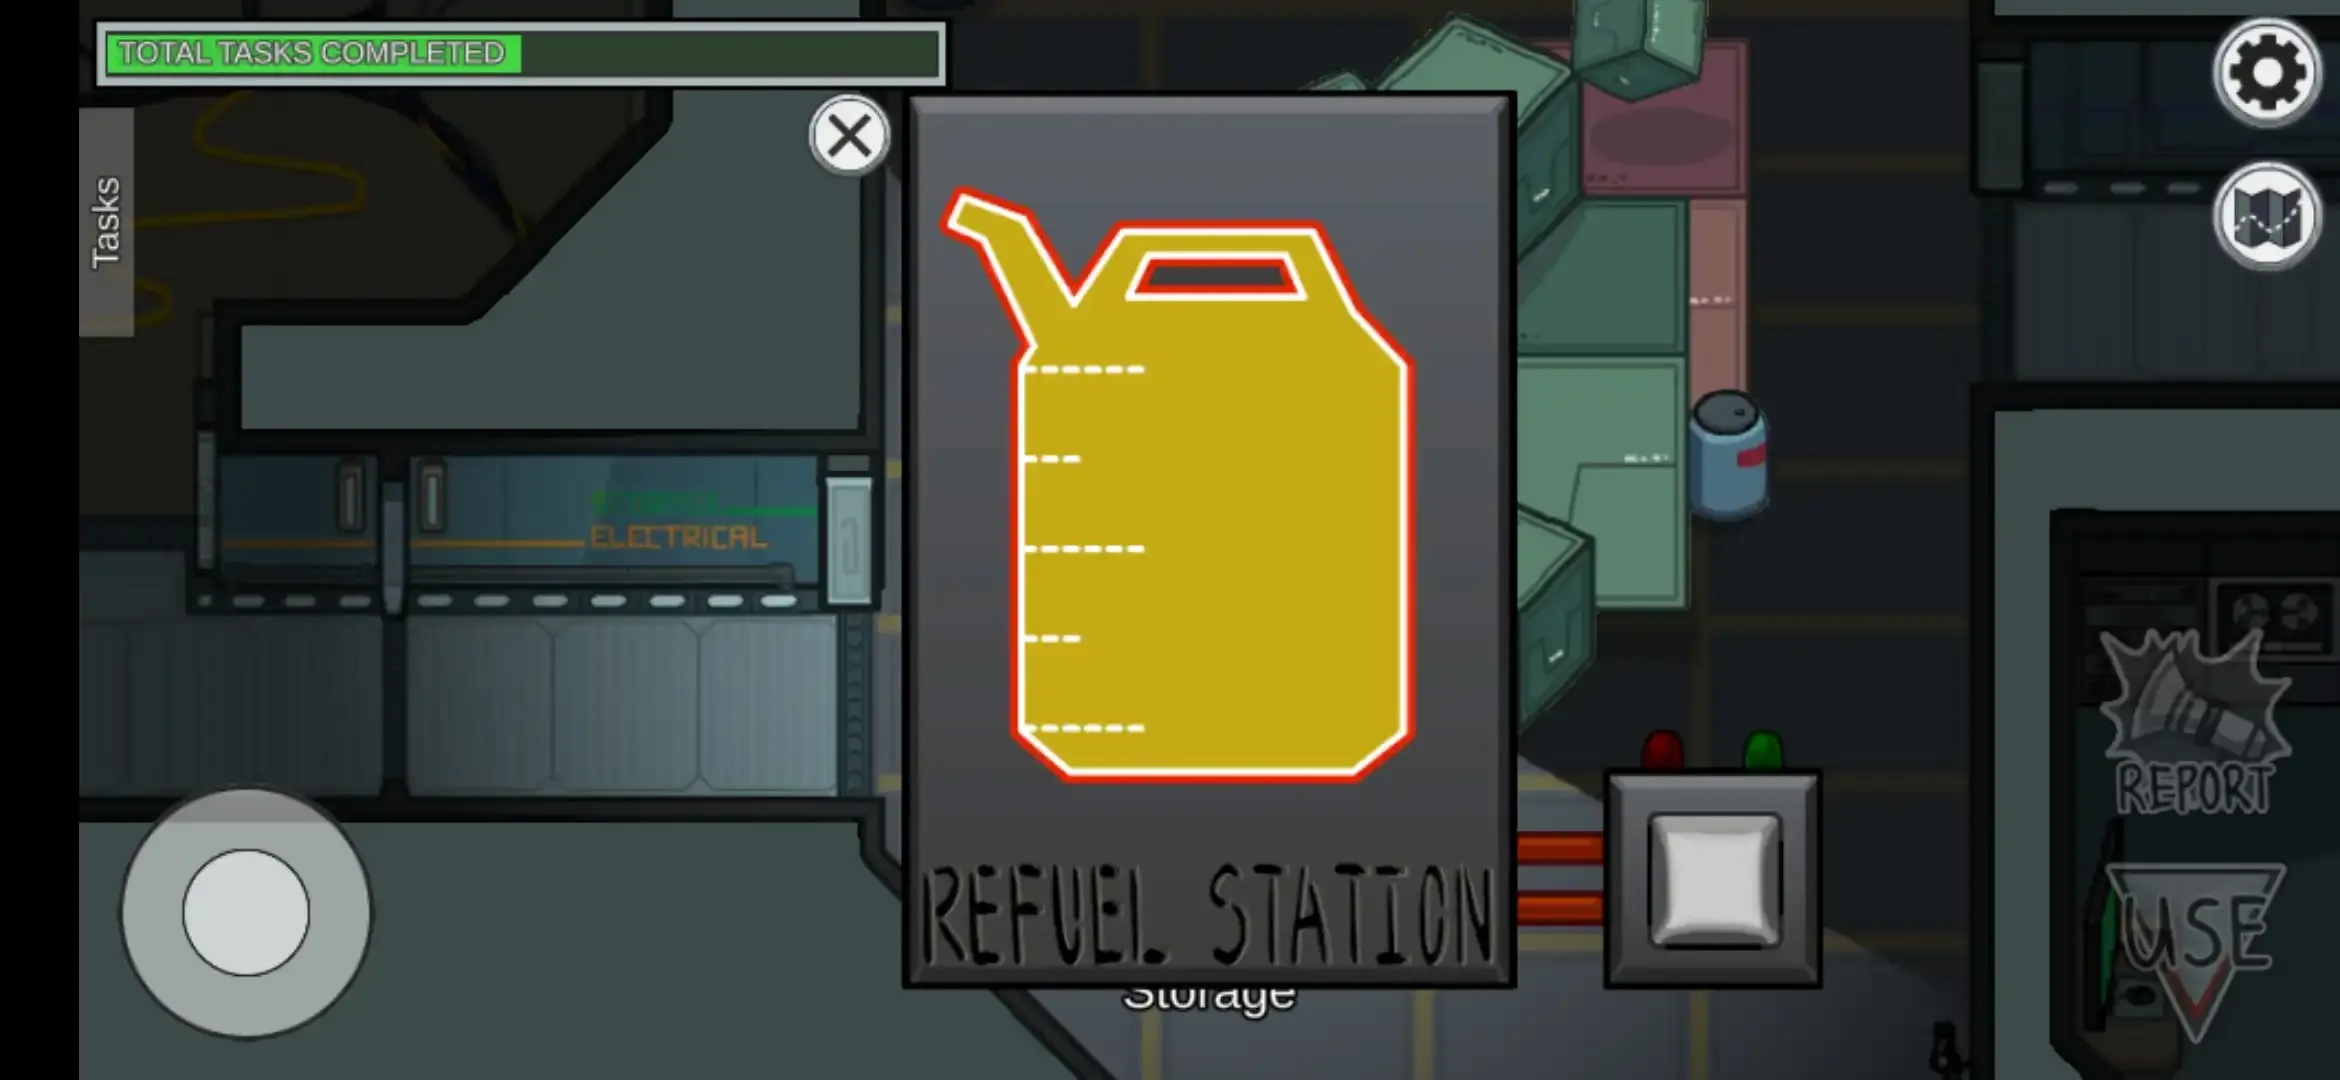
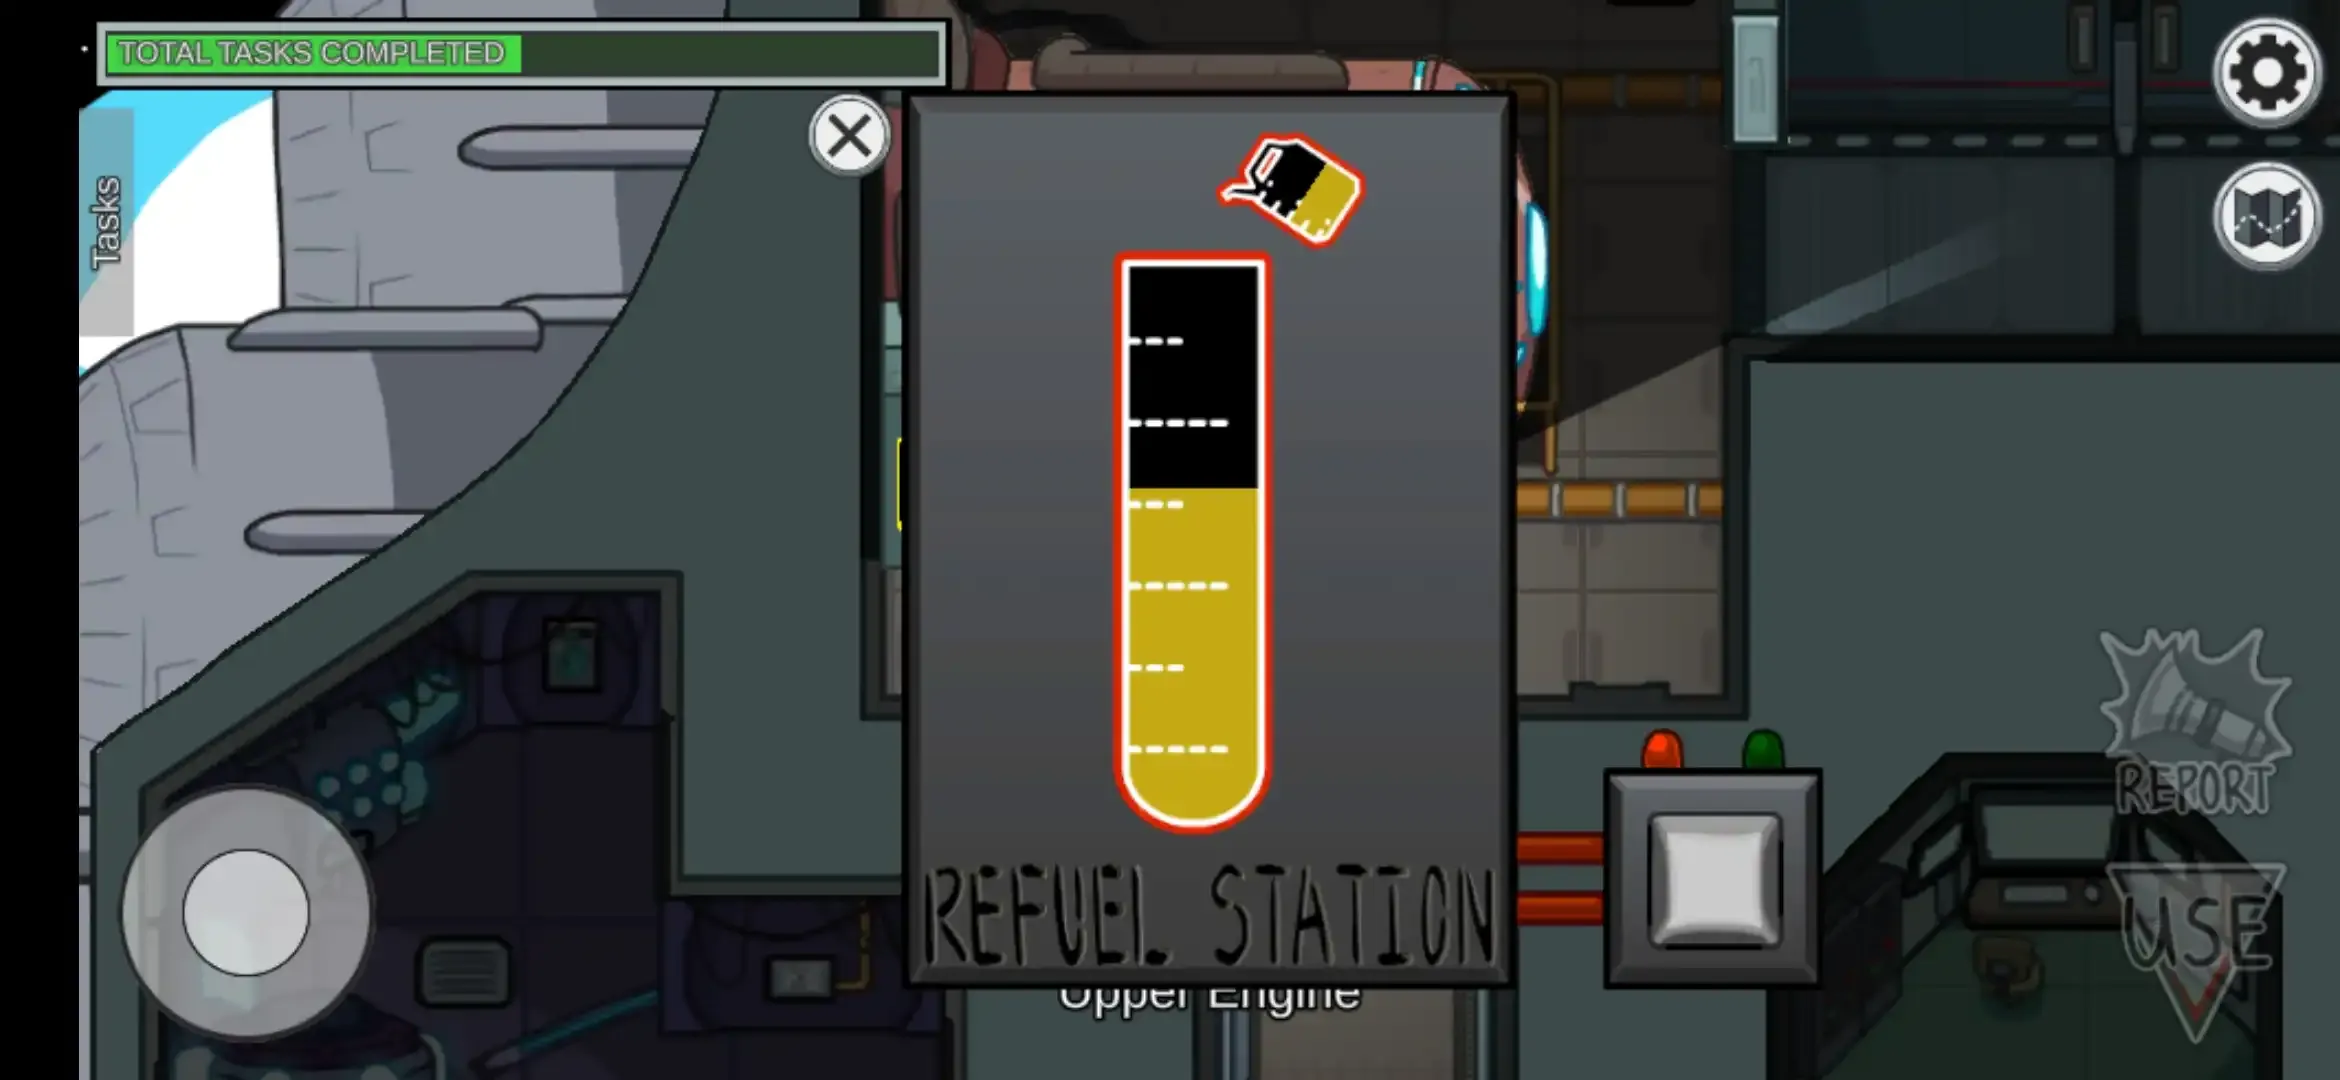
Step 1. In the storage location go near the red fuel can and tap or click use.
Now it will open the refuel Station with having a fuel level indicator and a white button. Long tap or hold click the white button until it fills full fuel can.
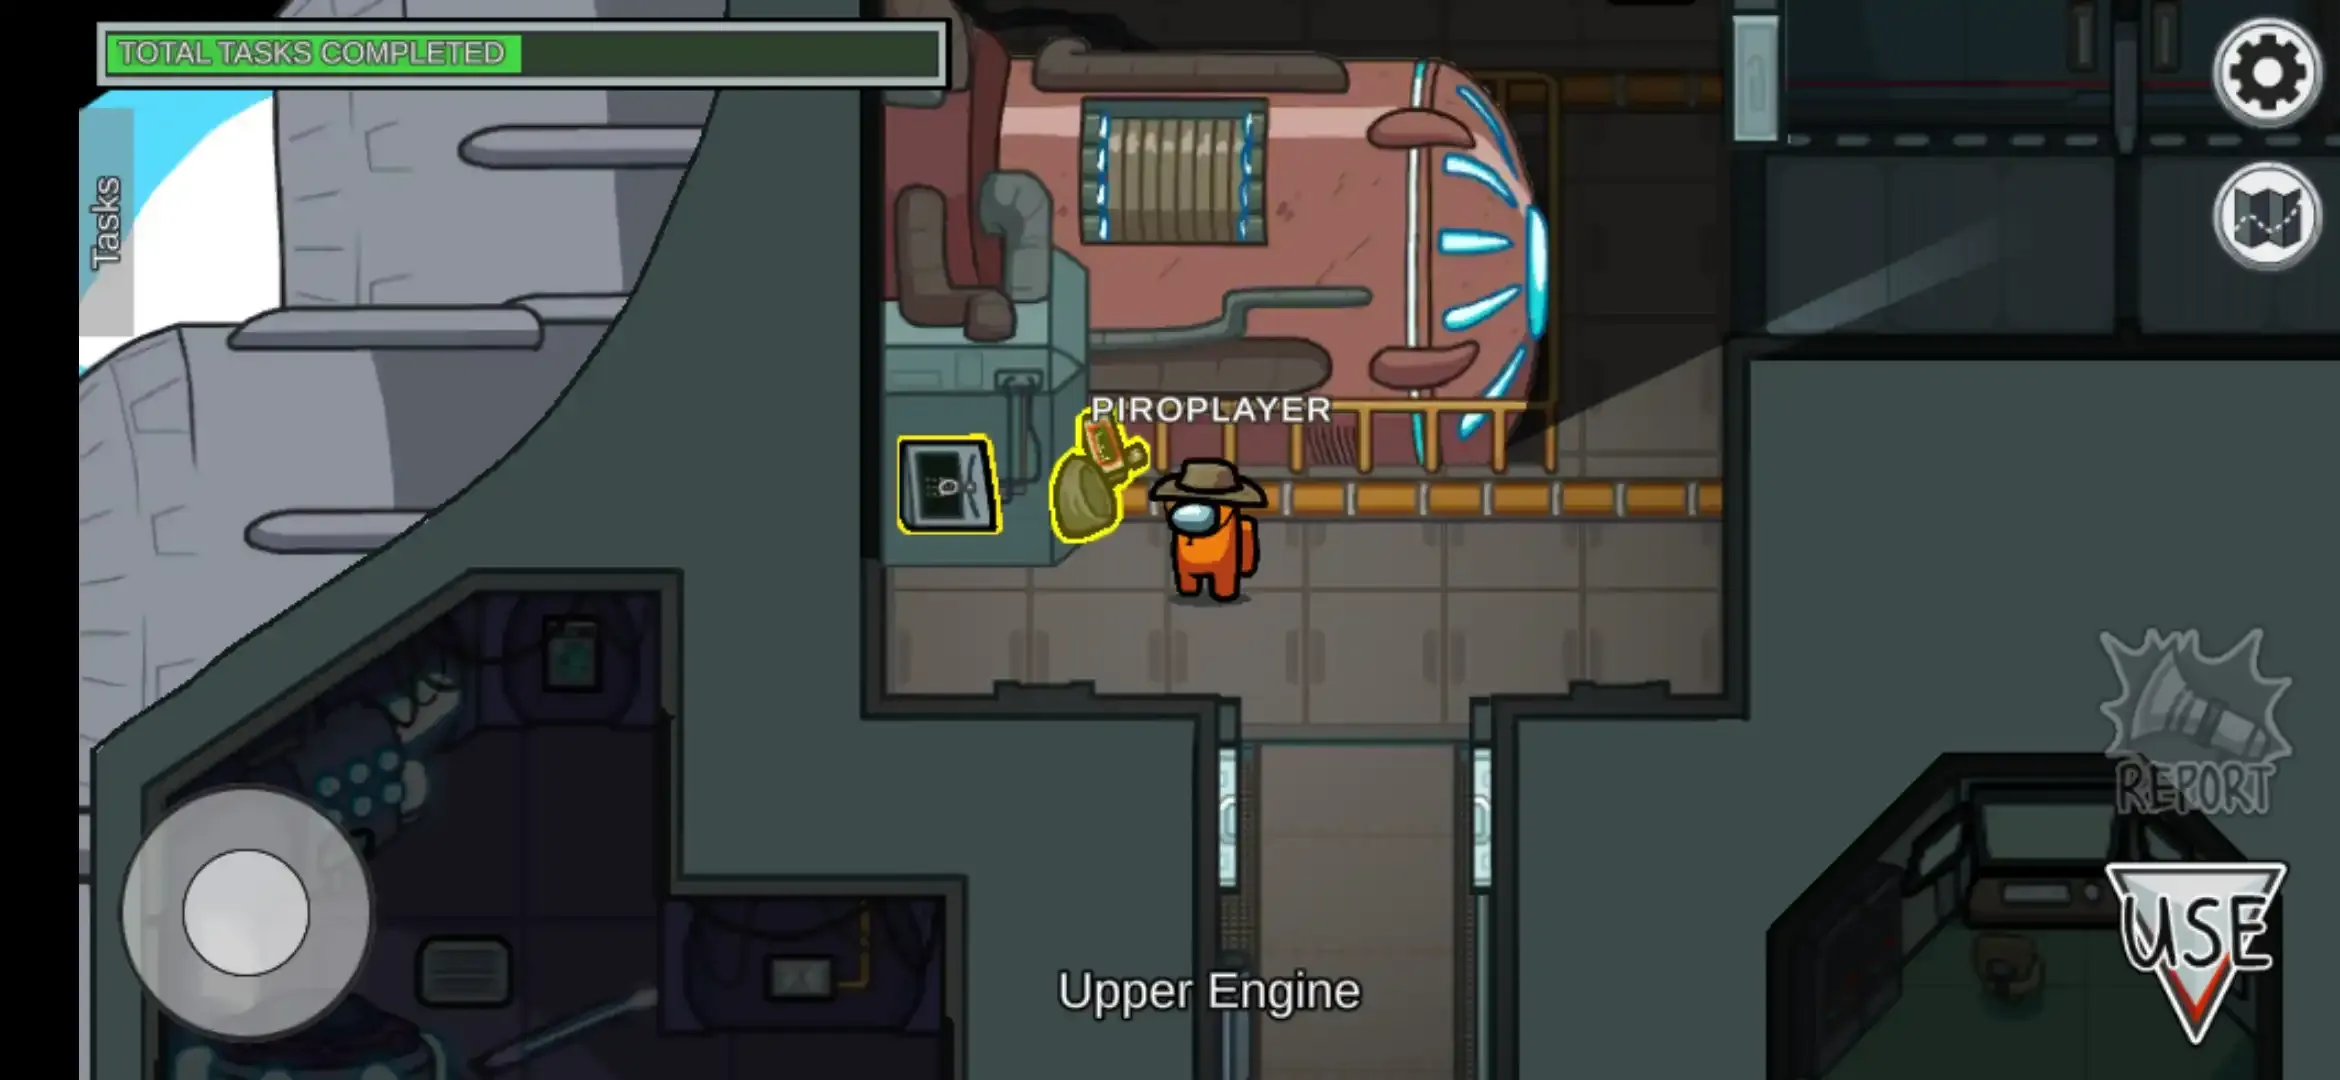
Now follow the➤ symbol which will direct you towards Upper Engine’s fuel station tap the use button.
button which will open the refuel station, level indicator, and one white button. Hold tap or long-click that white button to refuel the engine with the fuel you collected in step 1st and complete the task.
Step 2. Repeat the step 1 process in step 2, the difference is refueling of Lower Engine is done instead of Upper Engine to complete the task.
Fuel station of Lower Engine
[XIV] Weapons:
① Clear Asteroids –
➤ It is a long and visual task.
From the cafeteria go to the right door which will let you to the Weapons location, in the center there is a chair with a green screen in front of it go near it and tap ‘use’.
Now a translucent green screen will be visible to you with asteroids coming from right to left as shown in the following screenshot.
to complete this task tap or click the any 20 asteroids.
On every tap or click, there is a laser shot from outside the spaceship which is visible to other crewmates, thus it confirms the innocence of the player and is the proof of the player as a crewmate.
②Upload data –
➤ Upload data is a short task. It is divided into two parts.
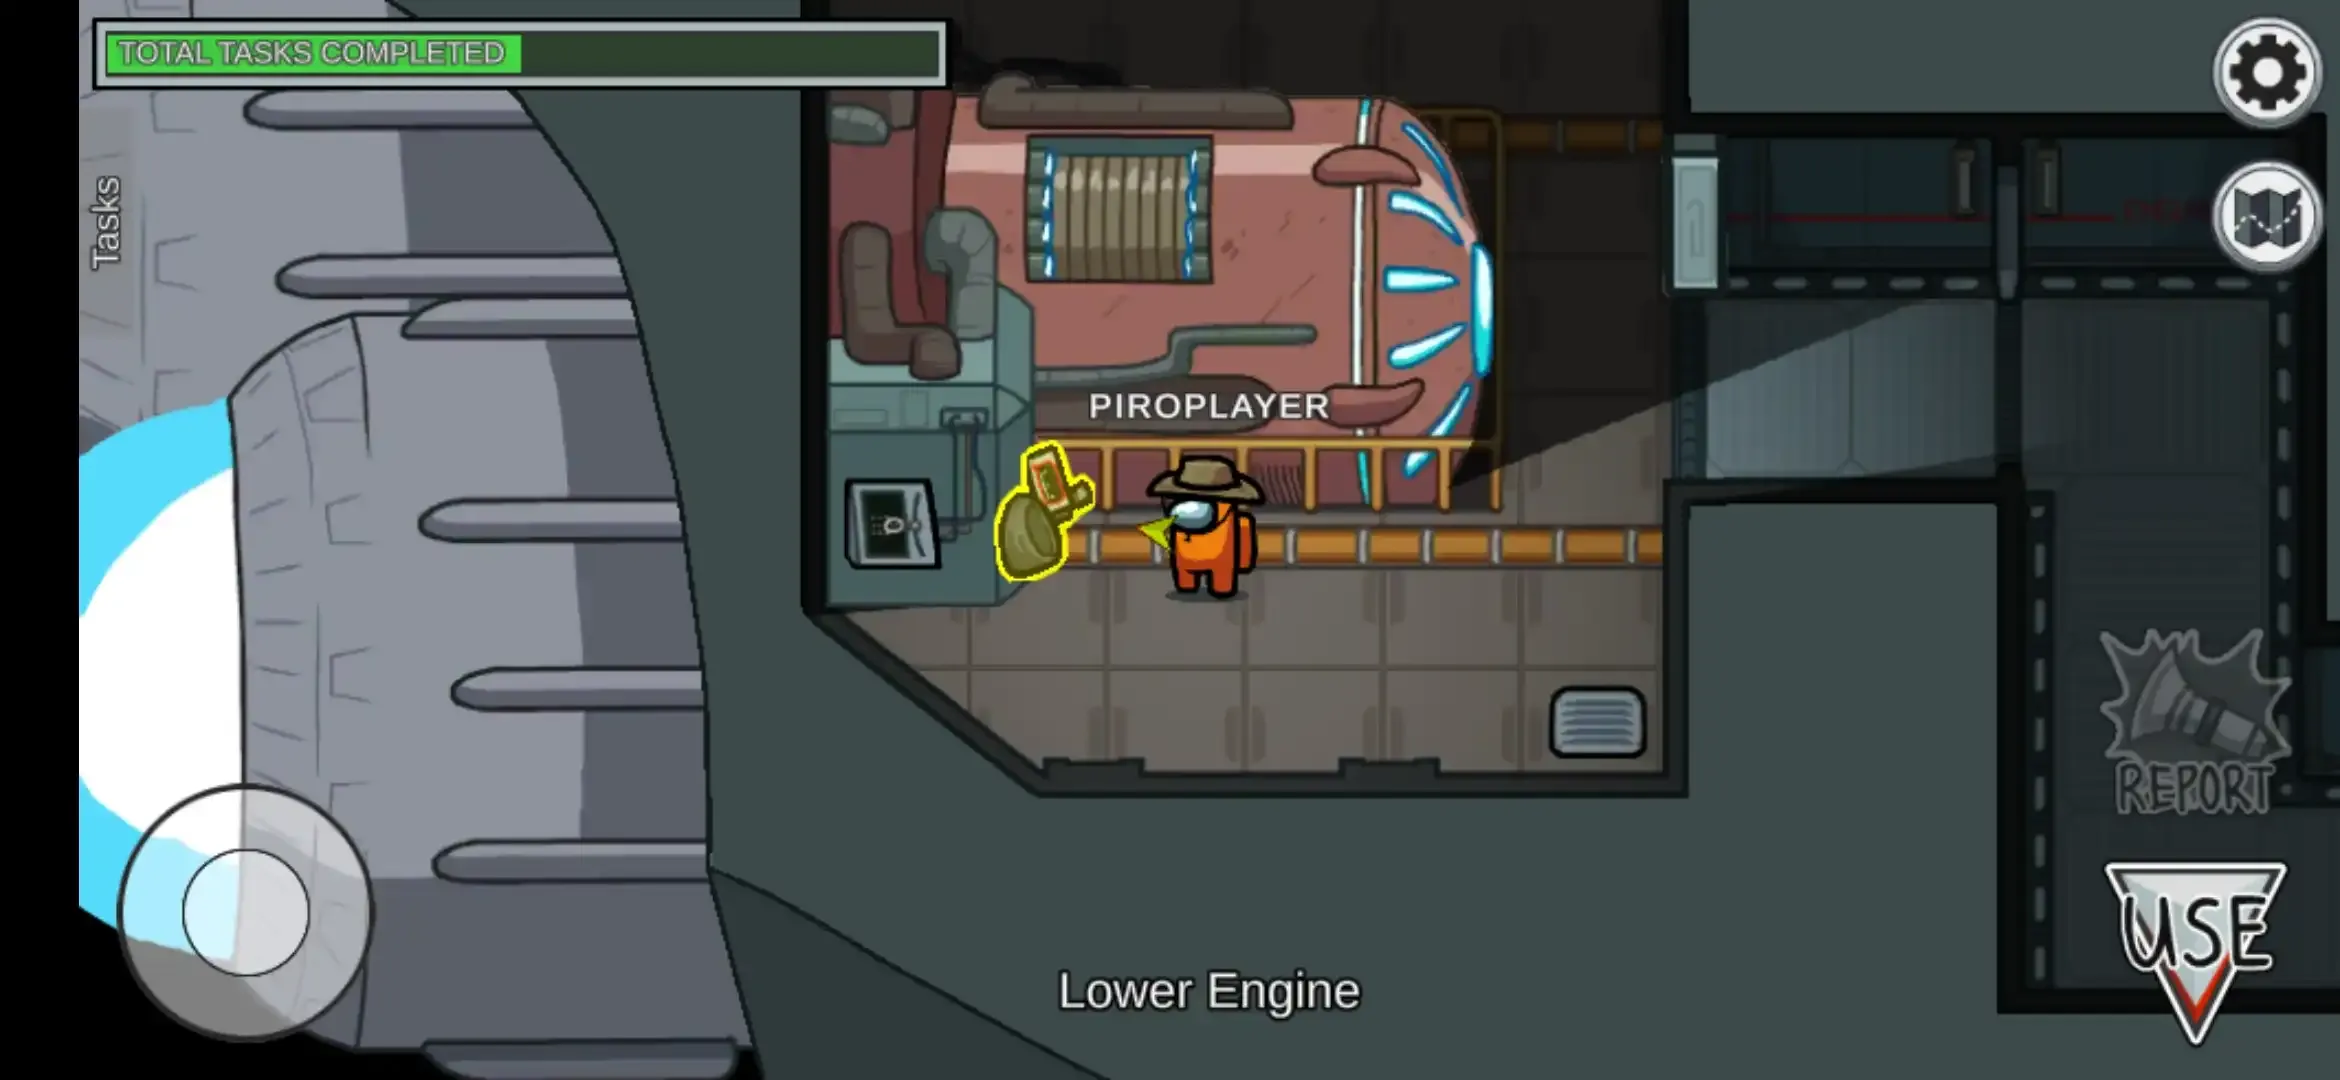
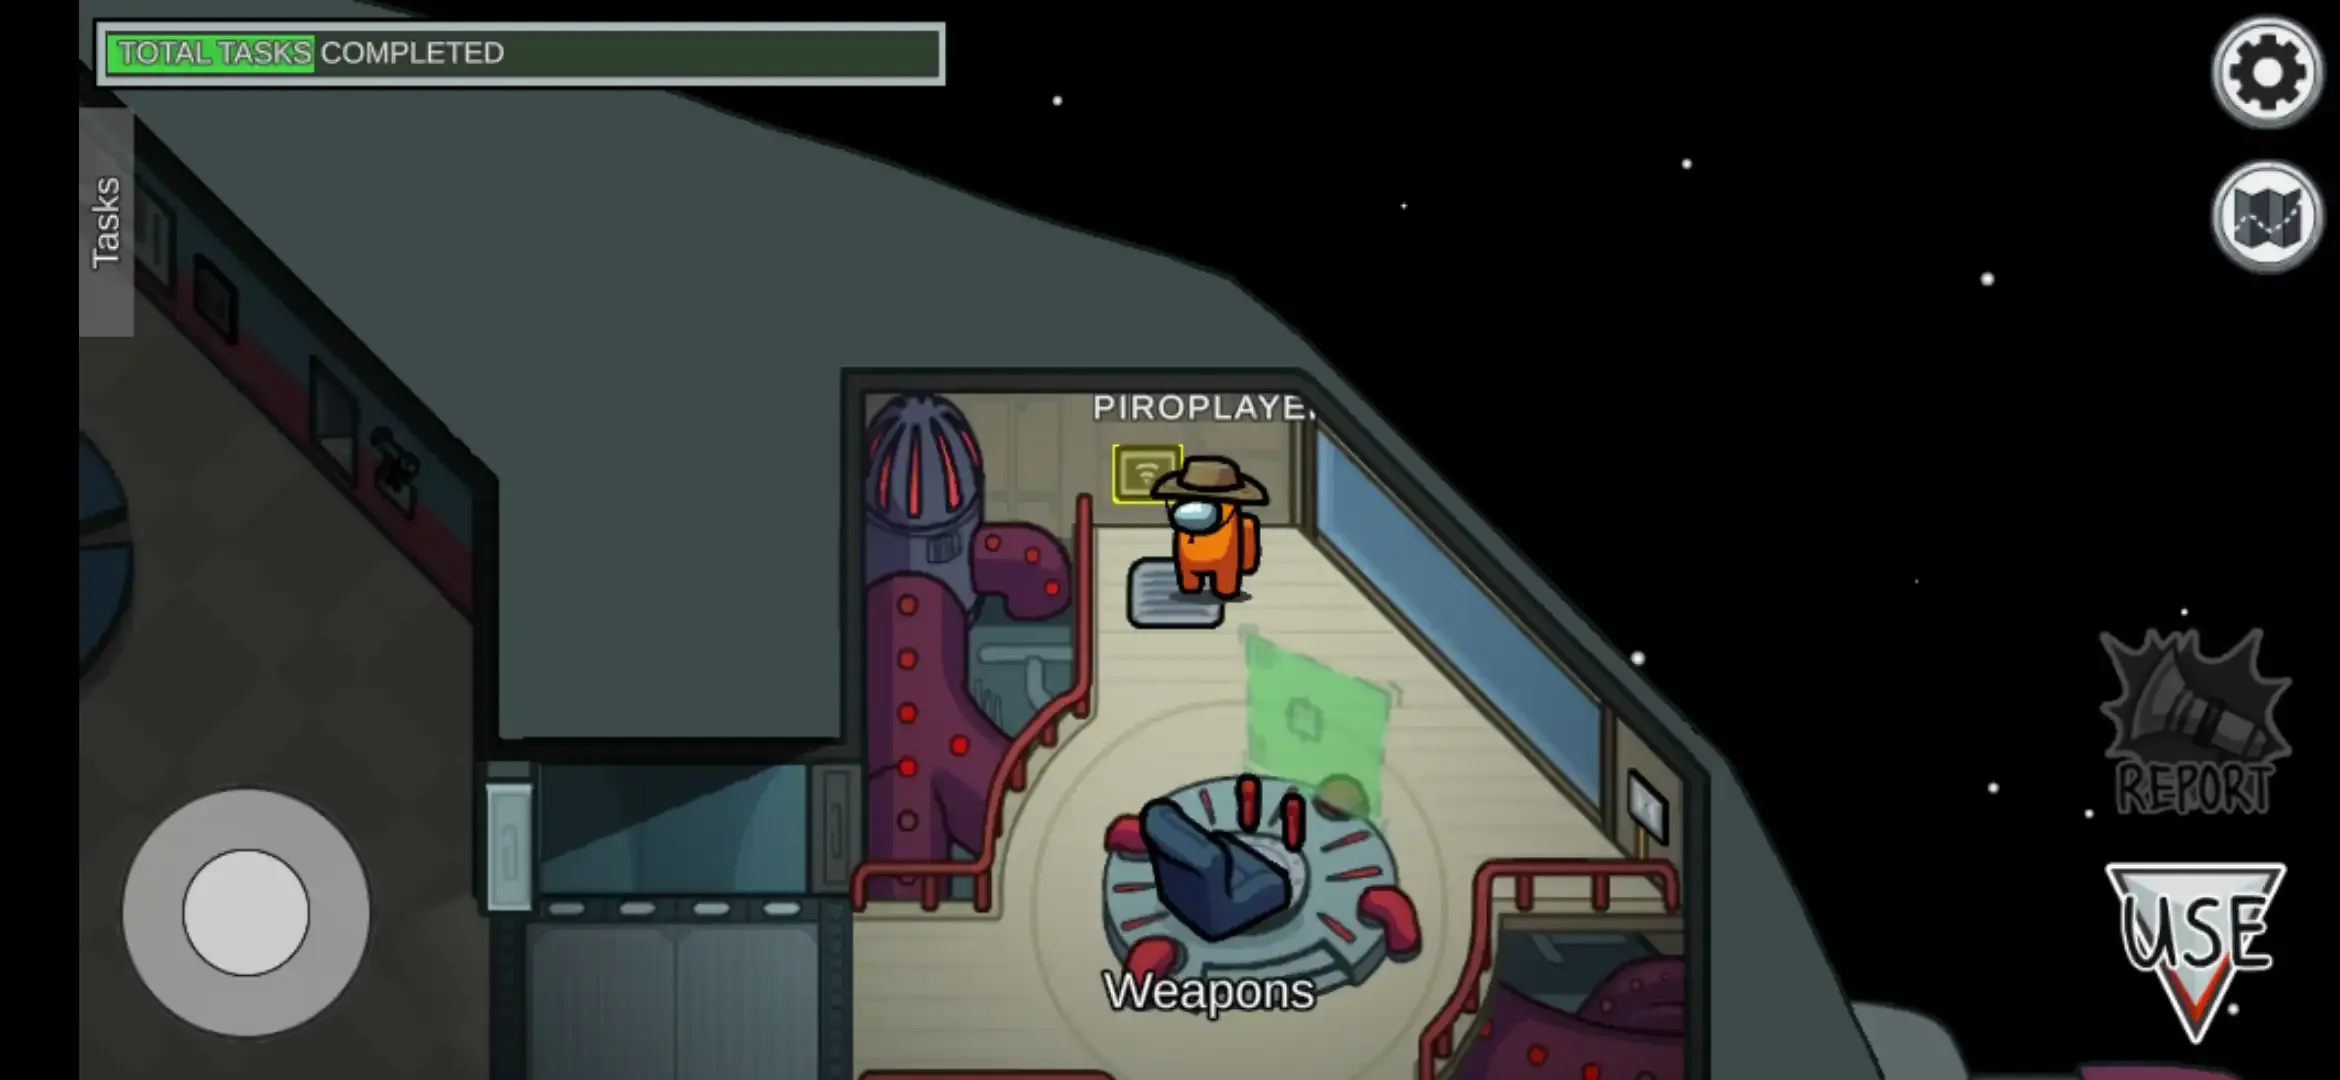
Step 1. Go to Weapons location and go near the upper wall to the WI-FI panel and tap the ‘use’ option.
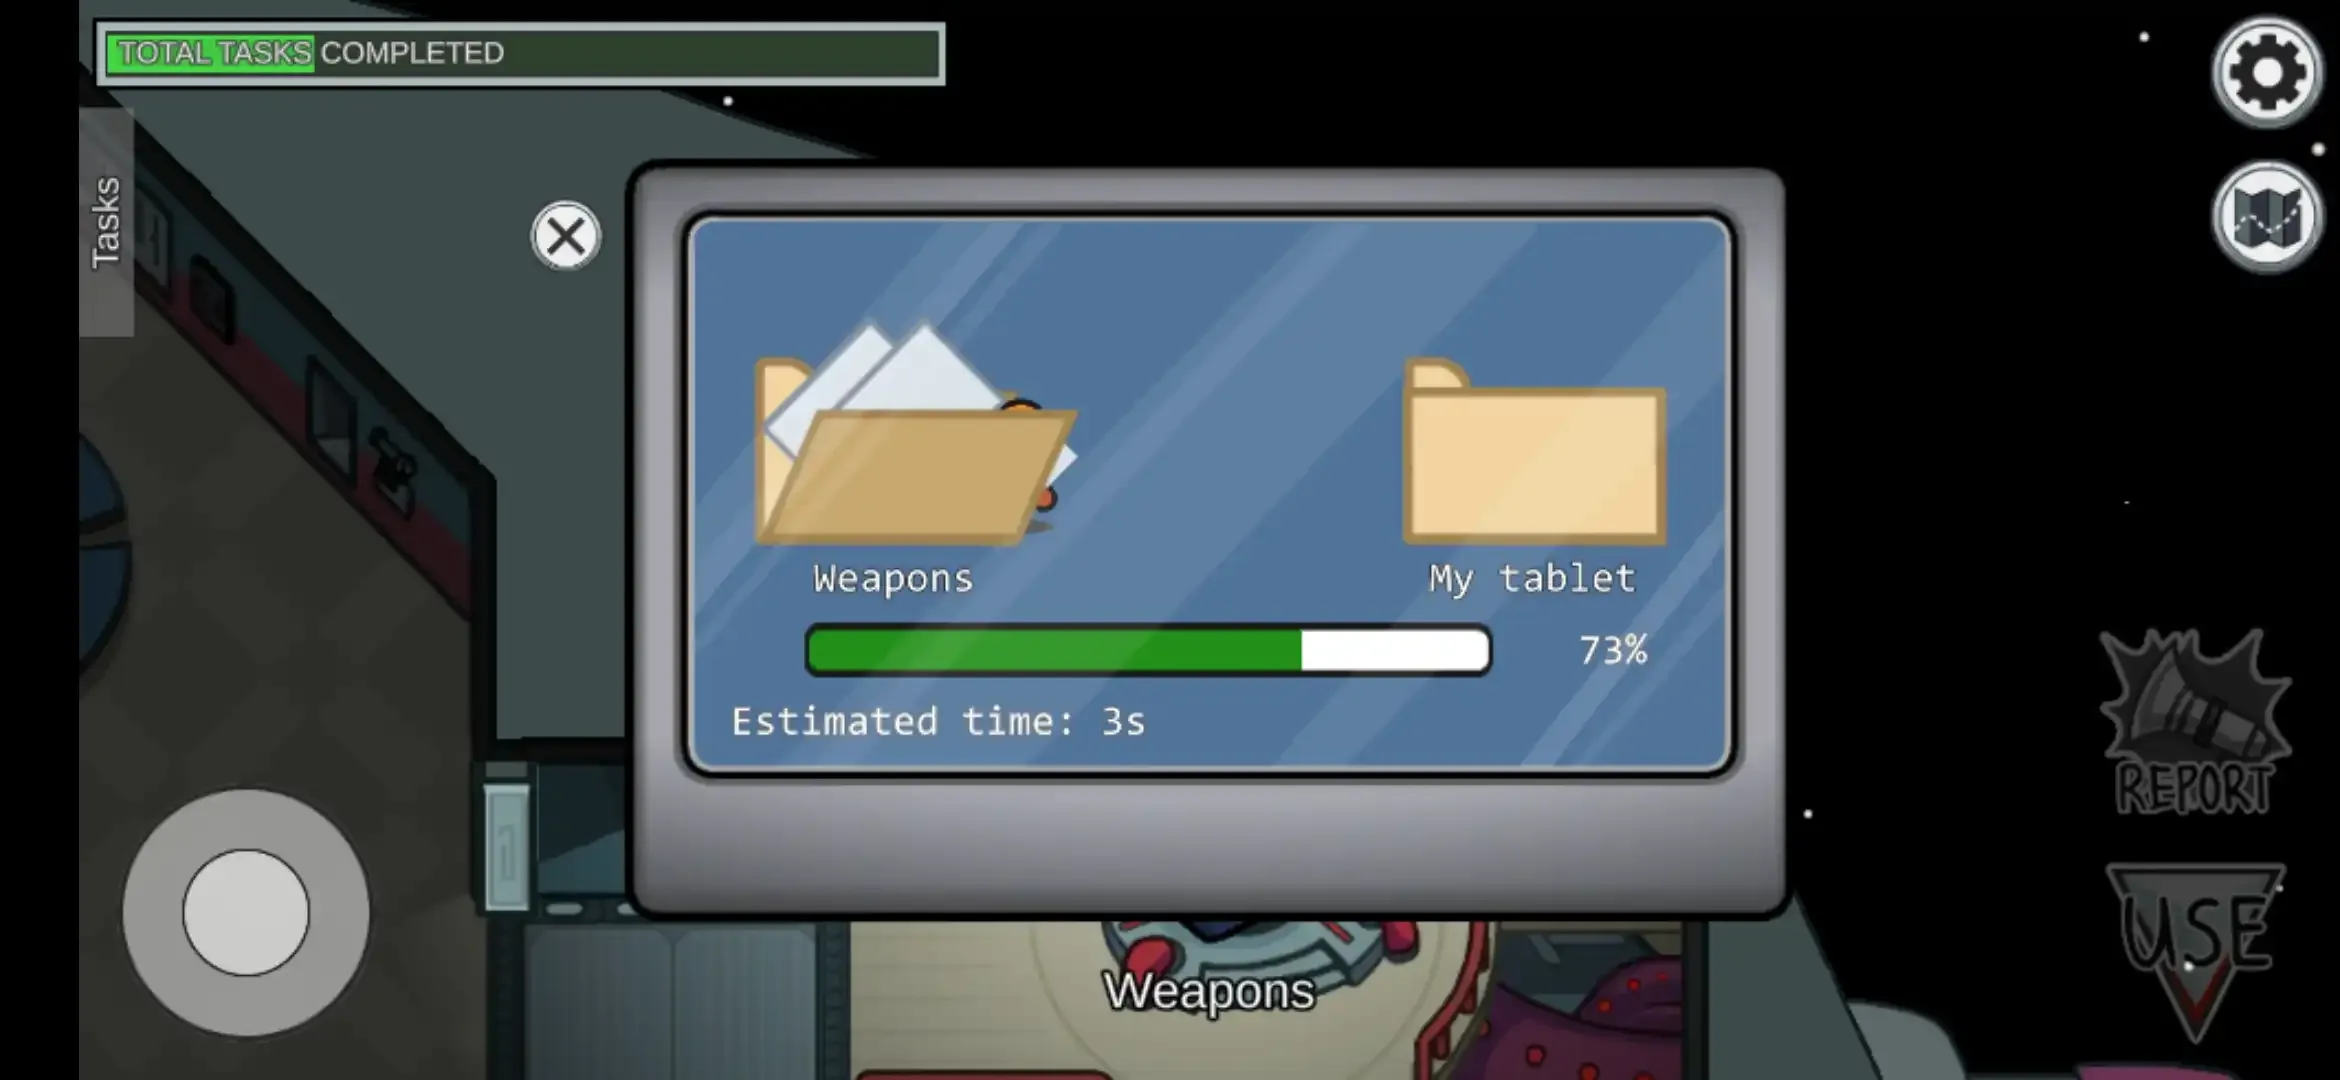
Now one popup will be visible to you tap the download button which will download the files from the Weapons folder to the ‘my tablet’.
Generally, it takes 8.7 seconds. While downloading a file if it closes by mistake then one has to download it again from the beginning.
Step 2. Now follow the ➤ symbol which must be directed to the WI-FI panel in the Admin location and tap use.
Then upload files from My Tablet to Headquarters. While uploading a file if it closes by mistake then one has to upload it again from the beginning.
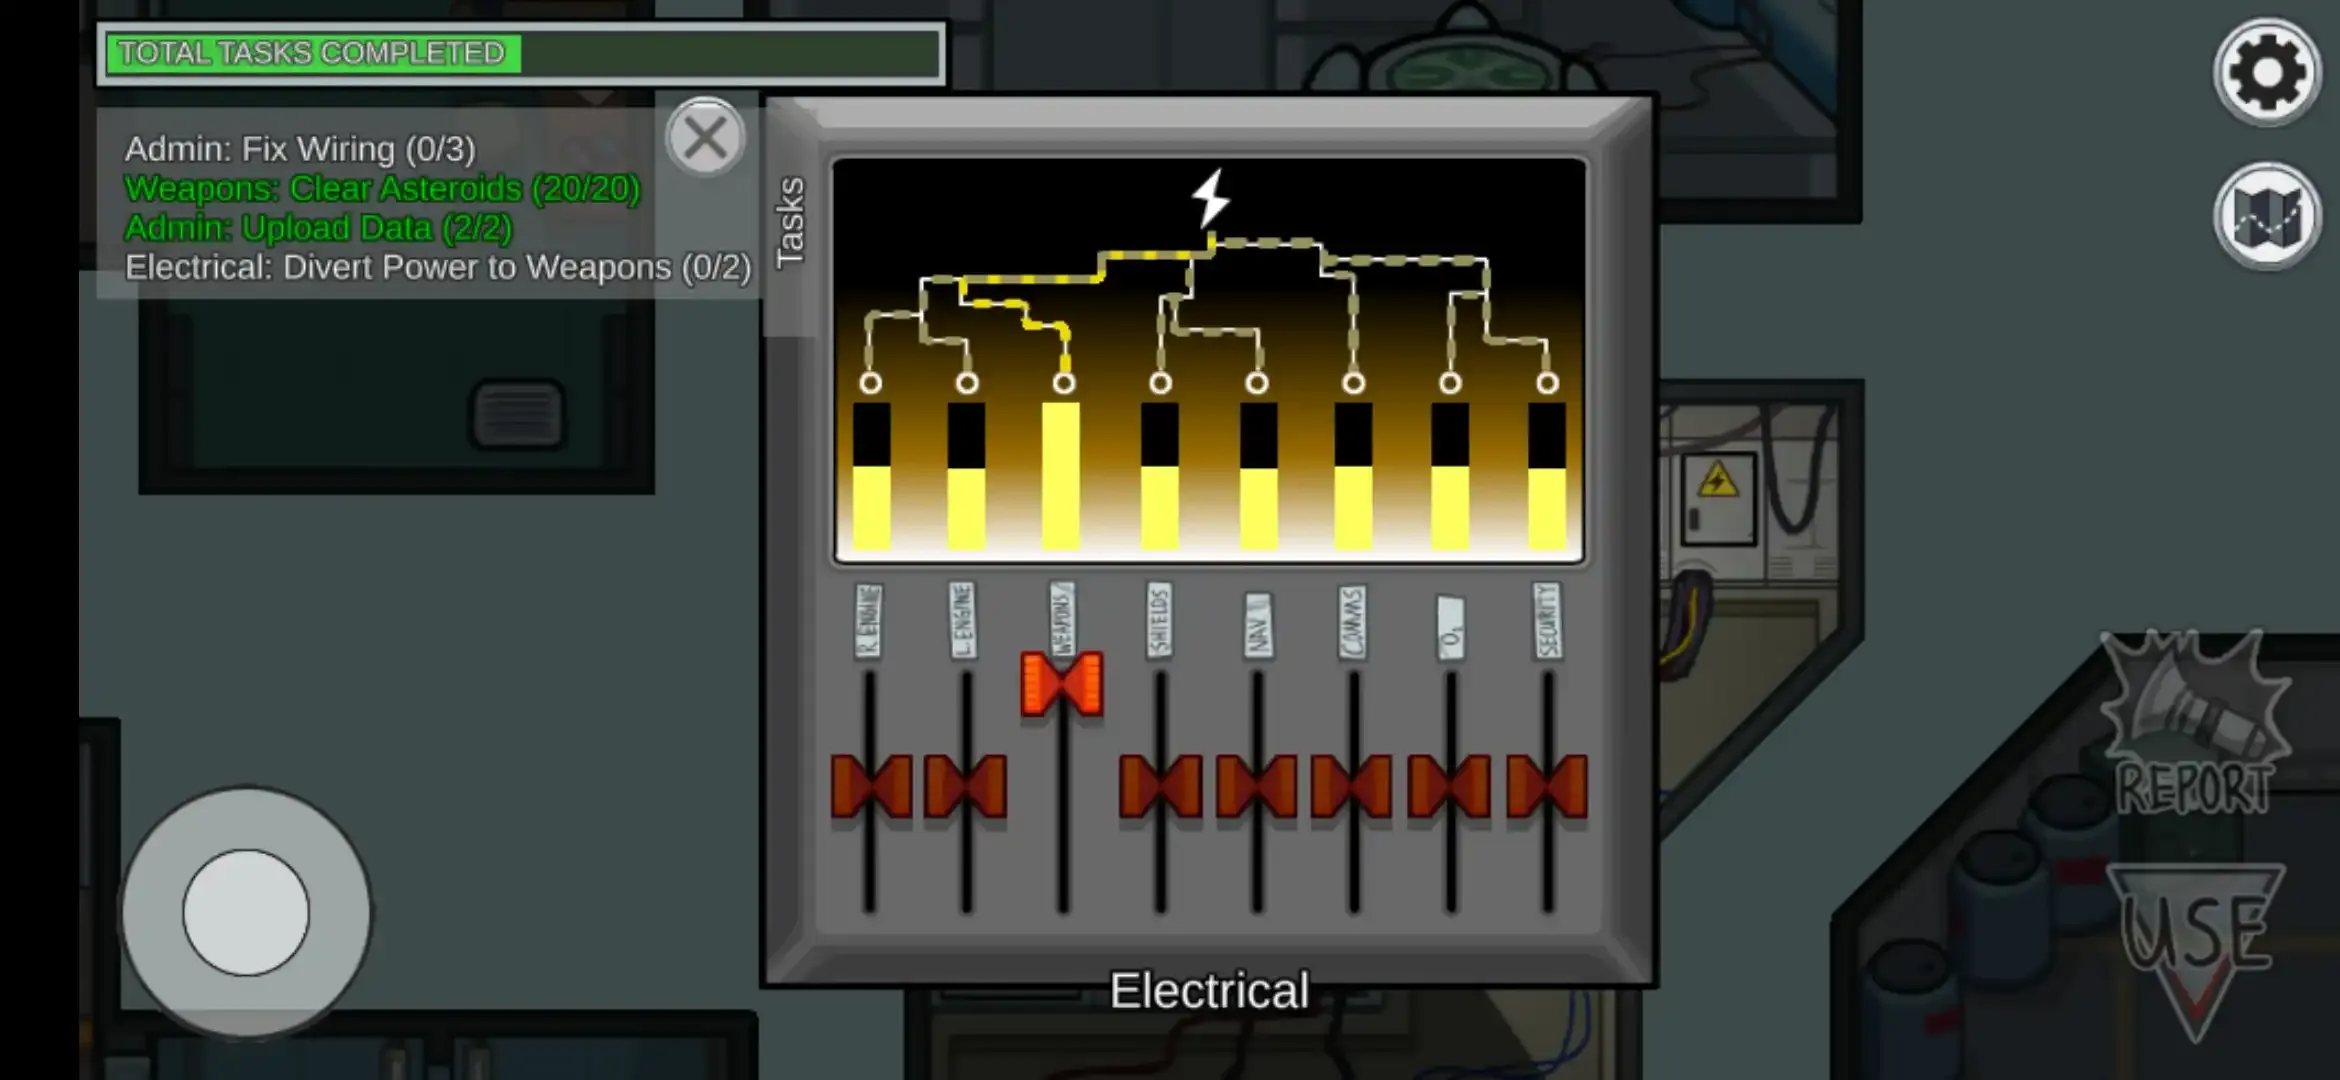
③Divert Power to Weapons –
➤ It is a long task. It is divided into two stages.
Step 1. Go to the electrical location and go near the right side of the WI-FI panel and tap use.
which will open an electric supply board. Now find the highlighted red switch with weapon tag and as the task is about to divert power to the Weapon room, slide the switch to the upper side.
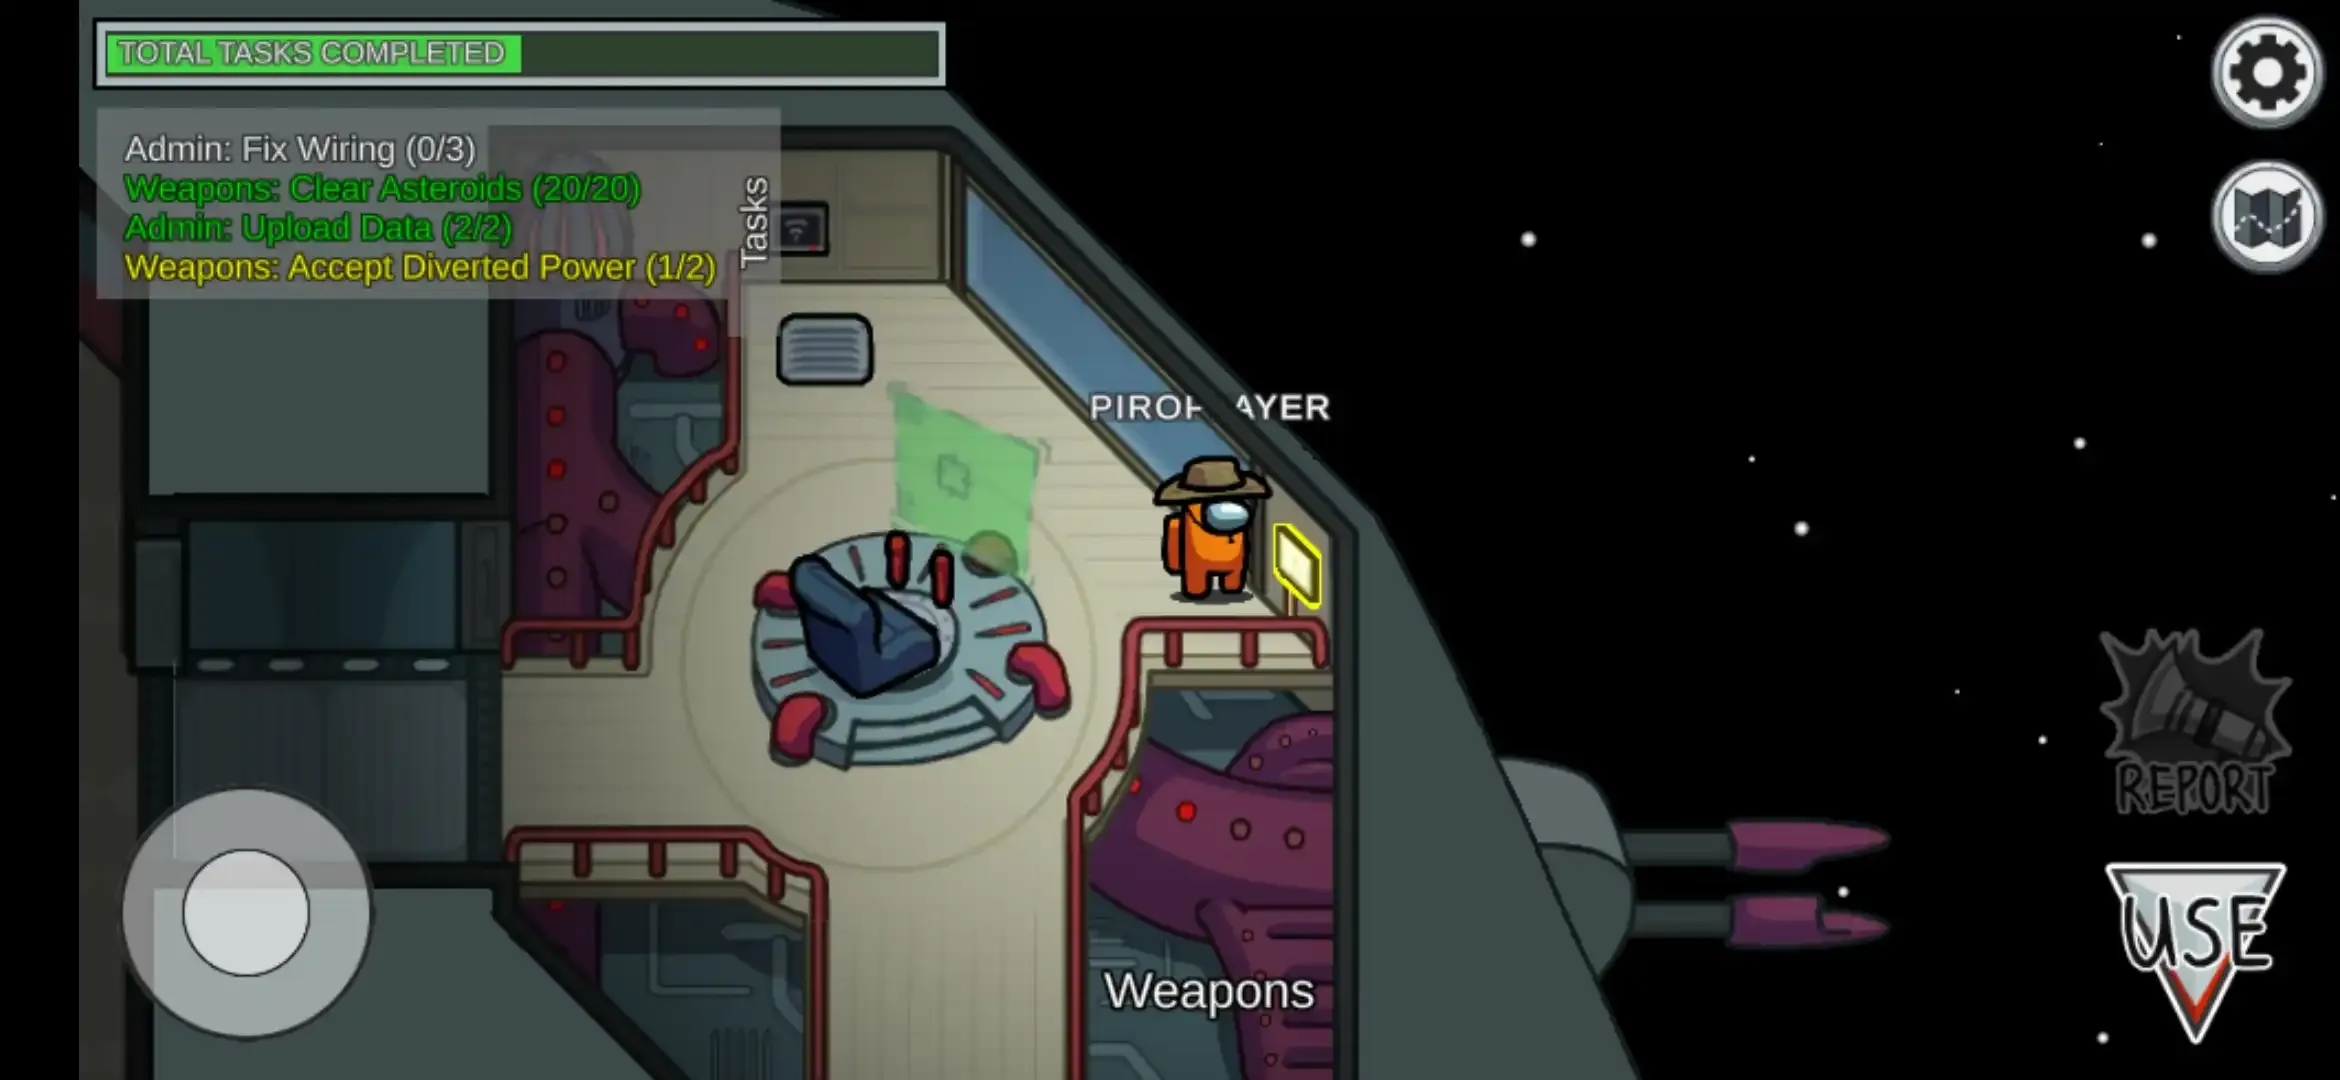
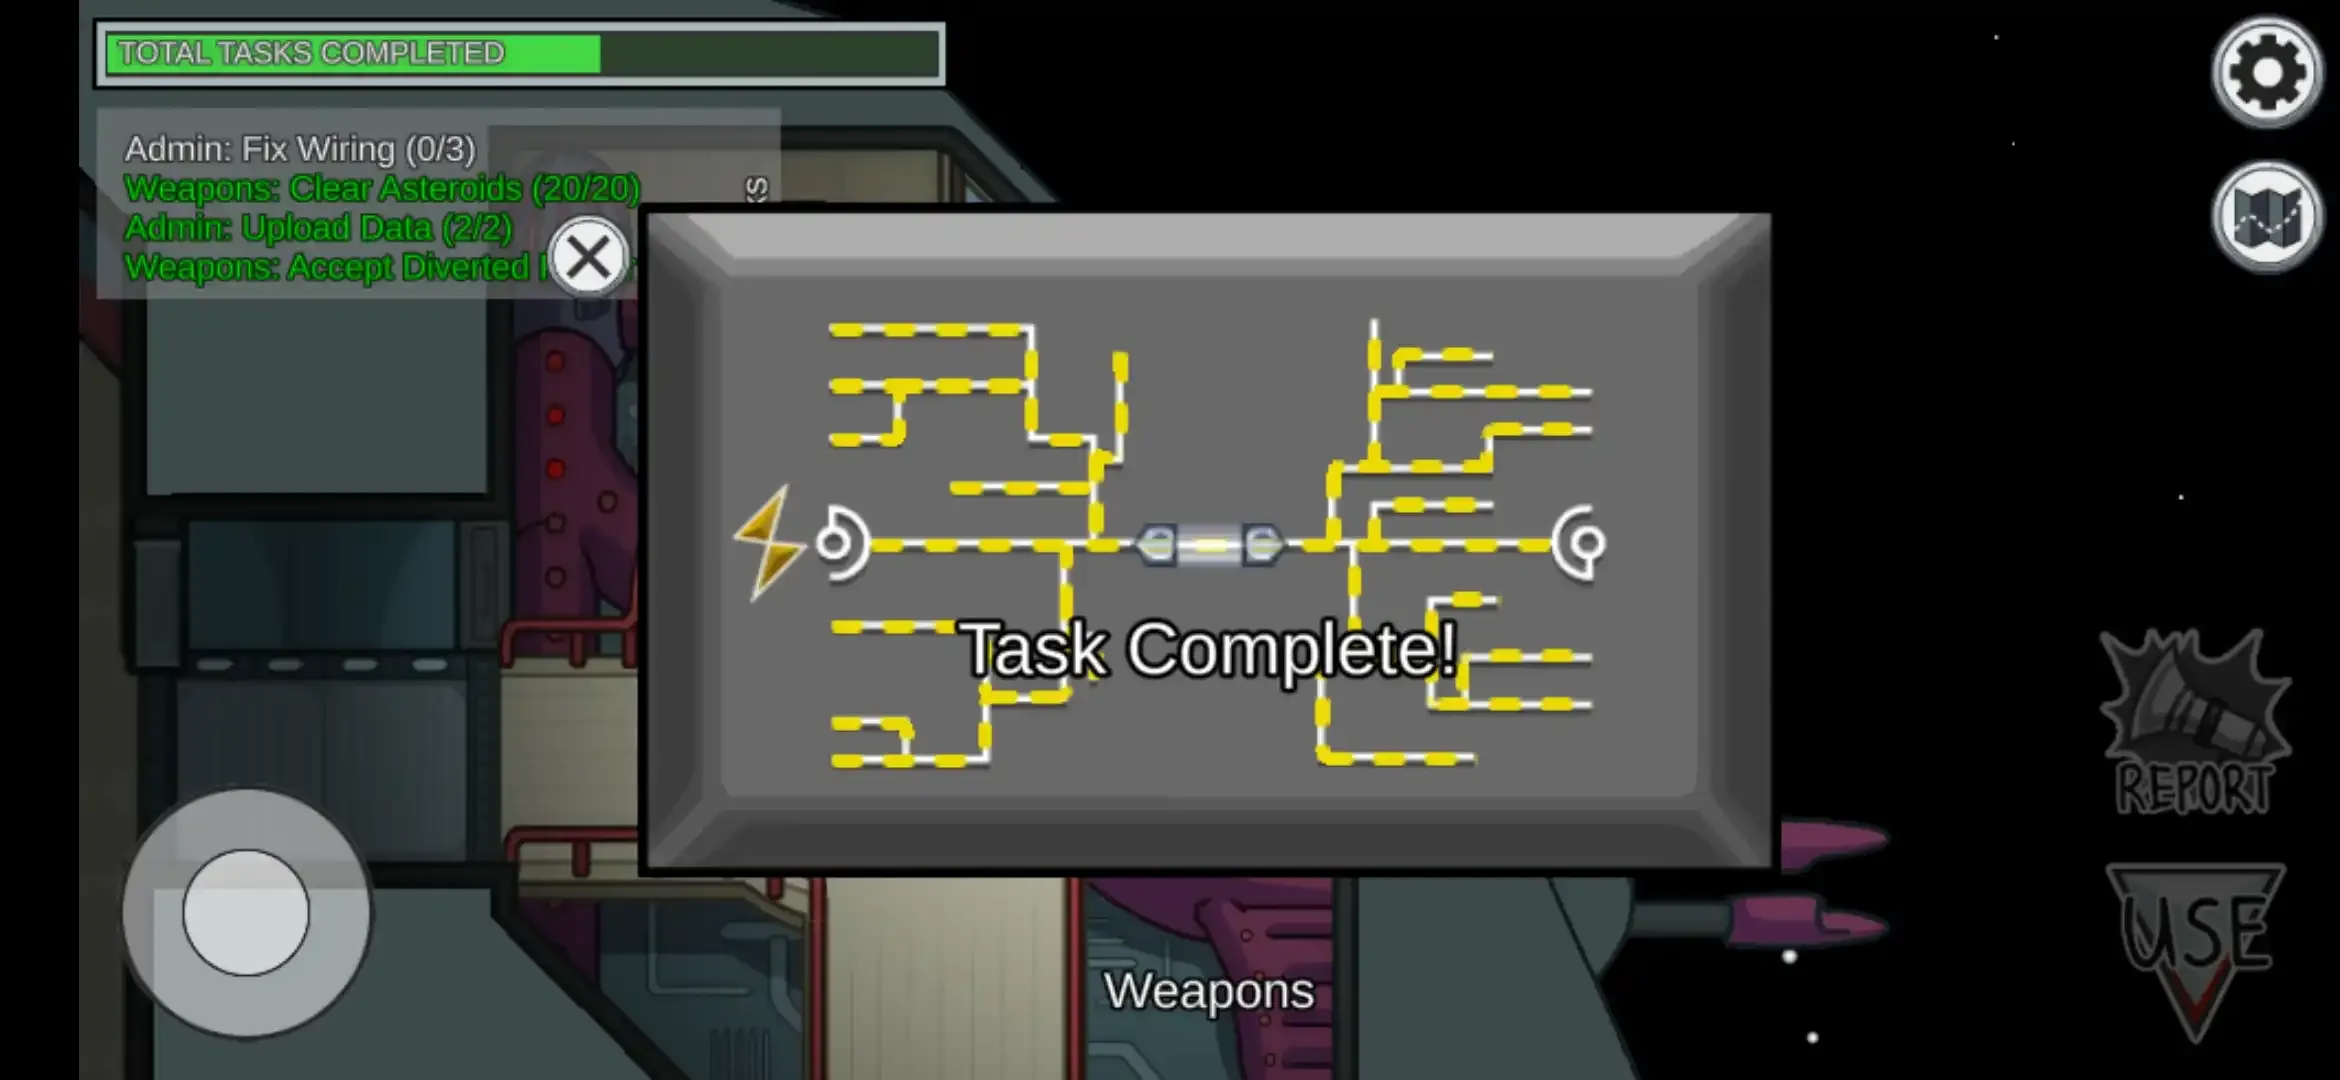
Step 2. After diverting power to the Weapons location follow the➤ symbol which will be directing you near the panel located on the right side wall of the Weapons room and tap use.
which will open the power supply control box. Now tap the switch located in the center which will turn on the electric supply to the weapons room and the task will be completed.
 Among Us is the game between Hidden impostors between crewmates which is very popular these days.